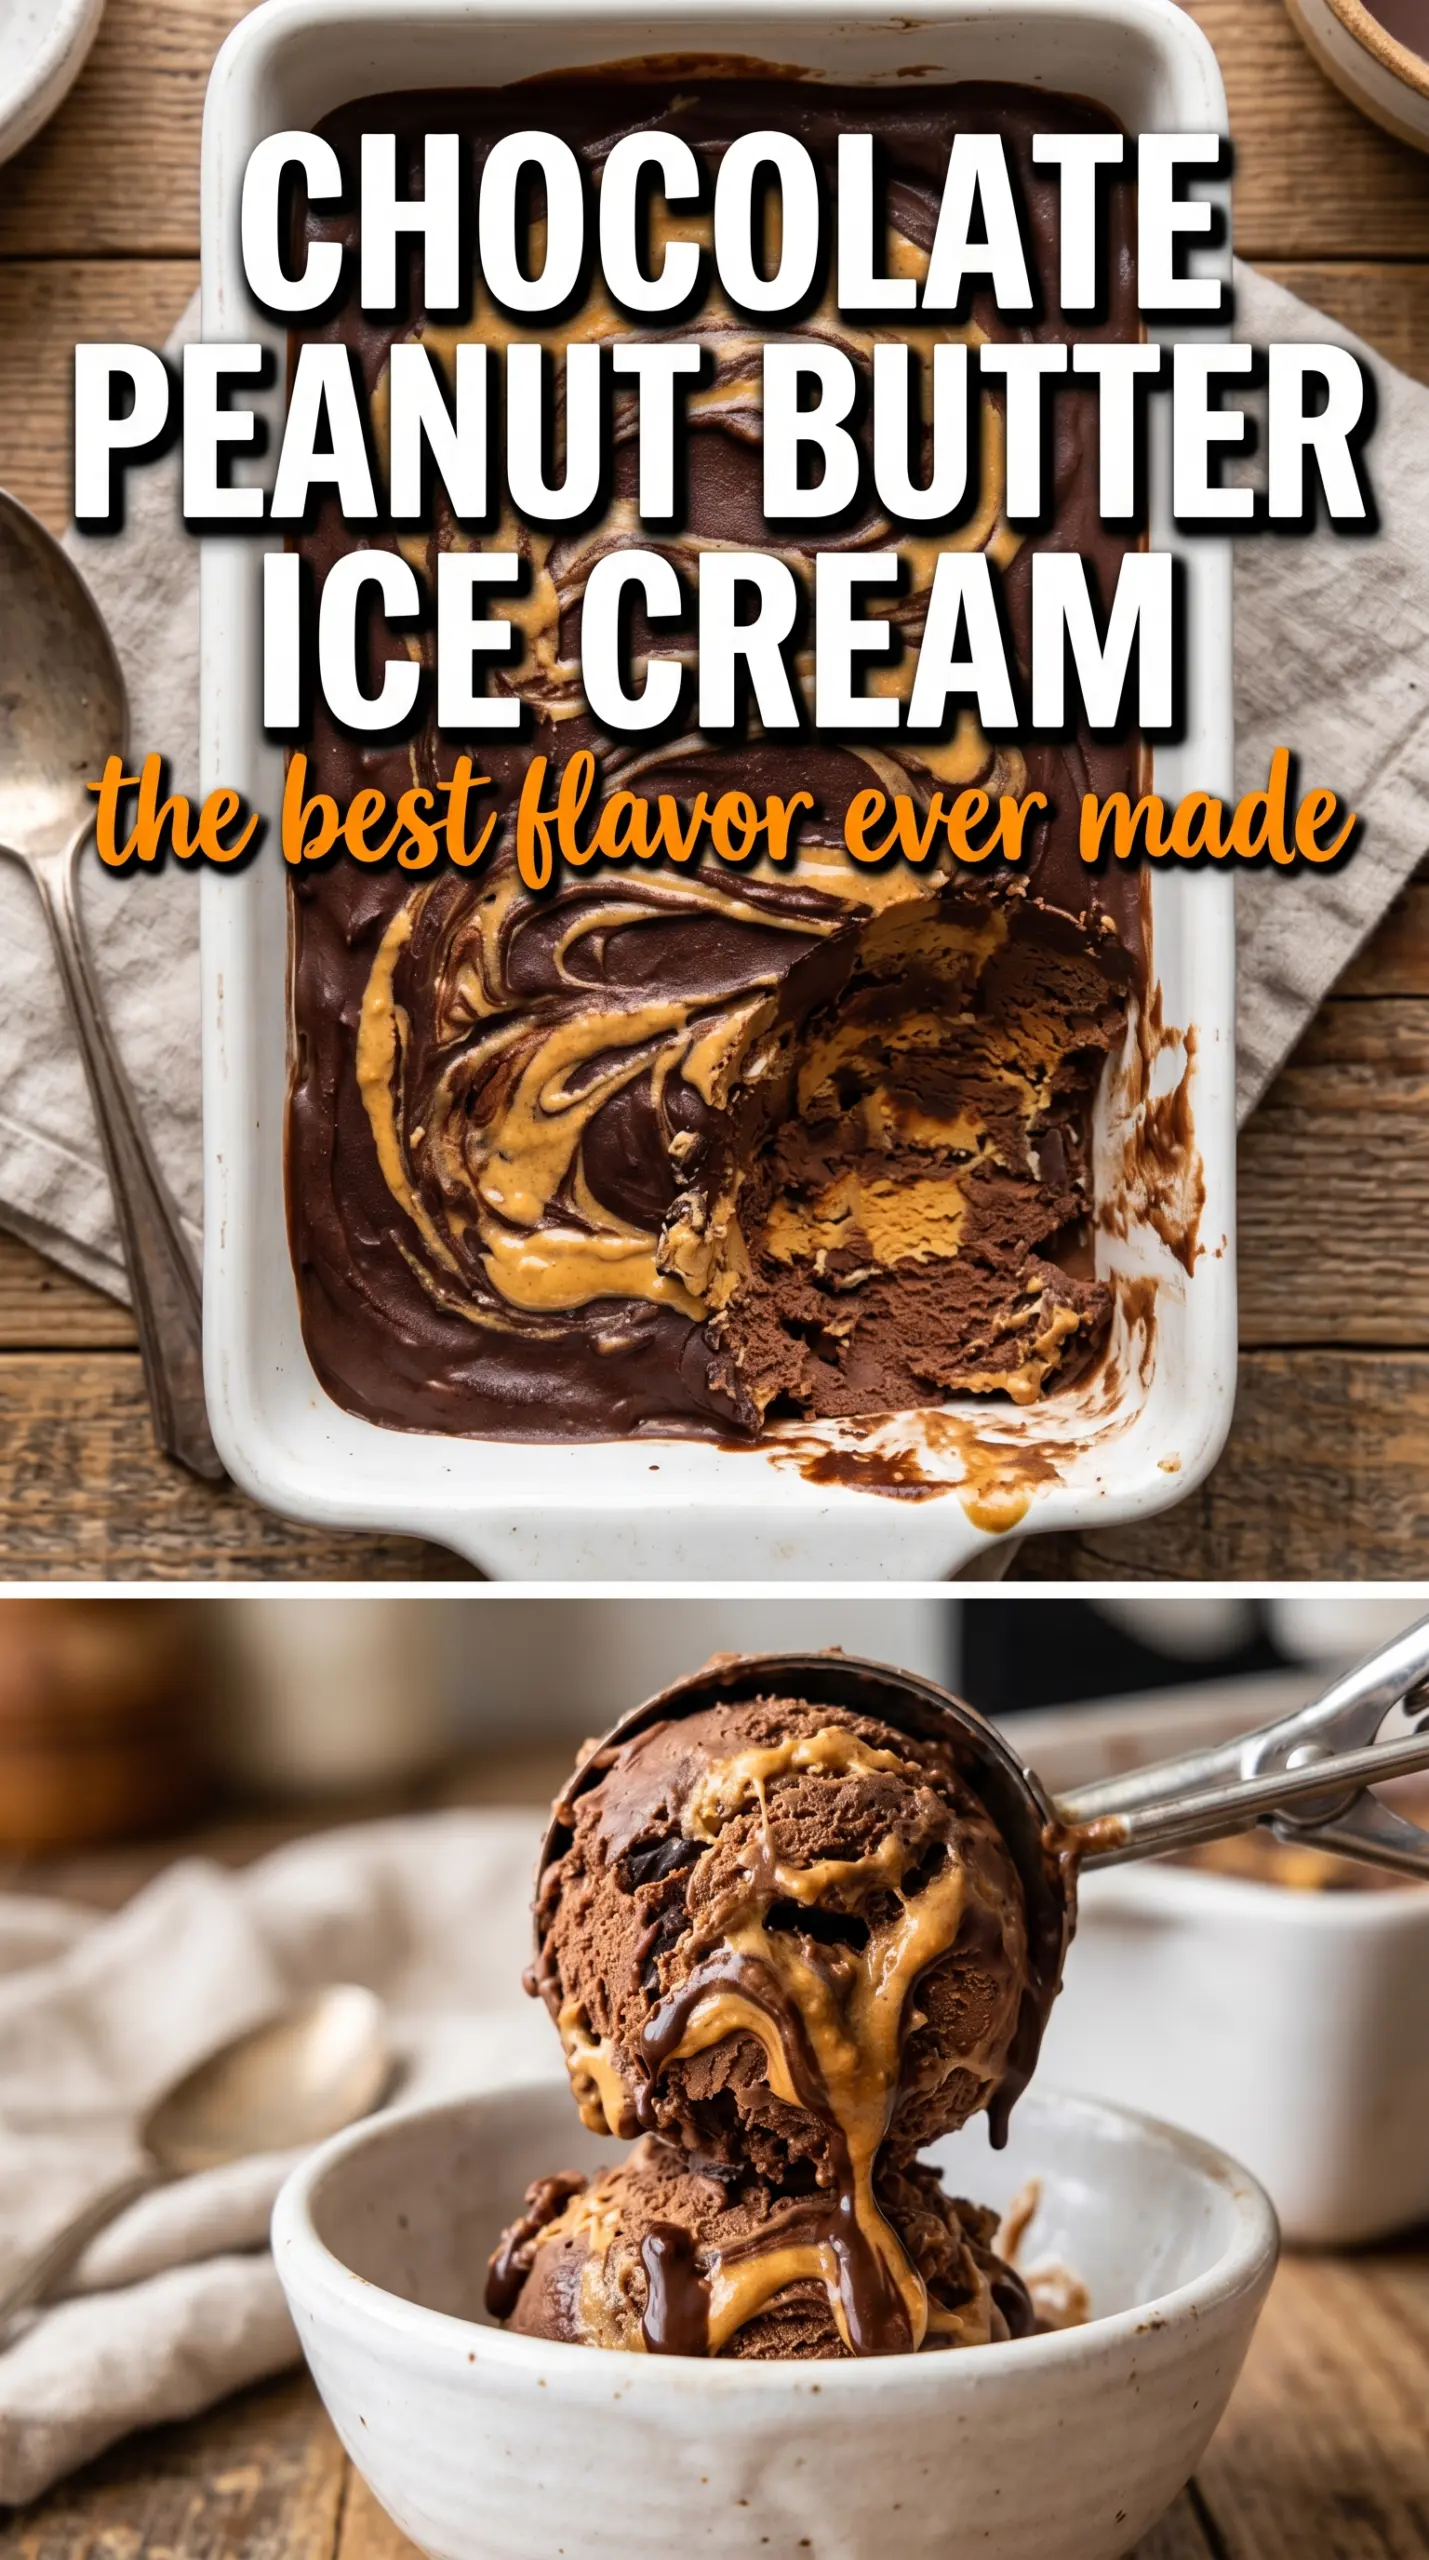
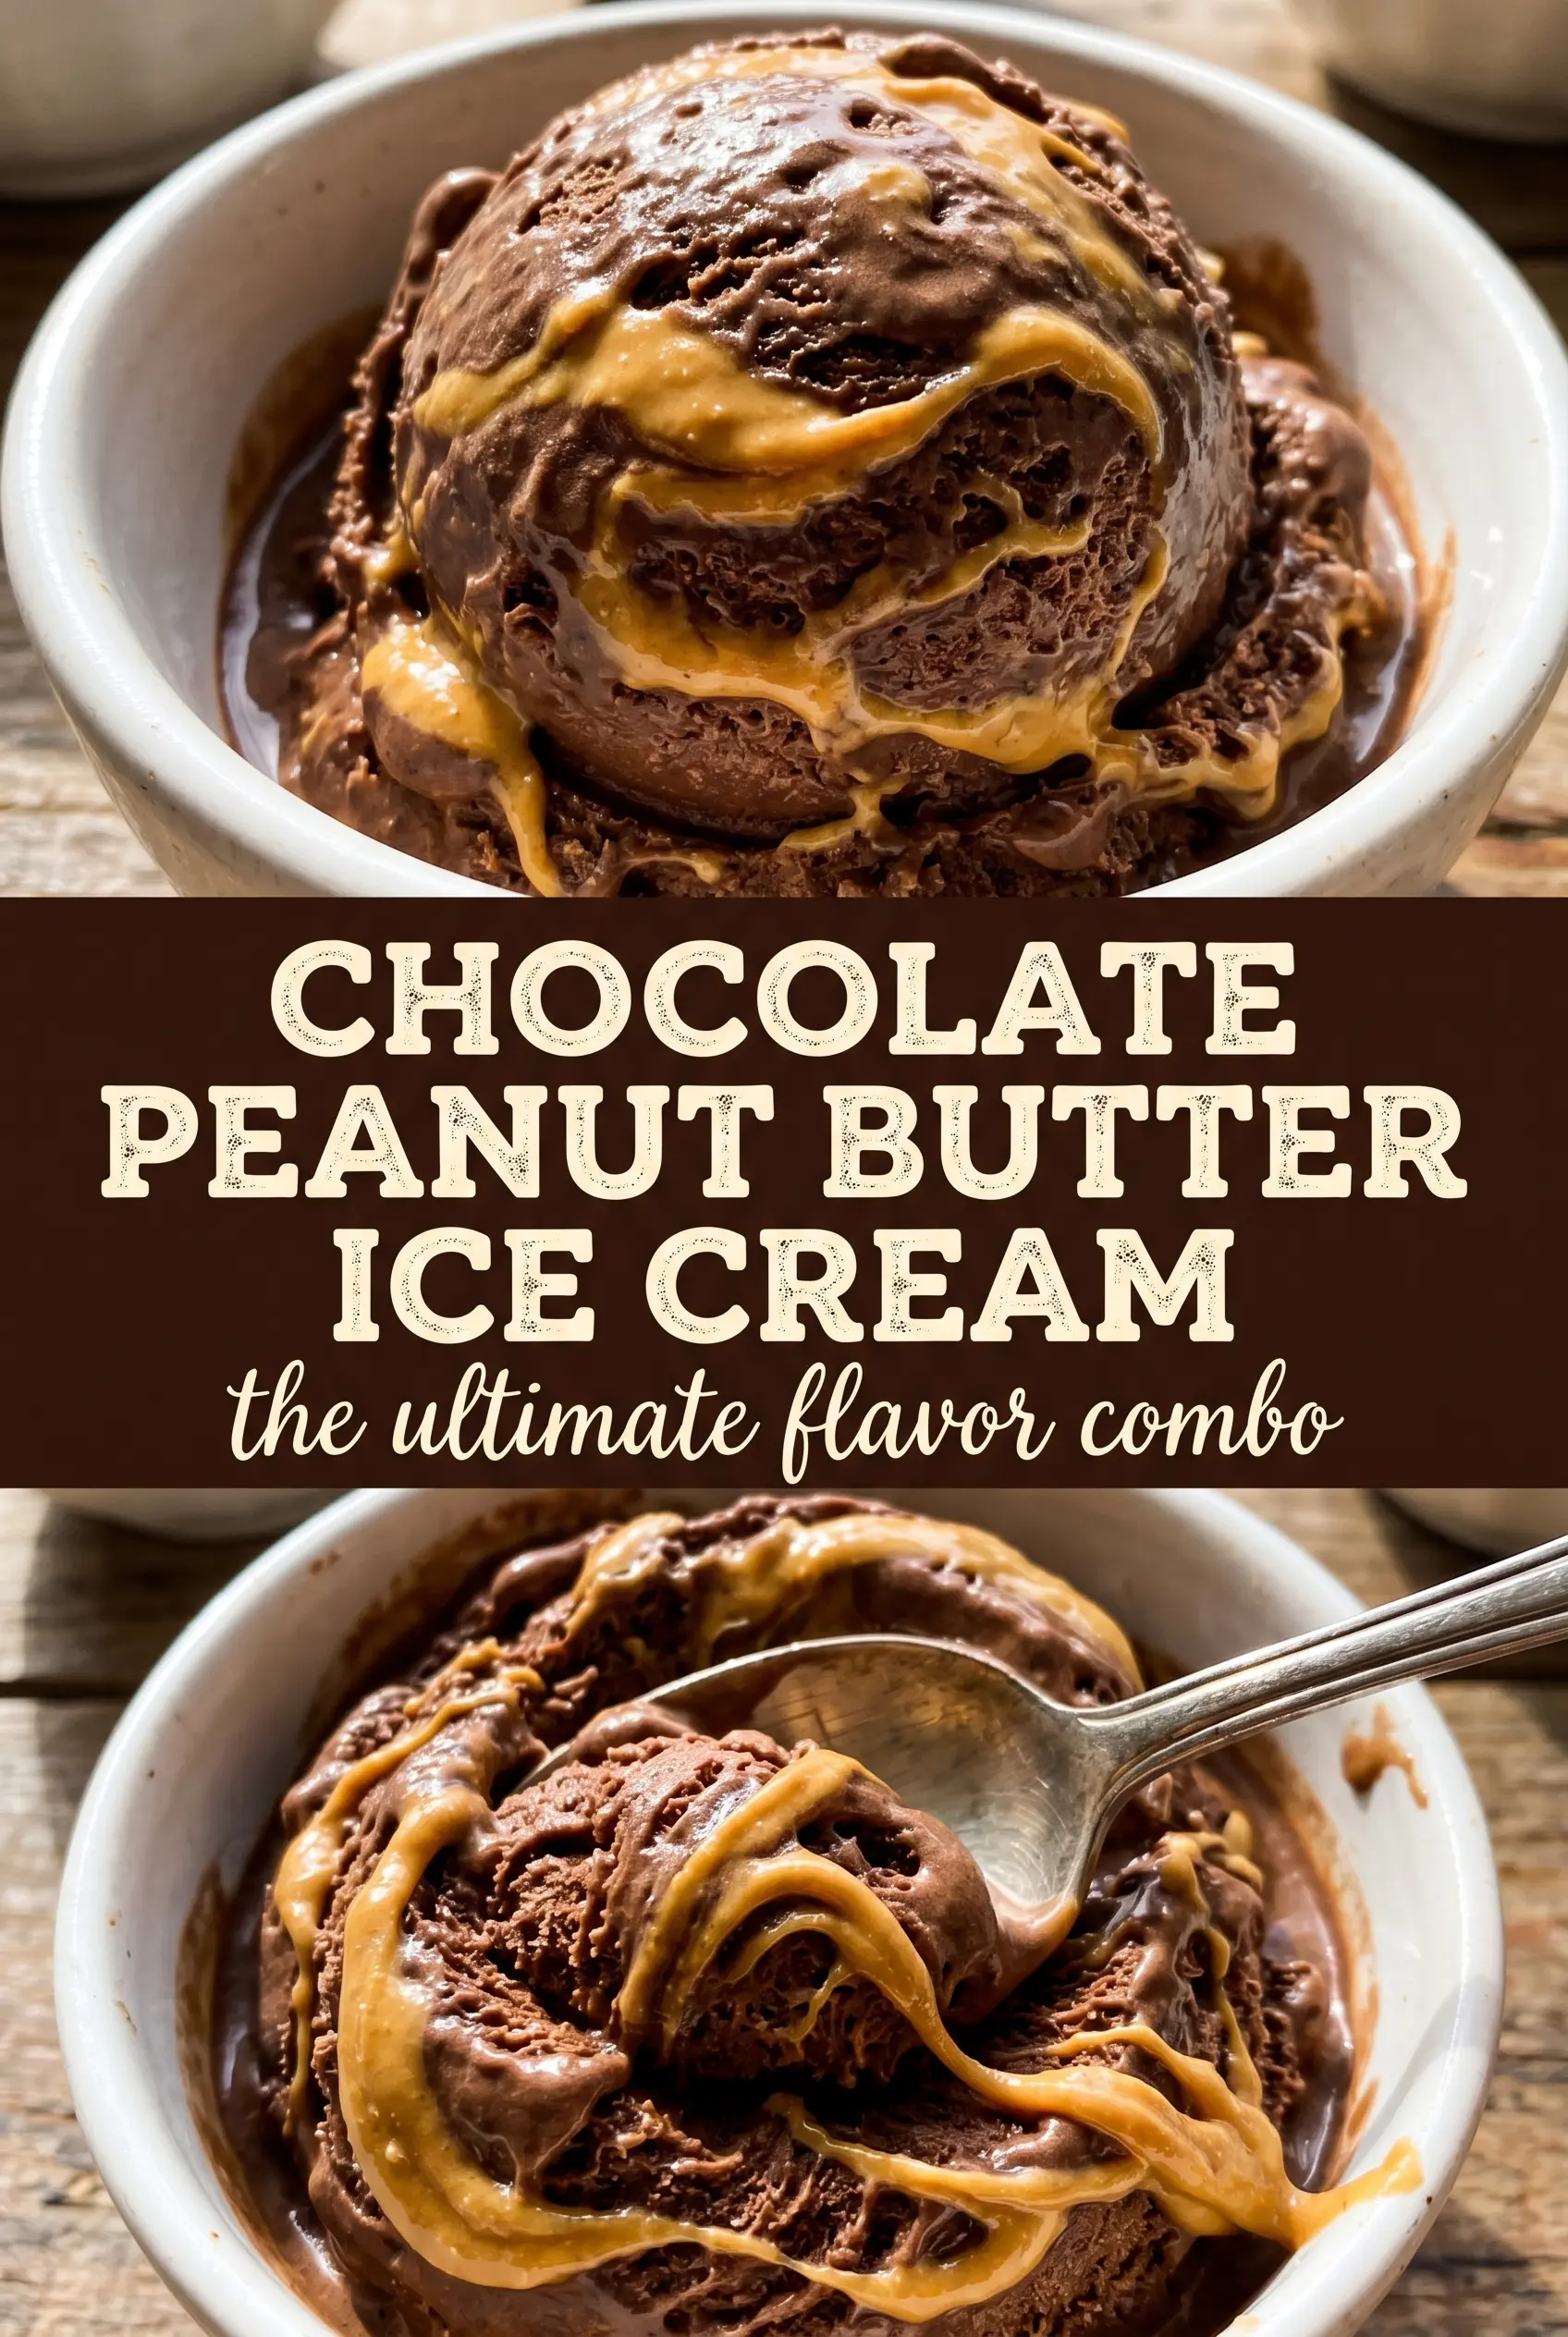
Deep chocolate ice cream with thick ribbons of peanut butter running through every scoop has a way of disappearing fast. The base is rich without tasting heavy, and the peanut butter stays distinct instead of turning muddy, which is what makes each bite taste like a chocolate-peanut butter cup in frozen form. The contrast matters here: bittersweet chocolate, creamy custard, and a warm peanut butter swirl that firms up just enough in the freezer to stay stripey and soft.
The trick is building a custard base that tastes like actual chocolate, not sweet cocoa milk. Blooming the cocoa in the cream and milk, then melting in chopped dark chocolate, gives the base depth and body before the yolks go in. Cooking it to 175°F thickens it enough to coat a spoon without scrambling the eggs, and straining it keeps the texture smooth. The peanut butter goes in warm at the end so it can ribbon through the churned ice cream instead of freezing into clumps.
Below you’ll find the easiest way to get a clean swirl, plus the small timing details that keep the base silky and scoopable instead of icy.
The chocolate base churned up smooth and the peanut butter stayed in those thick ribbons instead of sinking to the bottom. I served it after a 2-hour freeze and it scooped beautifully.
Save this chocolate peanut butter ice cream for the nights when you want thick chocolate custard and a bold peanut butter swirl in every scoop.
The Step That Keeps the Custard Smooth Instead of Eggy
Chocolate ice cream can go grainy fast if the custard gets pushed too hard on the stove. The yolks thicken the base, but they don’t need a boil. Once the mixture reaches 175°F and coats the back of a spoon, it’s done. Any hotter and the eggs tighten, which gives you a sandy texture that no amount of freezing can fix.
The other place people lose the texture is the chocolate itself. Cocoa powder gives you the deep base note, but chopped dark chocolate adds body and keeps the ice cream tasting full after it freezes. If you skip the strain, little bits of cooked egg or unmelted cocoa can survive into the churn. That small extra step is what separates a smooth custard from one that tastes rushed.
- Cocoa powder — Unsweetened cocoa blooms in the hot cream and milk, which pulls out a deeper chocolate flavor than stirring it into a cold base. Natural or Dutch-process both work, but Dutch-process gives a darker, rounder result.
- Dark chocolate — This adds richness and helps the ice cream feel dense and scoopable instead of thin. Use a bar you’d actually eat; chocolate chips work in a pinch, but they don’t melt as cleanly.
- Egg yolks — Yolks make the custard creamy and stable. Don’t swap in whole eggs unless you want a looser texture and a more cooked-egg flavor.
- Creamy peanut butter — Warm it until it pours slowly off a spoon. Thick, cold peanut butter will clump and break the swirl pattern instead of ribboning through the ice cream.
What Each Ingredient Is Actually Doing in This Frozen Dessert
- Base ingredient (cream, milk, or non-dairy) — This provides the foundation and richness. Quality matters.
- Sweetener (sugar, honey, or other) — This sweetens and prevents ice crystals. The ratio is critical.
- Flavor element (vanilla, fruit, or other) — This defines the ice cream personality. Use quality ingredients.
- Stabilizers (egg yolks, cornstarch, or gelatin) — These prevent melting and large ice crystals. Optional but helpful.
- Churning (if using ice cream maker) — This incorporates air and prevents ice crystals. Critical for smooth texture.
- Freezing temperature and time — Proper freezing prevents rock-hard texture. Store at 0°F or below.
- Mix-ins (chocolate, cookies, or fruit) — These add texture and prevent monotone flavor. Add near end of churning.
- No-churn method (if using whipped cream or condensed milk) — This creates creamy texture without ice cream maker. Freezing time is longer.
How to Build the Swirl Without Losing It in the Freezer
Blooming the Chocolate
Whisk the cocoa into the cream and milk before heating so there aren’t any dry pockets hiding in the base. Once the mixture is steaming, add the chopped chocolate and whisk until the surface turns glossy and completely smooth. If you see little specks floating around, keep whisking off the heat for a minute before moving on. That early smoothness carries through the whole custard.
Tempering the Yolks
Whisk the yolks and sugar until they look pale and a little thicker, then add the hot chocolate cream in a slow stream while whisking constantly. This is what keeps the eggs from scrambling. If you dump the hot base in all at once, you’ll get bits of cooked yolk instead of a silkier custard. Once everything is combined, pour it back into the saucepan and cook low and steady until it reaches 175°F.
Chilling Before Churning
Strain the custard into a clean bowl, then stir in the vanilla and salt. Let it cool completely before it goes into the fridge, because a warm base takes forever to chill and can churn up softer with more ice crystals. The full chill time matters here. A cold base freezes faster in the machine and gives you a finer texture.
Layering the Peanut Butter
Churn the ice cream until it’s thick and soft-serve textured, then spoon it into your container in layers. Drizzle warmed peanut butter between layers and run a knife through it once or twice for visible ribbons. If you stir too much, the swirl disappears and turns the whole batch beige. Freeze until firm, but not rock hard, so the peanut butter stays pleasantly soft when you scoop.
What to Change When You Want It a Little Different
Natural Peanut Butter Swirl
Use natural peanut butter if that’s what you keep on hand, but warm it well and stir it smooth first. It’s thinner and less sweet than commercial peanut butter, so the swirl tastes more roasted and a little less candy-like. If the oil has separated, mix it completely before warming or the ribbons can look greasy.
Dairy-Free Version
Use full-fat coconut milk in place of the cream and milk, then choose a dairy-free dark chocolate. The texture will be a touch softer and the flavor will pick up a faint coconut note, but the chocolate and peanut butter still carry the dessert. This works best when the base is fully chilled before churning.
Extra Chunky Peanut Butter Cups
Fold in chopped peanut butter cups right after churning if you want more texture. Add them at the very end so they don’t sink or turn icy in the freezer. The result is closer to a candy-shop ice cream, with little chewy pockets against the smooth base.
Storage and Reheating
- Refrigerator: Not applicable once churned; this ice cream should go straight to the freezer after layering.
- Freezer: Keeps well for about 2 weeks in a tightly covered container. After that, the texture starts to pick up more ice crystals, especially around the edges.
- Reheating: Let it sit at room temperature for 5 to 10 minutes before scooping. If it’s rock hard, don’t microwave the whole container — that melts the peanut butter swirl unevenly and gives you a slushy rim.
Answers to the Questions Worth Asking
Chocolate Peanut Butter Ice Cream
Ingredients
Equipment
Method
- Whisk cocoa into the heavy cream and whole milk, then heat until steaming and small bubbles form at the edges.
- Add the chopped dark chocolate and whisk until completely melted and smooth, then keep it just steaming.
- Whisk the egg yolks and granulated sugar until pale and slightly thick, about 1 minute.
- Slowly whisk the hot chocolate cream into the egg yolk mixture to temper it, keeping the whisk moving.
- Return everything to a saucepan and cook, stirring constantly, until the custard reaches 175°F.
- Strain the custard into a clean bowl, then whisk in the vanilla extract and salt.
- Cool the custard completely, then refrigerate at least 4 hours until very cold.
- Churn the chilled custard in an ice cream maker according to the manufacturer’s instructions until thick and scoopable.
- Layer the churned ice cream into a container, drizzling warm peanut butter between each layer.
- Swirl the peanut butter through the ice cream with a knife to create ribbon streaks.
- Freeze at least 2 hours until firm, then serve.