Apple cider beef stew lands in that sweet spot where the broth tastes deep and savory, but every spoonful still carries a little brightness from the cider and apples. The beef turns fork-tender, the sweet potatoes soften into the gravy, and the apples hold just enough shape to make each bite feel layered instead of heavy. It’s the kind of pot that gets better as it sits on the stove, filling the kitchen with a smell that makes everyone wander in asking when dinner is ready.
The key here is building flavor in stages. Browning the beef first gives the stew its backbone, and the flour clinging to the meat helps the cider broth thicken naturally as it simmers. The apple cider vinegar matters too; it keeps the cider from tasting flat and gives the finished stew a cleaner, more balanced edge. Cinnamon sounds unusual, but used lightly it rounds out the cider without turning the whole pot sweet.
Below you’ll find the timing that keeps the beef tender, not dry, plus the reason the apples go in at the end instead of cooking down into mush. There’s also a few practical swaps if you need to work with what’s in your pantry.
The cider gravy thickened up beautifully and the apples stayed in real pieces instead of disappearing. My husband kept going back for one more bowl, which never happens with stew in our house.
Save this apple cider beef stew for the nights when you want tender beef, sweet potatoes, and apples in one rich, cider-simmered pot.
The Browning Step That Gives This Stew Its Backbone
The biggest mistake with beef stew is crowding the pan. If the beef sits too close together, it steams instead of browns, and you lose the deep flavor that makes the whole pot taste like it cooked all day. Brown the meat in batches and wait for a real crust before turning it; pale gray beef gives you a thin stew.
The flour on the beef does two jobs here. It helps the cubes brown with a little more color, and it thickens the cider broth later without needing a separate slurry. If the bottom of the pot looks dark after browning, that’s a good thing. Those browned bits loosen when the cider goes in and become the savory base of the stew.
What the Apples, Cider, and Cinnamon Are Doing in the Pot

- Apple cider — Use the good, fresh-tasting cider here, not apple juice if you can help it. Cider has more depth and tang, which keeps the stew from tasting sugary. It’s the main source of that orchard flavor, so cheap, overly sweet cider will flatten the whole pot.
- Apple cider vinegar — This sharpens the broth and keeps the sweetness in check. Don’t skip it. Without that little hit of acid, the cider can taste broad and one-note after two hours on the stove.
- Beef chuck — Chuck is worth buying for stew because the connective tissue melts during the long simmer and gives you that rich, silky texture. Leaner beef will dry out before it gets tender. Cut it into even cubes so it cooks at the same pace.
- Sweet potatoes — These soften into the broth and help thicken it slightly without turning to paste. If you use regular potatoes, the stew will be more classic and less sweet, but the texture will still work.
- Firm apples — Use apples that hold their shape, like Honeycrisp or Braeburn. Soft apples collapse too fast and disappear. They go in at the end so they stay distinct and give you little pockets of brightness in the finished stew.
Building the Pot So the Beef Stays Tender and the Apples Stay Whole
Searing the Beef in Batches
Heat the oil until it shimmers, then add the beef in a single layer. Let it sit long enough to turn deeply browned on the first side before moving it. If the pieces stick at first, they’ll release once the crust forms. Pull the beef out as soon as it’s browned; overcooking at this stage won’t make it tender, it just dries the outside.
Cooking Down the Aromatics
Add the onion to the same pot and cook until it softens and starts picking up color from the browned bits underneath. Stir in the garlic and tomato paste for a minute so the paste darkens slightly and loses its raw edge. If the garlic goes in too early, it can scorch before the onion has softened, and that bitter note carries through the whole stew.
Simmering for Tenderness
Once the cider, broth, vinegar, thyme, cinnamon, bay leaves, and beef go in, bring everything to a gentle simmer and keep it there with the lid on. You want small bubbles, not a rolling boil. A hard boil tightens the meat fibers and can make the broth cloudy instead of rich. After about 90 minutes, the beef should be close to fork-tender before the vegetables go in.
Adding the Vegetables at the Right Time
Sweet potatoes and carrots need enough time to soften, but not so much that they collapse into the broth. Add them for the last 30 minutes, then stir in the apples for the final 15. That short finish keeps the apples recognizable and stops the sweet potatoes from turning chalky or falling apart.
How to Adapt This Stew for Different Pans, Diets, and Leftovers
Make It Gluten-Free
Swap the all-purpose flour for a gluten-free flour blend or skip the flouring step and thicken the stew with a cornstarch slurry at the end. The flour on the beef helps with browning, so if you omit it, give the meat a little more time to develop color in the pan.
Use Carrots and Potatoes Instead of Sweet Potato
Regular potatoes and extra carrots make this taste more like a classic beef stew and less like a sweet-savory braise. Add the potatoes in the same window as the sweet potatoes. Yukon golds hold their shape well; russets will thicken the broth more and break down faster.
Dial Back the Sweetness
If you want a more savory finish, cut the cider to 1 1/2 cups and add 1/2 cup more beef broth. You’ll still get the apple note, but the broth will lean deeper and less fruity. This is the version I’d pick if you’re serving the stew with crusty bread and want the gravy front and center.
Storage and Reheating
- Refrigerator: Store in a sealed container for up to 4 days. The stew thickens as it chills, and the apples soften a little more by the next day.
- Freezer: Freeze for up to 3 months. Cool it completely first, then freeze in portions; the sweet potatoes may soften slightly after thawing, but the flavor holds up well.
- Reheating: Warm it gently on the stove over low heat with a splash of broth or water if needed. A hard boil can make the beef tighten up and can push the apples past the point where they still hold their shape.
Answers to the Questions Worth Asking
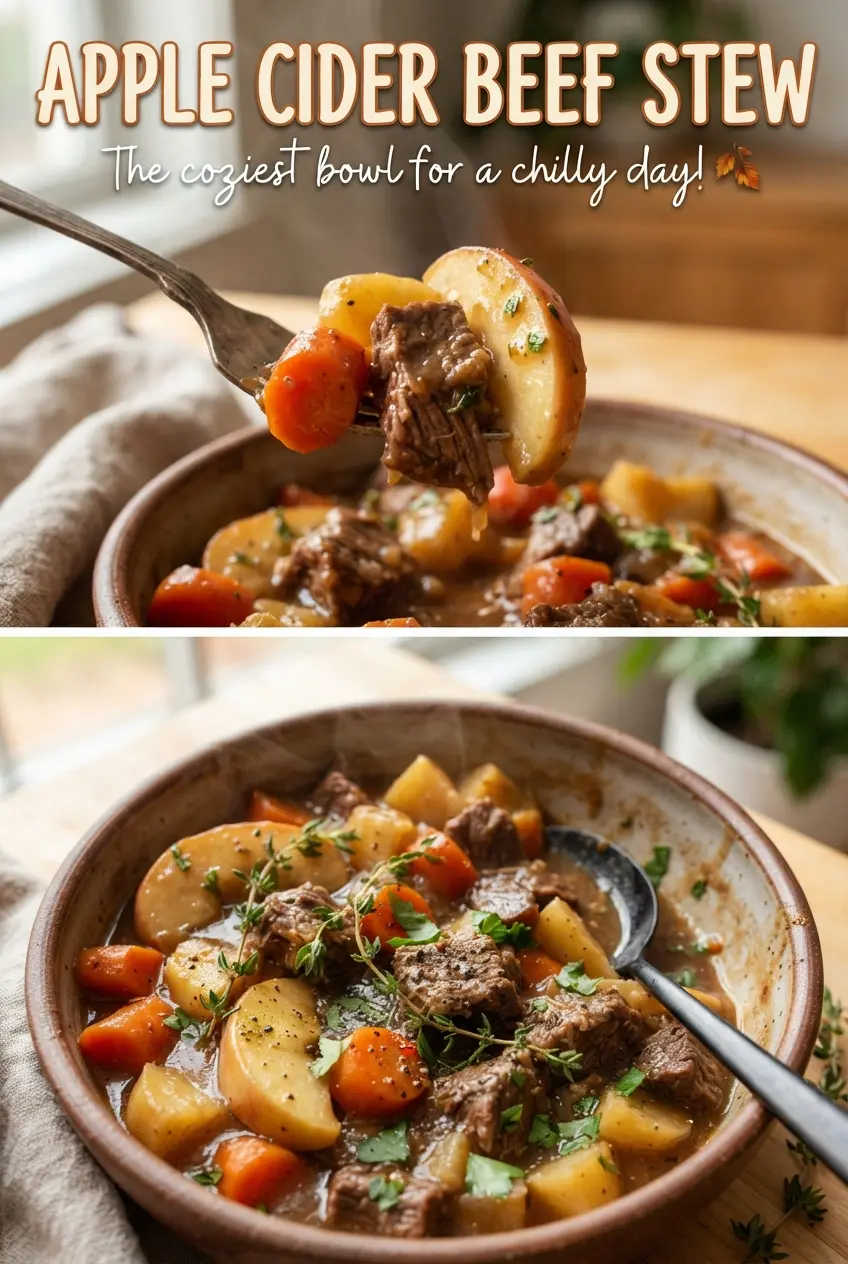
Apple Cider Beef Stew
Ingredients
Equipment
Method
- Season the beef chuck with salt and black pepper, then toss it with the all-purpose flour until evenly coated. Visual cue: the pieces look lightly dusted rather than wet with flour.
- Heat the olive oil in a Dutch oven over medium-high heat, then brown the beef in batches. Cook until deep golden-brown on the outside, about 3 to 5 minutes per batch, and transfer to a plate.
- Add the diced onion to the Dutch oven and cook for 5 minutes. Visual cue: the onion turns translucent and soft.
- Stir in the minced garlic and tomato paste and cook for 1 minute. Visual cue: the mixture becomes fragrant and slightly darker.
- Pour in the apple cider and scrape the bottom of the pot to loosen browned bits. Bring it to a simmer, about 2 to 3 minutes, until the surface looks glossy.
- Add the beef broth, apple cider vinegar, dried thyme, ground cinnamon, bay leaves, and browned beef. Bring to a simmer, then keep at a steady simmer with gentle bubbles.
- Cover and simmer for 1 1/2 hours. Visual cue: the beef should be noticeably tender when pierced with a fork.
- Add the cubed sweet potato and sliced carrots, then simmer for 30 minutes. Visual cue: the carrots soften and the sauce thickens slightly.
- Add the apple chunks and simmer for 15 minutes more. Visual cue: the apples soften but still hold their shape.
- Remove the bay leaves and serve. Visual cue: bay leaves are no longer visible in the broth.