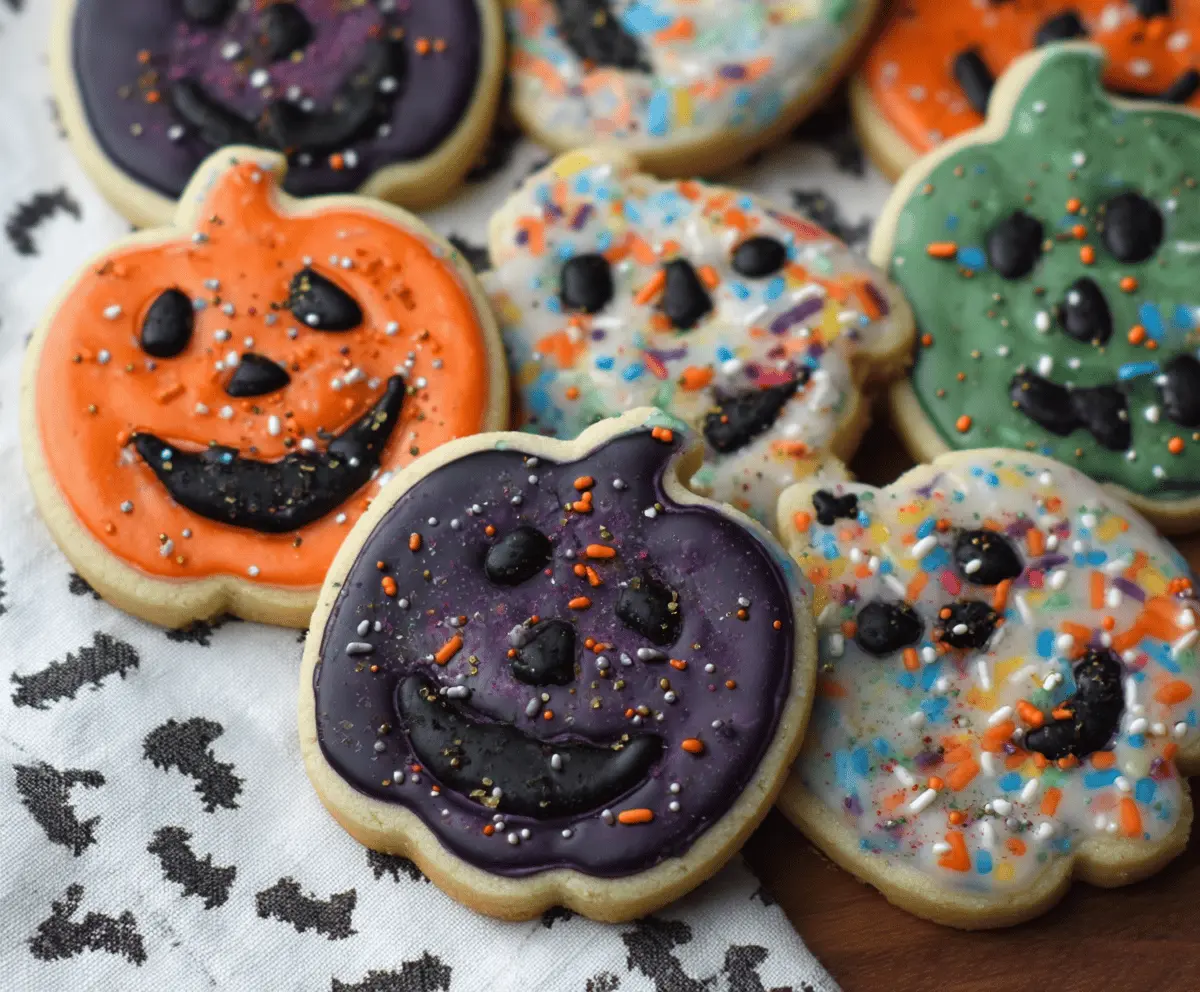
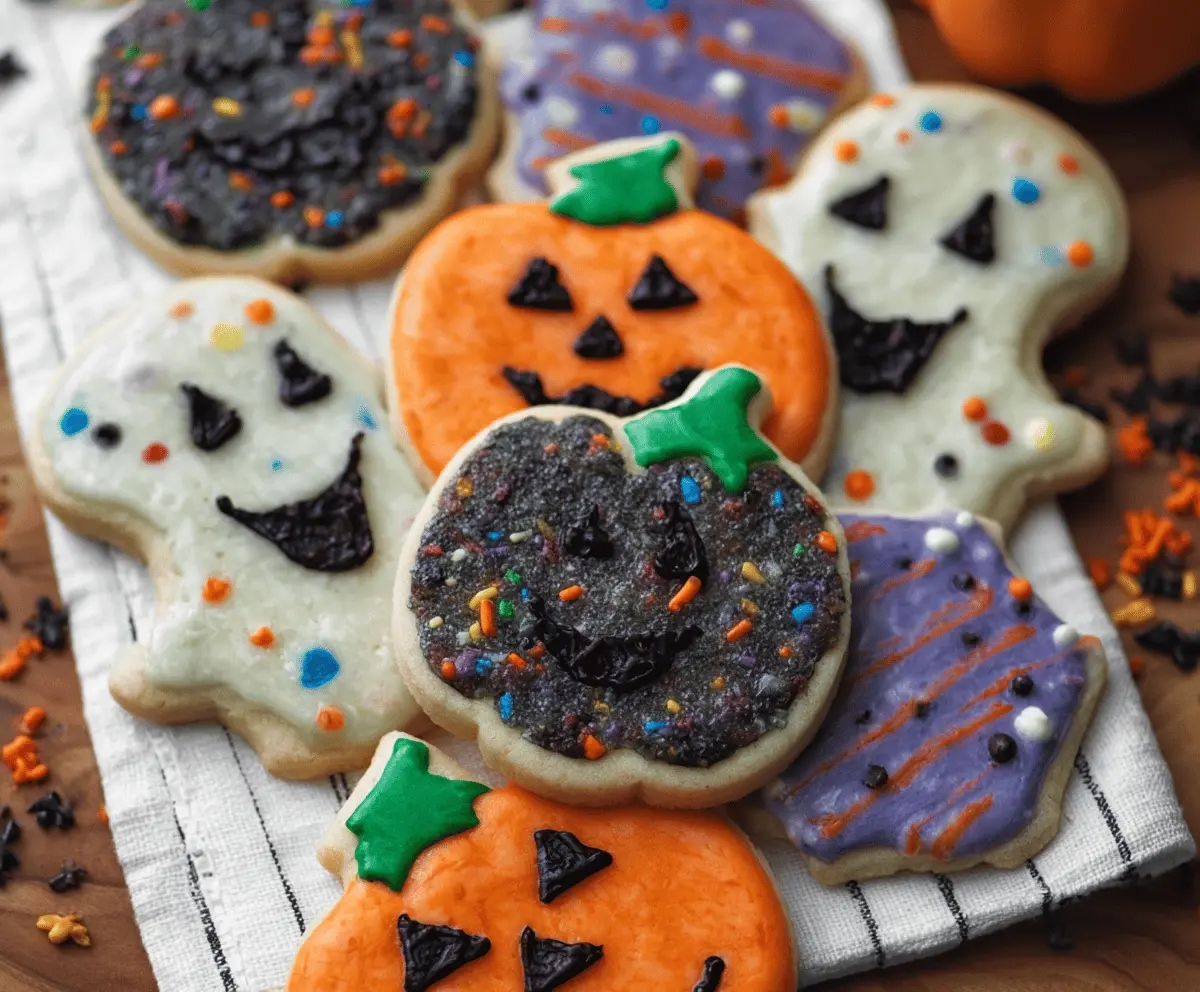
These Halloween Shortbread Cookies are fun and festive! They are buttery, crumbly, and perfect for getting into the spooky spirit. Plus, they can be easily decorated with icing or sprinkles!
Who wouldn’t love cookies shaped like ghosts and pumpkins? I like to have a cookie-decorating party with friends—it’s a sweet way to celebrate Halloween together! 🎃
Ingredients & Substitutions
Butter: Unsalted butter gives a rich flavor. If you’re watching salt intake, opt for a lower-sodium butter. Margarine can be used as a substitute, but it might change the texture slightly.
Powdered Sugar: Essential for sweetness and that melt-in-your-mouth texture. If you don’t have powdered sugar, you can blend granulated sugar until fine, but the results might not be as smooth.
Flour: All-purpose flour works best, but for a gluten-free option, you can swap with a gluten-free flour blend. Just ensure it has xanthan gum for proper texture!
Food Coloring: For a brighter hue, gel food colors are great. Liquid colors work too, but they may thin out the icing, requiring a bit more sugar to maintain consistency.
Sprinkles: You can use any seasonal sprinkles or even crushed candy for decorating! If you’re aiming for healthier options, nut or seed toppings can also work.
How Do I Get the Perfect Rolled and Cut Cookies?
Rolling out cookie dough can be tricky, but here are some tips to help you out. First, make sure the dough is well chilled; this prevents it from sticking.
- Lightly flour your surface and rolling pin to avoid sticking.
- Roll out the dough to an even thickness of about 1/4 inch. This makes sure each cookie bakes evenly.
- Use a sharp cookie cutter and press firmly to cut shapes. If the dough sticks, dip the cutter in flour.
- Transfer the cut cookies onto the baking sheet with a spatula, if needed, to keep their shape.
Chilling the cut cookies for a few minutes before baking helps keep their shape even more, so don’t skip this step!
Halloween Shortbread Cookies
Ingredients You’ll Need:
- 1 cup (2 sticks) unsalted butter, softened
- 3/4 cup powdered sugar
- 1 teaspoon vanilla extract
- 2 cups all-purpose flour
- 1/4 teaspoon salt
- Food coloring (orange, black, white, purple, green)
- Sprinkles (orange, black, blue, white, mixed Halloween colors)
- 1 cup powdered sugar (for icing)
- 2-3 tablespoons milk or water (for icing)
- 1/2 teaspoon vanilla extract (optional, for icing)
How Much Time Will You Need?
This Halloween Shortbread Cookie recipe takes about 15 minutes to prepare, plus at least 1 hour to chill the dough. Baking time is around 12-15 minutes, depending on how crunchy you like your cookies. Be sure to allow time for cooling and for the icing to set before enjoying!
Step-by-Step Instructions:
1. Make the Shortbread Dough:
In a large bowl, cream the softened butter and powdered sugar together until the mixture is smooth and fluffy. Add in the vanilla extract and mix well to combine. Next, gradually add the flour and salt. Mix until the dough just comes together, but be careful not to overmix to keep it nice and tender!
2. Chill the Dough:
Once the dough is formed, shape it into a disk, wrap it up in plastic wrap, and pop it in the refrigerator. Let it chill for at least 1 hour, which helps solidify the butter and makes it easier to roll out.
3. Roll and Cut Cookies:
Preheat your oven to 350°F (175°C). After chilling, place the dough on a lightly floured surface and roll it out to about 1/4-inch thickness. Using Halloween-themed cookie cutters (like ghosts, pumpkins, and tombstones), cut out shapes and place them on a parchment-lined baking sheet.
4. Bake the Cookies:
Bake the cookies in the preheated oven for 12-15 minutes, or until the edges begin to turn a light golden color. Once baked, let them cool completely on wire racks.
5. Prepare the Icing:
While the cookies are cooling, prepare the icing. In a bowl, mix 1 cup of powdered sugar with milk or water, one tablespoon at a time, until you achieve a smooth and spreadable consistency. You can add vanilla extract for extra flavor if you like!
6. Color the Icing:
Divide the icing into small bowls and add food coloring to each, creating spooky colors like orange, black, white, purple, and green. Stir well until the colors are bright and evenly mixed!
7. Decorate the Cookies:
Spread or pipe the colored icing onto the cooled cookies. Use sprinkles to add extra festive touch while the icing is still wet. Get creative with your designs!
8. Let Them Set:
Once decorated, allow the cookies to sit until the icing completely sets. This will make handling and serving easier. Store the cookies in an airtight container to keep them fresh.
These fun and festive Halloween Shortbread Cookies will not only brighten your celebration but also make for a delightful treat for family and friends! Enjoy every spooky bite! 🎃👻
Can I Use Different Types of Flour?
Yes, you can substitute all-purpose flour with a gluten-free flour blend if needed. Just ensure your blend contains xanthan gum for the best texture. For a denser cookie, you can also experiment with using whole wheat flour.
How Can I Make the Icing Thicker or Thinner?
If your icing is too thick, add a tiny bit more milk or water, mixing until smooth. Conversely, if it’s too thin, gradually sift in more powdered sugar until you reach the desired thickness. It should be spreadable but not runny!
How Do I Store Leftover Cookies?
Store your decorated cookies in an airtight container at room temperature for up to a week. If you have un-iced cookies, they can last longer—simply keep them stored the same way and ice them closer to the time you plan to serve.
Can I Freeze the Cookie Dough?
Absolutely! You can freeze the unbaked cookie dough for up to 3 months. Just wrap it tightly in plastic wrap and place it in an airtight container. When you’re ready to bake, thaw it in the fridge overnight before rolling and cutting as usual.