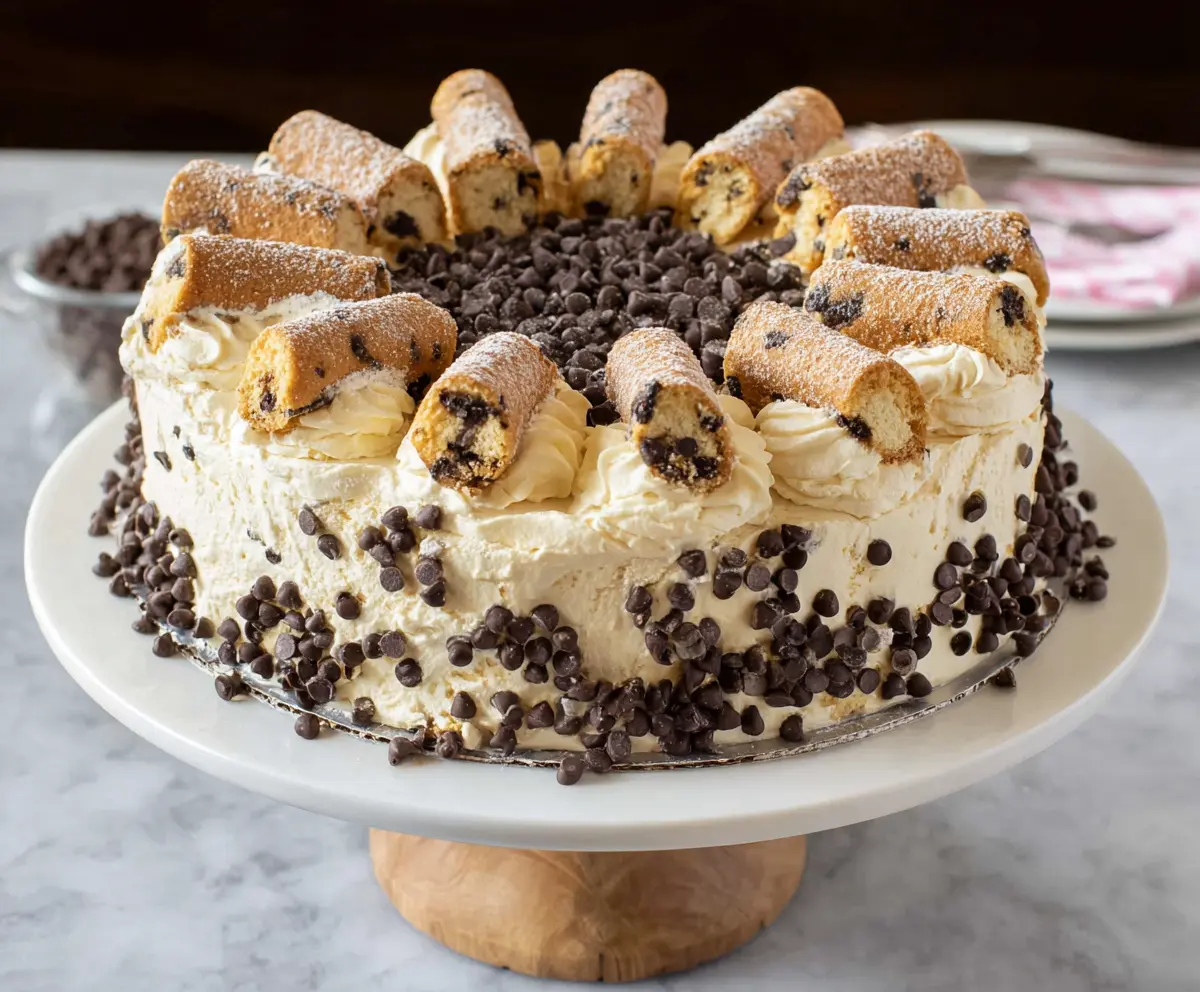
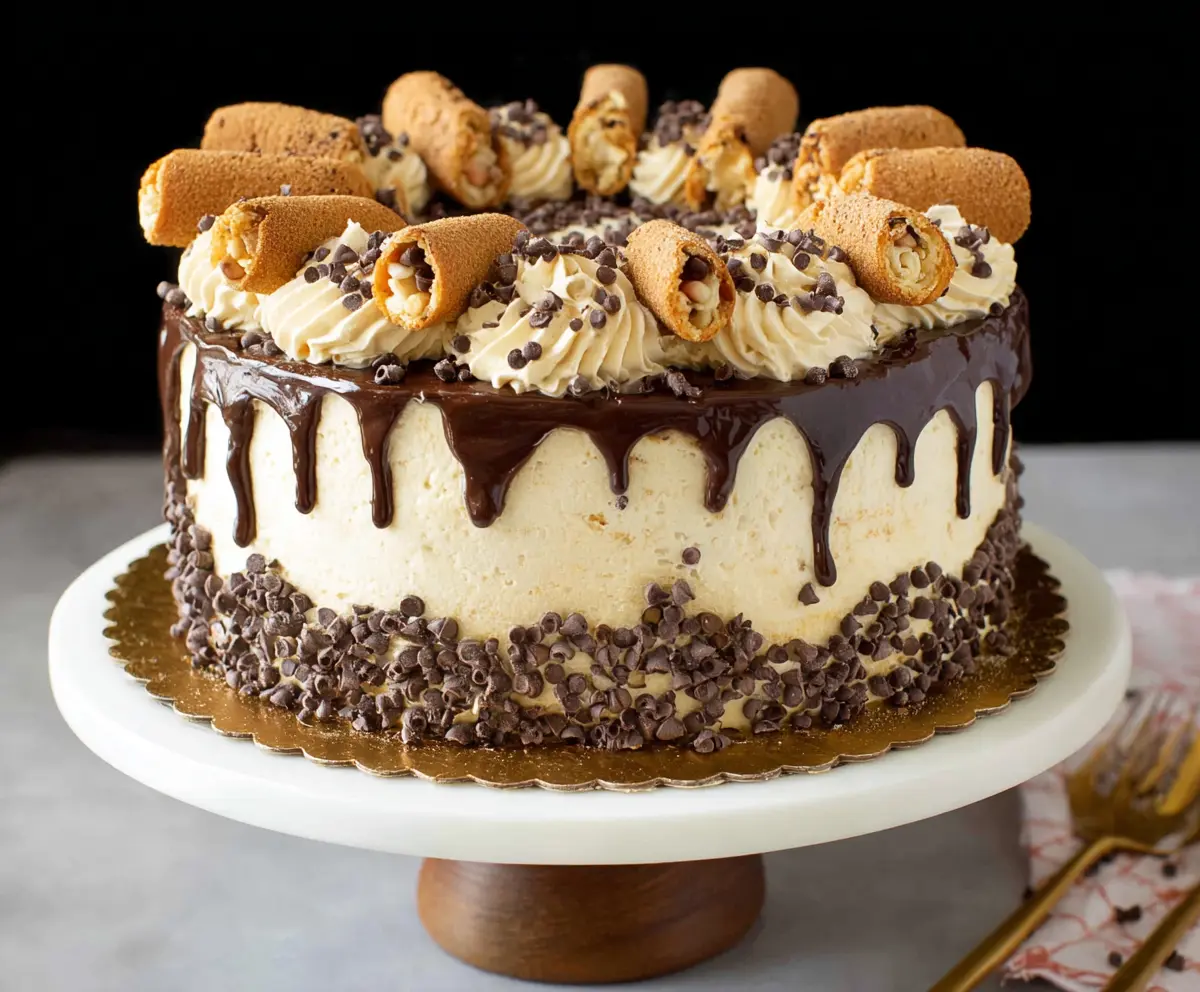
This Cannoli Cake is a delightful twist on the classic Italian dessert! It features soft cake layers filled with creamy ricotta, chocolate chips, and a hint of citrus zest.
The best part? You get all the flavors of cannoli without the mess of pouring filling into a shell. I love serving this cake at parties—it always gets smiles and happy taste buds! 😊
Key Ingredients & Substitutions
All-Purpose Flour: This is the base of the cake. If you’re looking for a gluten-free option, you can substitute with a gluten-free flour blend. Just make sure it has a 1:1 ratio!
Baking Powder: This helps the cake rise. If you run out, you can use 1 teaspoon of baking soda plus 1/2 teaspoon of vinegar or lemon juice for a substitute.
Ricotta Cheese: A key player in the frosting! Make sure it’s well-drained to avoid sogginess. If you don’t have ricotta, mascarpone or cream cheese works as a replacement, but it will change the flavor slightly.
Chocolate Chips: Mini chocolate chips give bursts of sweetness. If you prefer dark flavors, use dark chocolate chips or even finely chopped chocolate.
Orange Zest: This adds a nice zest to your frosting. You can swap it with lemon zest for a different citrus kick or skip it if you prefer a less fruity taste.
How Do You Achieve Perfectly Moist Cake Layers?
To get that perfect, moist texture, there are a couple of tricks you can follow. Here’s how:
- Do not over-mix the batter! Once you add the wet ingredients to the dry ingredients, mix just until combined to ensure a tender cake.
- Check for doneness a few minutes before the suggested baking time. Ovens can vary, so use a toothpick to see if it comes out clean.
- Let the cakes cool properly. Cooling in the pan helps retain moisture, but don’t leave them too long, or they can become soggy.
Following these tips will help you create cake layers that are soft and delightful, a perfect base for your cannoli filling!
Cannoli Cake Recipe
Ingredients You’ll Need:
For the Cake:
- 2 ½ cups all-purpose flour
- 2 ½ tsp baking powder
- ½ tsp salt
- ½ cup unsalted butter, softened
- 1 ¾ cups granulated sugar
- 4 large eggs
- 1 tbsp vanilla extract
- 1 cup whole milk
For the Cannoli Filling Frosting:
- 15 oz ricotta cheese, well-drained
- 8 oz cream cheese, softened
- 1 ½ cups powdered sugar, sifted
- 1 tbsp vanilla extract
- 1 tbsp orange zest (optional, for flavor)
- 1 cup mini chocolate chips
For Decoration:
- 12-15 mini cannoli shells or pre-made cannoli cookie rolls
- Additional mini chocolate chips for decoration
- Powdered sugar for dusting
How Much Time Will You Need?
This Cannoli Cake will take about 30 minutes of prep time and roughly 25-30 minutes to bake. After that, don’t forget to let it chill in the refrigerator for at least 2 hours before serving to let all those delicious flavors meld together. In total, you’re looking at about 3 hours of time from start to finish, including cooling and chilling.
Step-by-Step Instructions:
1. Prepare the Cake:
First, preheat your oven to 350°F (175°C). Grease and flour two 8-inch round cake pans to help the cake layers come out easily. In a medium bowl, whisk together the flour, baking powder, and salt.
In a large mixing bowl, beat the softened butter and sugar together until the mixture is creamy and light. Next, add the eggs one at a time, making sure to beat well after each addition before stirring in the vanilla.
Gradually mix in the dry ingredients you set aside, alternating with the milk. Start and end with the flour mixture, mixing just until everything is combined. Pour the batter evenly into your prepared pans, smoothing the tops with a spatula.
Now, bake these lovely layers for 25-30 minutes or until a toothpick inserted into the center comes out clean. Once done, let the cakes cool in the pans for about 10 minutes, then turn them out onto wire racks to cool completely.
2. Prepare the Cannoli Filling Frosting:
While your cakes are cooling, let’s make the frosting! Take the ricotta cheese and place it in a fine mesh strainer lined with cheesecloth. Let it drain over a bowl for at least 1 hour to remove excess moisture.
In a mixing bowl, beat the drained ricotta with the softened cream cheese until the mixture is smooth. Then, add the powdered sugar, vanilla extract, and optional orange zest. Mix it all together until it’s creamy and well combined, but be gentle. Finally, fold in the mini chocolate chips carefully so you keep those yummy chips whole.
3. Assemble the Cake:
Once your cake layers are cool, place one layer on a serving plate or cake stand. Spread a generous and even layer of the cannoli filling frosting on top of the first layer.
Next, add the second cake layer on top and cover the entire cake—top and sides—with the remaining frosting. To add some flair, press mini chocolate chips around the sides near the bottom of the cake.
4. Decorate:
For decoration, pipe small rosettes or dollops of frosting around the top edge of the cake. Then, take your mini cannoli shells, halve them, and place them standing on the frosting dollops around the top of the cake. Fill the center of the cake’s top with a generous handful of mini chocolate chips.
Lastly, give the top a light dusting of powdered sugar for that perfect finishing touch.
5. Chill and Serve:
Pop the cake in the fridge for at least 2 hours to let all those delicious flavors meld and the frosting to set. When you’re ready to serve, let it sit at room temperature for a bit to get the best texture, and then enjoy your fabulous Cannoli Cake!
Happy baking! 🎉
Can I Use a Different Type of Cheese for the Frosting?
Yes, if you prefer a different flavor, you can substitute the ricotta with mascarpone or even cream cheese. Just keep in mind that it may alter the overall taste slightly, but it will still be delicious!
Can I Make This Cake Gluten-Free?
Absolutely! You can substitute the all-purpose flour with a gluten-free all-purpose flour blend. Make sure to choose a blend that has a 1:1 substitution ratio for the best results.
How Do I Store Leftover Cannoli Cake?
Store any leftovers in an airtight container in the refrigerator for up to 3 days. It’s best to consume it within the first couple of days to enjoy its flavors at their best!
Can I Freeze This Cake?
Yes, you can freeze the unassembled cake layers! Wrap them tightly in plastic wrap and then foil before placing them in the freezer. When you’re ready to enjoy, simply thaw in the fridge overnight and frost as usual—a great way to make it ahead of time!