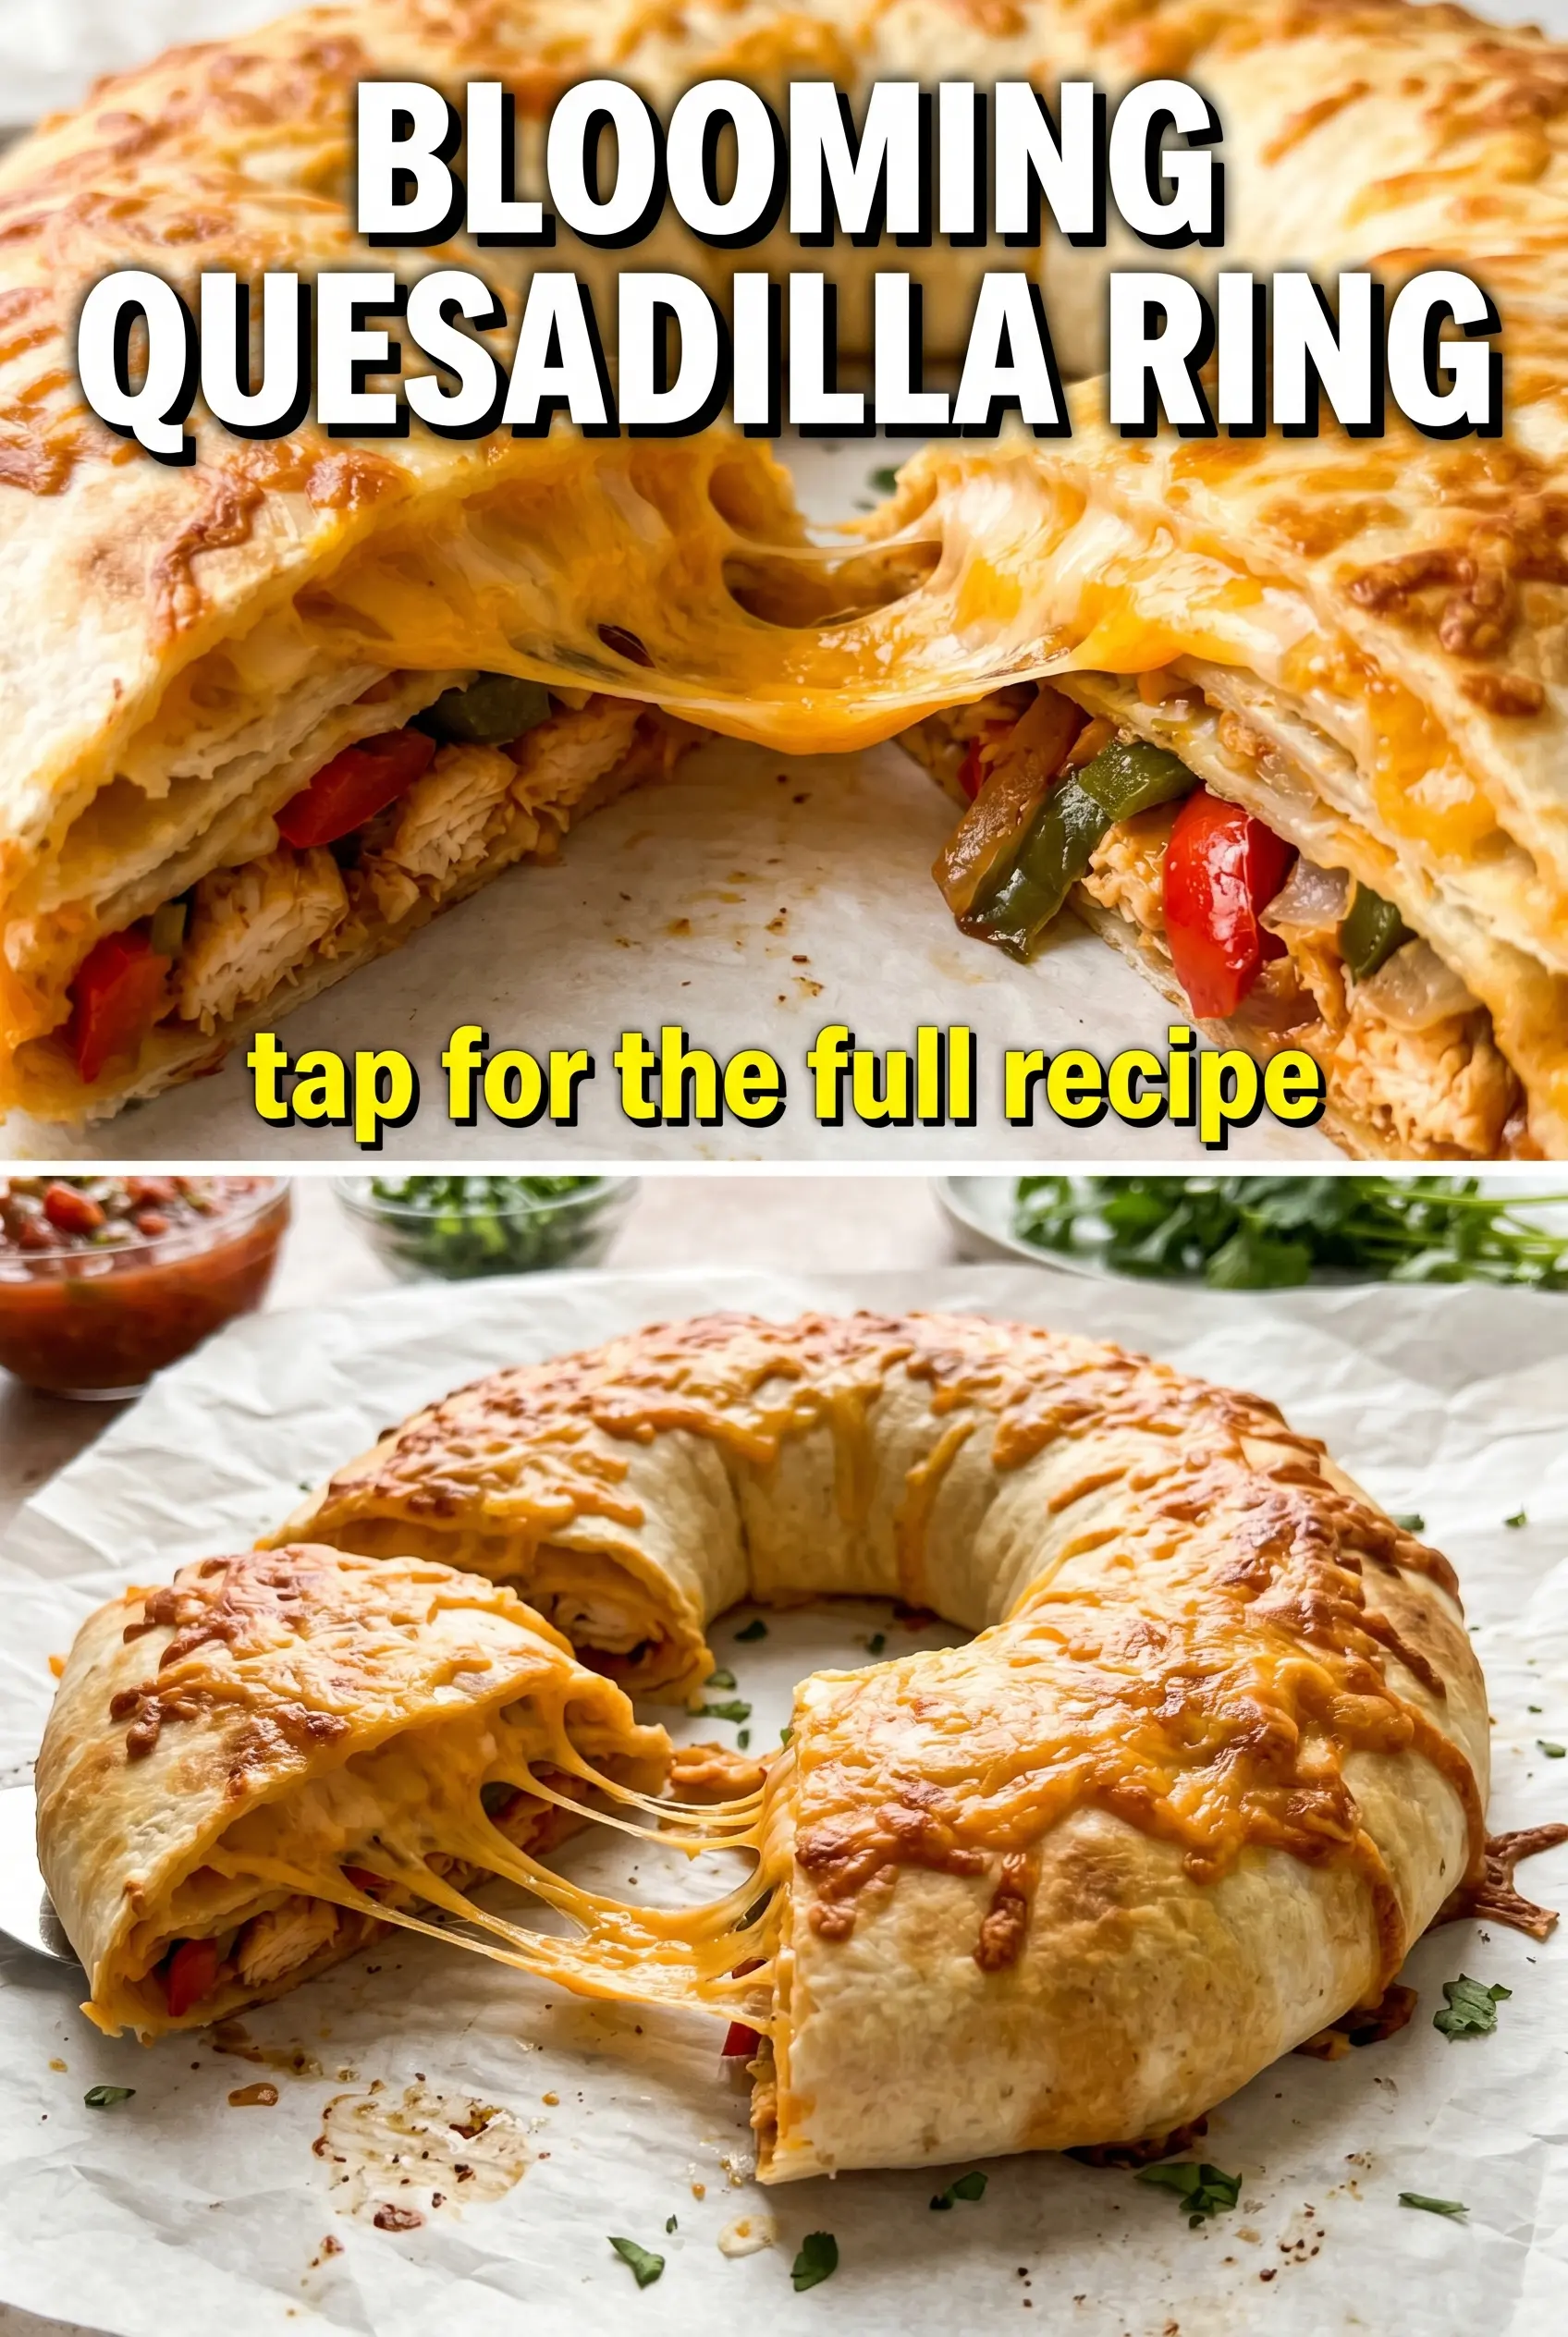
The Blooming Quesadilla Ring lands on the table looking like a party trick, but it eats like the best kind of comfort food: crisp edges, molten cheese, seasoned beef, and little pops of sweet corn tucked between the layers. The triangles stand up in a circle, so every piece gets that golden, shattering exterior while the center stays soft and gooey.
What makes this version work is the balance. The filling isn’t overloaded, so the tortillas seal and crisp instead of turning soggy, and the cheese is used twice in a way that matters: once to glue everything together and again to give you those stretchy, melty layers when the ring is pulled apart. A quick skillet fry gives the quesadillas enough structure to hold their shape on the platter.
Below, I’ve included the small details that keep the ring neat, the best way to keep the triangles from opening while they cook, and a few swaps if you want to change the filling without losing that showy centerpiece effect.
The triangles held together beautifully and the cheese melted all the way through without the tortillas getting greasy. I’d serve this exact ring again for game day because it disappeared fast.
Save this Blooming Quesadilla Ring for the next time you need a crisp, cheesy party appetizer that slices into perfect triangles.
The Part That Keeps the Ring Crisp Instead of Soggy
The mistake that ruins most layered quesadillas is too much filling in one spot. Once the tortillas are packed too heavily, they steam before they brown, and the cut edges slide open in the pan. This ring works because each triangle gets just enough filling to stay sealed, with cheese acting as the glue and the buffer between the tortillas and the wetter ingredients.
The other thing that matters is cooking the triangles after they’re cut, not before. That gives you clean points and more exposed surface area, which means more crispness and better browning. The skillet should be hot enough that the tortilla sizzles right away, but not so hot that the outside darkens before the cheese inside loosens.
What Each Filling Ingredient Is Doing Here
The beef gives the ring its backbone, but it needs to be cooked and seasoned before it goes into the tortilla. Raw beef would release too much liquid and stop the quesadillas from crisping. The bell peppers, onion, and corn add color and sweetness, but they also need to be diced small so they don’t tear the tortilla when you fold and cut it.
Cheddar is the cheese I’d keep exactly as written if you want that sharp, stretchy melt. Pre-shredded works, but freshly shredded cheese melts smoother because it doesn’t have the anti-caking coating. The sour cream and salsa in the center aren’t just garnish; they cool the heat of the filling and give you a creamy dip that matches the smoky beef. If you want a milder swap, Monterey Jack slides in easily, though the flavor will be softer.
- Flour tortillas — Use the large size so you have enough surface area to fold and cut without the filling spilling out. Smaller tortillas make the ring fussy and harder to arrange.
- Cheddar cheese — This is what gives you those pull-apart strands. Shred it yourself if you can; it melts cleaner and helps the triangles stay sealed.
- Cooked seasoned beef — Cool it slightly before assembling so it doesn’t melt the cheese too early. Drain off excess grease or the quesadillas will fry up heavy.
- Bell peppers, onion, and corn — These add texture and sweetness, but keep the dice small. Big chunks push the filling out when you fold the tortillas.
- Queso dip — Serve it warm, not piping hot, so it stays scoopable without running all over the platter.
How to Build the Filling and Fry the Triangles Without Losing the Shape
Layering the Tortillas
Spread the filling in a thin, even layer over one half of each tortilla, then fold it over firmly so the edges line up. The temptation is to overfill, but that’s what causes split seams and scattered cheese in the pan. After folding, cut each half-moon into triangles with a sharp knife or pizza cutter so the points stay neat.
Getting the Pan Hot Enough
Heat a thin layer of oil in a large skillet over medium-high heat until it shimmers. If the oil isn’t hot enough, the tortillas soak it up and turn greasy before they brown. If it’s smoking, the outside will scorch while the cheese inside is still stiff. You want an immediate sizzle the second a triangle hits the pan.
Frying to a Clean Golden Edge
Cook the triangles in batches and leave space between them so they crisp instead of steam. Two to three minutes per side is the sweet spot, but use the color as your guide: deep golden spots and a firm edge mean they’re ready. If a piece tries to open, press it gently with a spatula and let the melted cheese do the work of sealing it back together.
Building the Blooming Ring
Arrange the cooked triangles upright on a platter, overlapping them slightly so they hold each other in place. Think of it like shingling roof tiles; the overlap is what creates the blooming effect. Put the sour cream and salsa mixture in the center, then place the warm queso nearby or in a small bowl so people can dip without disturbing the shape of the ring.
Three Ways to Change the Ring Without Ruining the Texture
Make it vegetarian with black beans
Swap the beef for well-drained black beans, lightly mashed so the filling stays put. You’ll lose some of the meaty heft, but the beans bring a creamy texture that works especially well with the cheddar and salsa.
Go gluten-free with certified GF tortillas
Use gluten-free flour-style tortillas that are flexible enough to fold without cracking. They usually brown a little faster, so keep the heat at medium rather than pushing it high, or the edges will crisp before the center warms through.
Make it spicier with jalapeño and pepper jack
Add finely diced jalapeño to the filling and swap some or all of the cheddar for pepper jack. The heat will come through more clearly if you keep the salsa mild in the center, which balances the richness of the fried tortilla.
Storage and Reheating
- Refrigerator: Store leftover triangles in an airtight container for up to 3 days. The tortillas soften a bit, but the flavor holds up well.
- Freezer: Freeze the cooked triangles in a single layer, then transfer to a freezer bag for up to 2 months. Reheat from frozen for the best texture; thawing first makes them limp.
- Reheating: Use a skillet or air fryer at medium heat until the outside crisps again and the center is hot. The microwave works in a pinch, but it turns the tortillas chewy instead of crisp.
Answers to the Questions Worth Asking
Blooming Quesadilla Ring
Ingredients
Equipment
Method
- Layer each flour tortilla with shredded cheddar cheese, cooked seasoned ground beef, diced red and green bell peppers, diced onion, corn, and chopped cilantro, then fold in half. Cut the folded tortillas into triangles so each piece has a visible filling mix and cheese layers.
- Heat oil in a large skillet over medium-high heat until shimmering. Cook quesadilla triangles in batches for 2-3 minutes per side, flipping once, until golden and the cheese is melted.
- Transfer cooked triangles to a platter as you go so they stay crisp. If the pan browns too quickly, lower the heat slightly to keep the cheese fully melted by the end of each 2-3 minute side.
- Arrange the cooked quesadilla pieces in a circular ring on a platter, standing them up slightly overlapped to show the triangular shapes. Mix sour cream with salsa and spoon the mixture into the center of the ring like a dip well.
- Serve immediately with warm queso dip on the side. For a cleaner look, add extra salsa-sour-cream at the end only so the ring stays structured.