Fluffy campfire bread turns a few pantry staples into a golden, crackly loaf with a soft center that tastes even better eaten warm off the stick. The outside picks up that toasted campfire flavor while the inside stays tender enough to pull apart with your fingers, which is exactly why this one earns a place in the camping rotation. It feels a little old-fashioned in the best way and never lasts long once it comes off the fire.
The dough is simple, but the order matters. Mixing the dry ingredients first keeps the baking powder evenly distributed, and the melted butter goes in before the milk so the dough comes together without turning greasy or tough. You don’t need yeast or a long rise here; the lift comes from baking powder, and that means the texture depends on gentle mixing and steady heat, not a lot of waiting.
Below, I’ll show you how to keep the bread from burning before the center cooks, what to do if the dough feels sticky, and a few easy ways to change the flavor without losing that classic campfire bread feel.
The bread cooked through right on the stick and stayed fluffy inside instead of turning gummy. I kept rotating it over the coals and it came out with the best little crusty shell.
Like this fluffy campfire bread? Save it to Pinterest for your next camping trip when you want golden stick bread with a soft center and toasted crust.
The Trick to Keeping Campfire Bread Fluffy Instead of Doughy
The biggest mistake with stick bread is holding it too close to the flames and letting the outside brown before the center has a chance to cook. Coals are your friend here. They give steady heat, which lets the dough set slowly all the way through while the outside turns deep golden instead of blackened.
The second thing that matters is thickness. If the rope is too fat, the middle stays raw; if it’s too thin, it dries out and falls apart as it roasts. A long, even rope wrapped with slight overlap gives you the best balance of structure and fluff.
- Rotating constantly — This keeps one side from scorching and helps the bread cook evenly from all angles.
- Moderate rope thickness — Aim for a rope about as thick as your thumb so the center bakes through before the outside burns.
- Coals, not open flame — Direct fire chars the dough fast. Glowing coals give you control.
What the Dough Ingredients Are Doing Here
- All-purpose flour — This gives the bread enough structure to wrap around the stick without collapsing. Bread flour makes it chewier, which is not what you want here.
- Baking powder — This is the lift. Since there’s no yeast, fresh baking powder matters. If it’s old, the bread turns flat and dense.
- Butter — Melted butter enriches the dough and helps the exterior brown. You can swap in neutral oil, but you’ll lose some of that warm, bakery-style flavor.
- Milk — Milk makes the dough tender and easy to knead in the bag. Water works in a pinch, but the finished bread won’t be as soft or rich.
- Sugar — Just enough sweetness to round out the flour and help the crust color. It also makes the bread taste more like a treat when served with honey or jam.
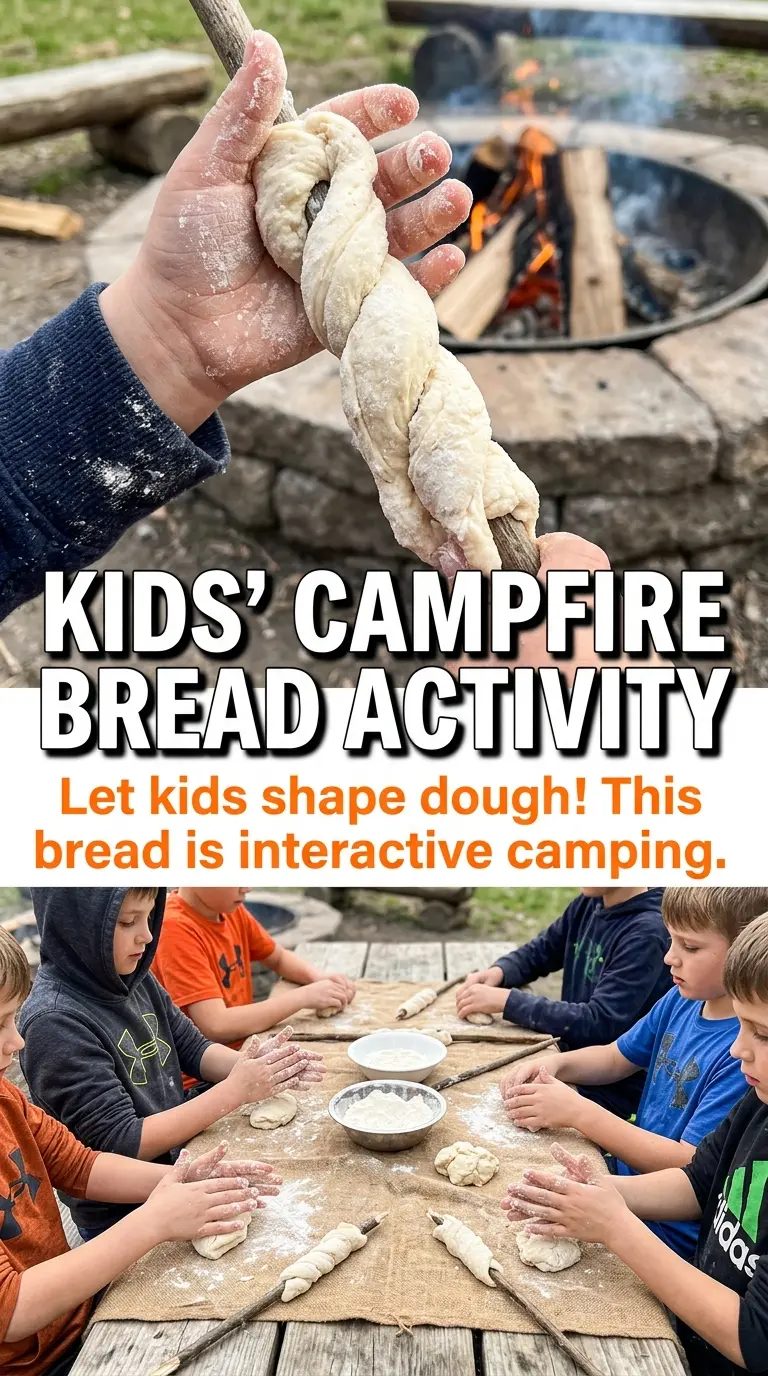
How to Shape and Roast the Bread So It Cooks Evenly
Mixing the Dough in the Bag
Start by combining the dry ingredients in the zip-top bag so the baking powder is spread through the flour evenly. Add the melted butter and milk, then knead until the dough just comes together and looks smooth enough to hold its shape. If it feels sticky, leave it alone for a minute before adding more flour; a slightly tacky dough wraps better than a dry one that cracks on the stick.
Rolling and Wrapping the Ropes
Divide the dough into eight equal pieces and roll each one into a rope with even thickness from end to end. Wrap it around the stick with a little overlap so there aren’t gaps where the heat can reach the bare stick. Press the ends lightly so they stick to the dough and don’t unwind while you roast.
Roasting Over the Coals
Hold the bread over hot coals and keep it moving. You’re looking for a slow, steady color change from pale dough to a deep golden crust with a dry, set surface. If the outside is browning too fast, move higher or farther from the heat; if it stays pale and wet-looking after several minutes, it needs more heat, not more time in one spot.
Finishing and Serving Warm
Slide the bread off the stick as soon as it’s cooked through and serve it warm. The exterior should feel crisp and lightly firm, while the inside pulls apart in soft strands. Brush on butter right away if you want it to melt into the cracks, or serve it with honey or jam while the bread is still hot enough to soak it in.
Three Ways to Change Campfire Bread Without Losing the Classic Feel
Dairy-Free Campfire Bread
Swap the butter for melted coconut oil or a neutral oil and use unsweetened non-dairy milk. The bread still roasts up with a good crust, but the flavor becomes a little less rich, so serving it with honey or jam helps bring back some of that buttery finish.
Savory Campfire Bread
Cut the sugar in half and add a pinch of garlic powder, dried herbs, or a little shredded cheese to the dry mix. This turns the bread into more of a side for chili or grilled meat, though the crust will brown a touch less quickly without the full amount of sugar.
Gluten-Free Version
Use a 1:1 gluten-free flour blend with baking powder already included only if you reduce or omit the added baking powder so the bread doesn’t taste metallic. The texture will be a little more delicate and less stretchy, so handle the ropes gently and keep them on the thicker side when wrapping.
Make It for a Bigger Group
Double the dough and shape it in batches instead of trying to roast everything at once. The bread holds best when it goes from shaped to fire-roasted right away, and working in smaller rounds keeps the dough from drying out before it reaches the coals.
Storage and Reheating
- Refrigerator: Store leftovers in an airtight container for up to 2 days. The crust softens as it sits, but the bread stays usable for snacking or serving alongside soup.
- Freezer: The baked bread freezes fairly well for about 1 month if wrapped tightly once cooled. Thaw at room temperature; freezing before roasting isn’t ideal because the shaped dough loses some of its lift.
- Reheating: Warm in a low oven or over very gentle heat until the outside loosens up again. High heat dries it out fast, and the sugar in the dough can make the crust darken before the center warms through.
Answers to the Questions Worth Asking
Fluffy Campfire Bread
Ingredients
Method
- In a large zip-top bag, mix all-purpose flour, baking powder, salt, and sugar until evenly combined.
- Add melted butter and milk to the bag, seal it, and knead until a single dough forms with no dry pockets.
- Divide the dough into 8 portions of equal size.
- Roll each portion into a long rope and wrap it around the end of a roasting stick so it spirals evenly.
- Hold each stick-bread loaf over campfire coals and rotate constantly while roasting for 10-12 minutes, until golden brown and cooked through.
- Slide the bread off the stick and serve warm.