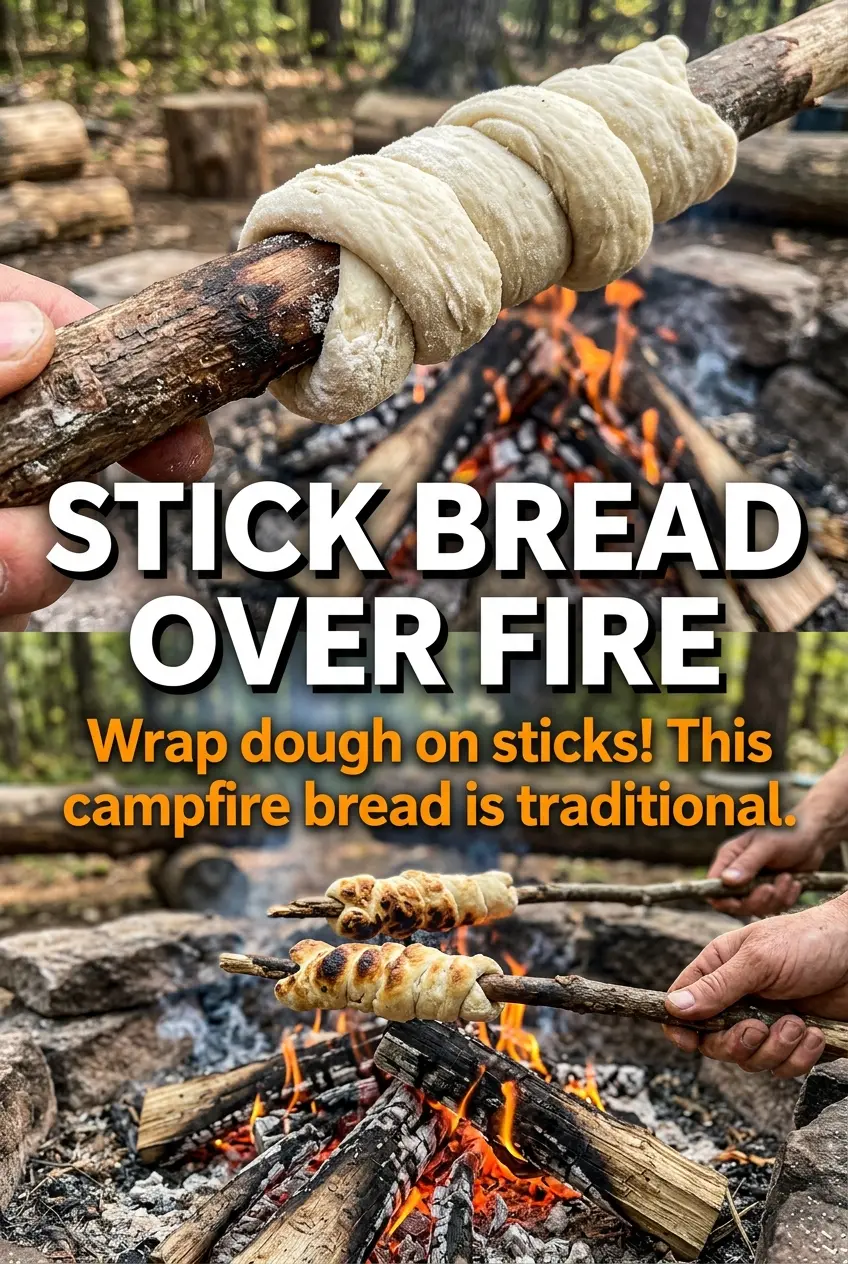
Golden, crisp-edged campfire bread has a way of disappearing faster than anything else around the fire. The outside turns toasty and lightly blistered while the inside stays soft and fluffy, and that contrast is exactly why this old-school camping classic still earns its place on the menu. It tastes even better eaten warm with butter melting into the spirals.
This version keeps the dough simple and reliable. Baking powder gives the bread its lift, powdered milk adds a little richness and better browning, and a touch of sugar helps the crust color without turning it sweet. The dough is meant to be a little sticky, which helps it cling to the stick and cook into those neat spirals instead of sliding around.
Below, I’ll walk through the part that matters most: how to keep the bread over hot coals, not flames, so the outside doesn’t burn before the center is cooked. I’ve also included a few variations if you want to serve it sweet, savory, or adapt it for different diets.
The dough wrapped around the stick perfectly and cooked through all the way to the center without burning. We had it with butter and honey, and the texture was fluffy inside with just the right toasted crust.
Save this campfire bread for your next trip when you want soft, spiral bread with a golden crust straight from the coals.
The Part That Keeps Campfire Bread Golden Instead of Charred
The biggest mistake with campfire bread is treating it like a marshmallow and holding it in the flames. That gives you a blackened outside and raw dough underneath. The bread needs steady heat from hot coals, with constant turning so every side gets the same chance to brown.
The dough itself also matters. A slightly sticky dough grips the stick better than a dry one, and the powdered milk plus sugar help the surface color before the inside dries out. If the dough feels too loose to wind neatly, dust it with just a spoonful of flour at a time; too much flour makes the bread dense and dull.
What Each Ingredient Is Actually Doing in This Dough
- All-purpose flour — This gives the bread its structure and keeps it sturdy enough to wrap around the stick. Bread flour isn’t needed here; it would make the texture a little chewier than you want for this style.
- Baking powder — This is the lift. Since the bread cooks over a fire instead of in an oven, baking powder is what keeps the interior light instead of turning into a tight, flat rope of dough.
- Powdered milk — This adds a gentle richness and helps the crust brown better. If you skip it, the bread still works, but it loses a little of that campfire-bakery taste.
- Sugar — Just enough to encourage browning and round out the flavor. It won’t make the bread sweet, but it does help the spirals finish with a better color.
- Water — Add it gradually and stop as soon as the dough comes together. If the dough gets too wet, it will slump on the stick and cook unevenly.
How to Shape, Roast, and Finish It Without Burning the Outside
Mixing the Dough Fast
Stir the dry ingredients together first, then add the water and mix just until a dough forms. It should feel slightly sticky and shaggy at first, not dry and tidy. If you knead it too much, the bread turns tougher and less tender after roasting. A zip-top bag works well for mixing because it keeps cleanup easy when you’re cooking outdoors.
Rolling Long Ropes
Divide the dough into 10 even pieces and roll each one into a rope about 1 inch thick. Keep the ropes even so they cook at roughly the same speed. If one end is much thinner than the other, that thin section will char before the thicker part is done. Lightly dust your hands if the dough clings too much, but don’t work in so much flour that the ropes stop sticking together.
Wrapping the Stick
Start at the tip of the roasting stick and spiral the dough down with a little overlap so it holds its shape. Press the first turn gently so it anchors, then keep the spiral loose enough for heat to reach the center. If you wrap it too tightly, the outside browns before the inside cooks. Leave a little space at the very end of the stick so you have a handle to hold without touching hot dough.
Roasting Over Coals
Hold the bread over hot coals, not open flames, and keep turning it the whole time. You’re looking for a deep golden surface with no wet dough showing between the spirals. The bread is done when it feels firm all around and sounds a little hollow if you tap the outside gently with the stick. If the outside is coloring too fast, move it farther from the heat; rushing this step is what burns campfire bread.
Sliding Off and Serving Warm
Let the bread sit for a minute before sliding it from the stick so it doesn’t tear. Serve it warm, while the crust is still crisp and the center is soft. Butter melts into the spirals beautifully, and jam works if you want it a little sweeter. If the bread cools completely before serving, the crust softens, so eat it soon after roasting.
Three Ways to Change Campfire Bread for the Fire You Have
Make it dairy-free
Swap the powdered milk for an equal amount of instant non-dairy milk powder if you want to keep the same dry mix format. You can also leave it out and add a tablespoon of neutral oil to the water for a little extra tenderness, though the crust won’t brown quite as deeply.
Turn it savory
Reduce the sugar to 1 teaspoon and add a little garlic powder, onion powder, or dried herbs to the dry mix. The bread will still brown, but the flavor shifts toward something you’d want next to chili, soup, or grilled meat instead of jam.
Make it gluten-free
Use a cup-for-cup gluten-free flour blend that already includes xanthan gum. The dough may need a touch less water and will be a little more fragile when wrapping, so handle it gently and roast over slightly lower heat for a few extra minutes.
Sweeten the finish
Brush the finished bread with melted butter and a pinch of cinnamon sugar as soon as it comes off the stick. The warm crust catches the coating fast, giving you a more dessert-like version without changing the dough itself.
Storage and Reheating
- Refrigerator: Store leftovers in an airtight container for up to 2 days. The crust softens, but the bread stays usable for reheating.
- Freezer: It freezes well after cooling completely. Wrap tightly and freeze for up to 1 month, then thaw before reheating.
- Reheating: Warm in a 300°F oven for 5 to 8 minutes or over very low campfire heat. High heat dries the inside before the outside comes back to life, so go slow.
Answers to the Questions Worth Asking
Campfire Bread
Ingredients
Method
- Mix all-purpose flour, baking powder, salt, sugar, and powdered milk in a large bowl or zip-top bag until evenly combined, with no dry streaks visible.
- Add water and mix until a dough forms; it should look slightly sticky and hold together when pressed.
- Divide the dough into 10 portions so each portion will wrap into one spiral on a stick.
- Roll each portion into a long rope about 1 inch thick so it stays thick enough to cook through without burning.
- Wrap each dough rope around the end of a roasting stick in a spiral pattern, keeping the loops tight and even for uniform browning.
- Hold each stick over campfire coals (not flames), rotating constantly for 12-15 minutes until golden brown and cooked through, with dry-looking patches giving way to a fully set crumb.
- Slide the bread off the stick and serve warm so the exterior stays crisp-golden and the inside stays fluffy.