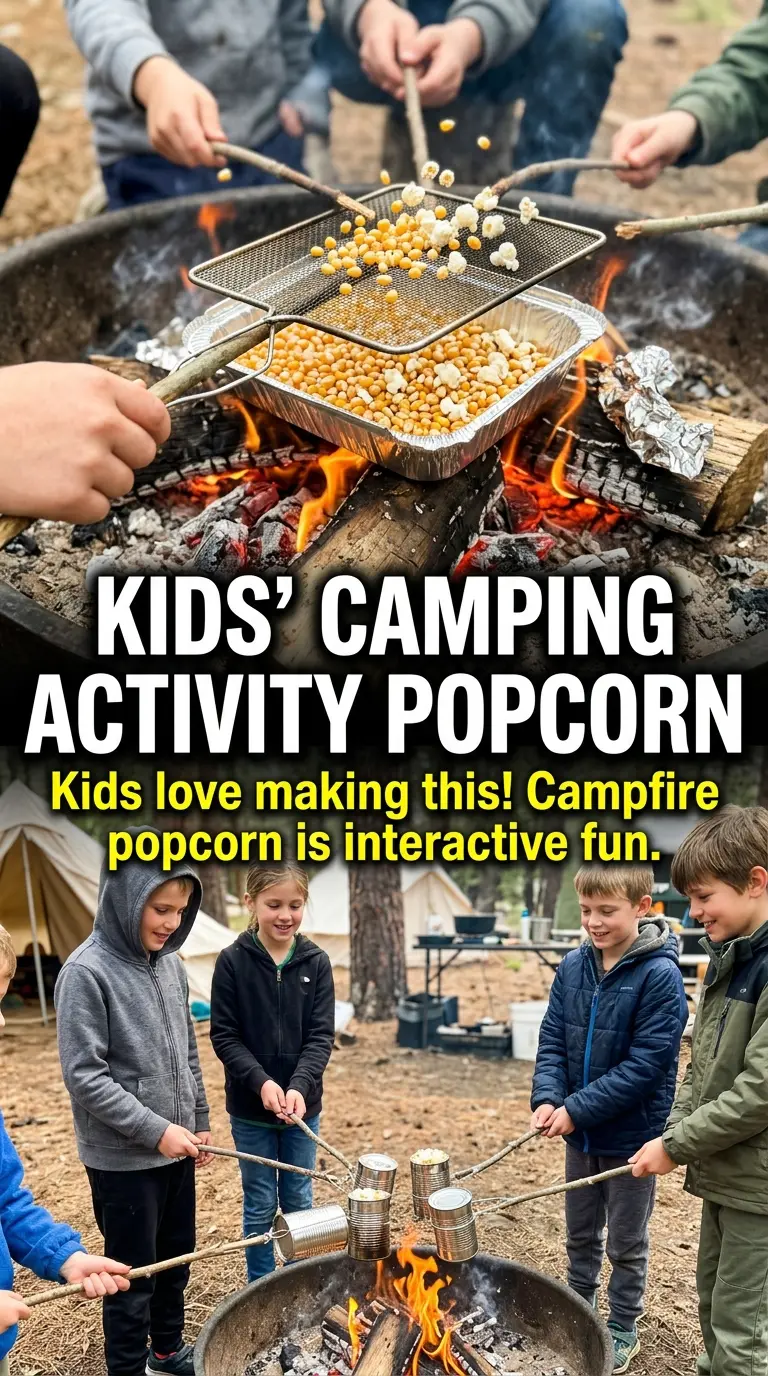
Campfire popcorn in a can turns a simple handful of kernels into the kind of snack people remember from a trip. The popcorn comes out light, crisp, and full of that smoky, toasted edge you only get when it’s popped over real fire. It’s the kind of thing that stops conversation for a minute while everyone grabs a warm bowl and starts picking out the best pieces.
The trick is keeping the kernels moving. A can held too still will scorch the oil and leave you with bitter popcorn before the popping even gets going. The other piece that matters is venting the can well enough for steam to escape, because trapped steam is what makes popcorn chewy instead of crisp. A lid that stays snug and a steady shake give you the best shot at clean, evenly popped kernels.
Below, I’ve laid out the small details that make this work over a campfire, plus the one substitution that matters most if you don’t have exactly the right gear. The process is simple, but the order matters more than it looks.
The popcorn came out fluffy instead of chewy, and shaking the can kept almost every kernel from burning. I added a little melted butter at the end and it tasted like a movie snack at camp.
Campfire popcorn in a can is the smoky, shake-and-pop snack worth saving for your next fire night.
The Reason Campfire Popcorn Burns Before It Finishes Popping
Campfire popcorn fails for one reason more than any other: the oil gets too hot before the kernels have a chance to pop evenly. A campfire is not a burner with a dial. The heat shifts fast, so the can needs constant motion to keep the bottom from scorching.
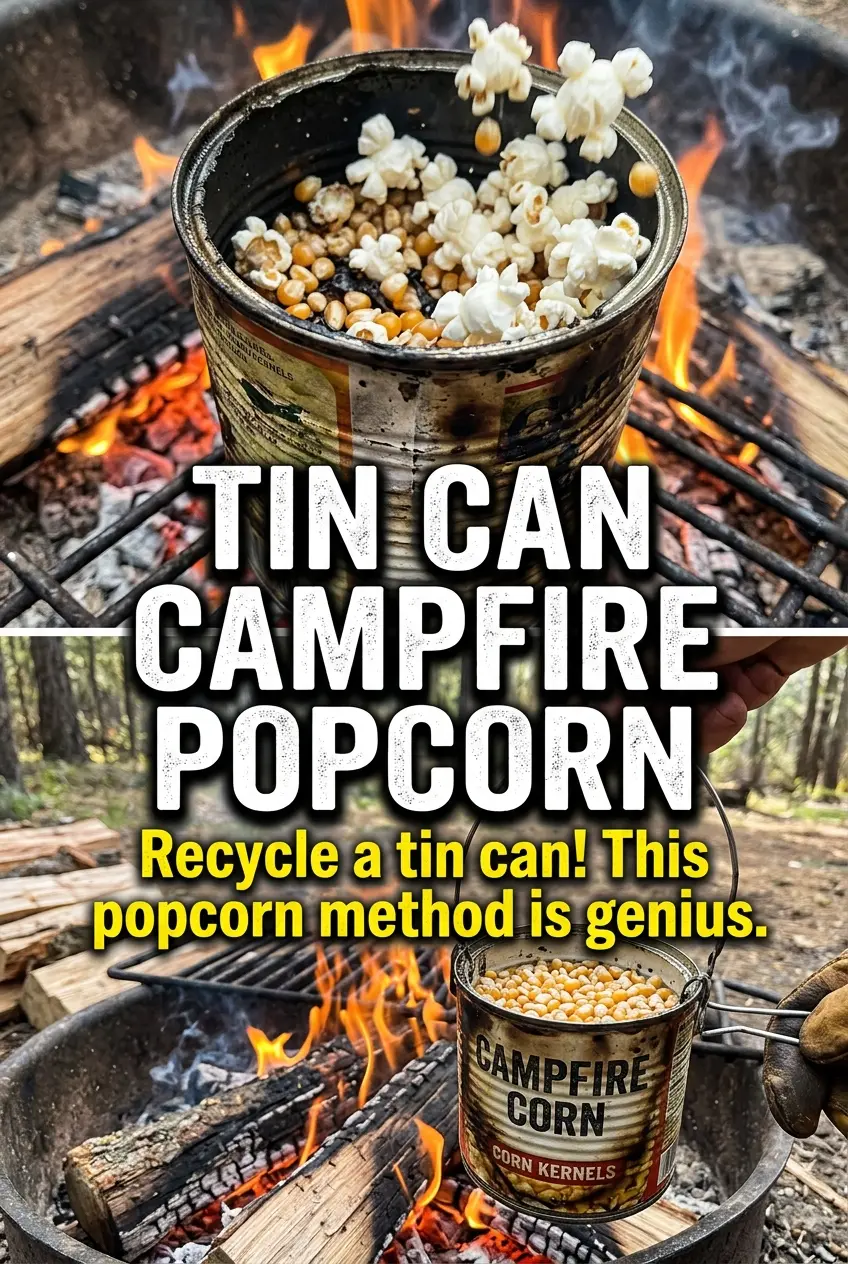
That’s why the can isn’t just a quirky serving vessel. It gives you a closed popping chamber that traps enough heat to pop the kernels while still letting steam escape through the holes you punch in the bottom. Without that venting, the popcorn softens as it pops. Without the shaking, the kernels sitting on the bottom blacken before the rest catch up.
- Constant shaking keeps the kernels moving through the hot zone so one spot doesn’t overcook.
- Small vent holes let steam out, which keeps the popcorn crisp instead of damp.
- Medium campfire heat works better than a roaring flame. You want hot coals or the edge of the fire, not direct blast heat.
What Each Ingredient Is Actually Doing in This Popcorn
- Popcorn kernels — Use regular popping corn, not old kernels from the back of the pantry. Fresh kernels pop with fewer duds and give you a better yield. If your popcorn has been sitting around for a long time, it may leave too many unpopped kernels behind.
- Vegetable oil — This is the heat transfer that gets the kernels going. A neutral oil handles campfire heat cleanly; olive oil can work, but it brings its own flavor and can smoke sooner. Use just enough to coat the bottom and move the kernels around freely.
- Large metal coffee can — The can needs to be metal, not coated paper, and big enough for the popcorn to move. A clean coffee can is ideal because it holds heat evenly and is easy to rig with a wire handle. If the lid doesn’t fit tightly, use foil secured over the top instead.
- Coat hanger or sturdy wire — This is what keeps your hands away from the flame. Make the handle secure before you ever add the kernels, because you won’t want to be fiddling with it once the can is hot.
- Salt and melted butter — Salt goes on after popping so it sticks to the hot popcorn. Butter is optional, but if you use it, drizzle lightly and toss right away so the popcorn doesn’t turn soggy.
How to Pop It Evenly Over an Open Flame
Preparing the Can
Punch several small holes in the bottom of the clean metal can before you add anything else. Those holes are the escape route for steam, and they help the popcorn stay crisp instead of turning leathery. Add the kernels and oil, then secure the lid before the can ever goes over the fire. If the lid shifts or comes loose, kernels can spill and the popping won’t stay contained.
Building the Handle
Wrap a coat hanger or heavy wire around the can to form a sturdy handle. The goal is a grip long enough to keep your hand well above the heat while you shake the can steadily. If the wire feels flimsy before you start, it will be worse once the metal heats up. Test the balance over cold ground first so the can hangs straight and doesn’t tilt oil to one side.
Shaking Through the Popping
Hold the can over the fire and shake constantly for 8 to 10 minutes, keeping it moving across the heat instead of parked in one spot. You’ll hear the popping start slowly, then build quickly, then thin out again. That fading sound is your cue to pull it away before the remaining kernels burn. If the popping slows to a few seconds between pops, stop immediately and pour it out.
Finishing and Seasoning
Take off the lid carefully, because steam will rush out, and pour the popcorn into a bowl right away. Season while it’s hot so the salt clings and any melted butter spreads evenly. If you wait too long, the popcorn cools and the butter just sits on the surface instead of coating each piece. Give it one quick toss and eat it while it’s still warm.
How to Adapt Campfire Popcorn When Your Gear Isn’t Perfect
No coffee can? Use a heavy-duty foil packet.
If you don’t have a metal coffee can, fold the kernels, oil, and seasoning into a double layer of heavy-duty foil and crimp the edges tightly. It won’t give you quite the same even heat, but it still lets you shake and pop over the fire. Keep the packet moving so one corner doesn’t burn through.
Dairy-free popcorn with just oil and salt
Leave off the butter and finish with salt only. You still get a crisp, satisfying snack, and the popcorn stays lighter and cleaner-tasting. This is the easiest way to keep the recipe dairy-free without changing the popping method at all.
Movie-style buttered popcorn
Drizzle on melted butter right after popping and toss in a big bowl so the heat disperses it evenly. If you pour too much on at once, the bottom layer turns soggy fast. A light hand gives you buttery flavor without losing the crunch.
Storage and Reheating
- Refrigerator: Store leftover popcorn in an airtight container at room temperature for 2 to 3 days. The fridge adds moisture and makes it stale faster.
- Freezer: Freezing isn’t a good fit here. Popcorn picks up condensation when it thaws, and that ruins the texture.
- Reheating: If the popcorn softens, spread it on a sheet pan and warm it in a low oven for a few minutes to dry it out. Don’t use the microwave; it makes the kernels chewy instead of crisp.
Questions I Get Asked About This Recipe
Campfire Popcorn in a Can
Ingredients
Equipment
Method
- Punch several small holes in the bottom of the can for ventilation, keeping them evenly spaced so steam can escape.
- Add popcorn kernels and vegetable oil to the can, then secure the lid tightly.
- Create a handle by wrapping the coat hanger or sturdy wire around the can so you can hold and shake it safely over the fire.
- Hold the can over campfire flames and shake constantly for 8-10 minutes, with the popcorn visibly popping and increasing in volume.
- Carefully remove the lid and pour the popcorn into a bowl when popping slows, using a quick, controlled motion to avoid steam.
- Season with salt and melted butter if desired, then serve immediately for best crunch.