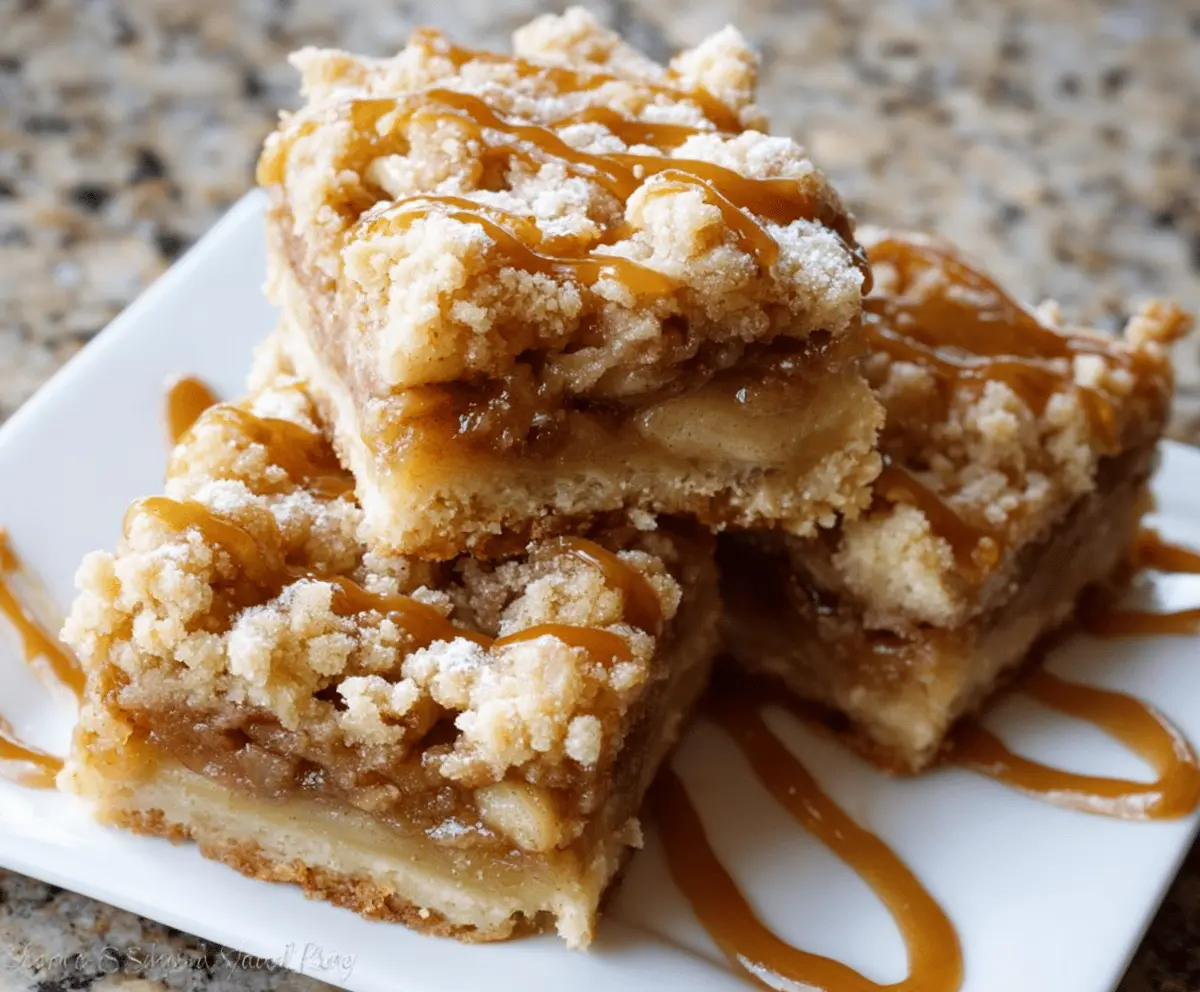
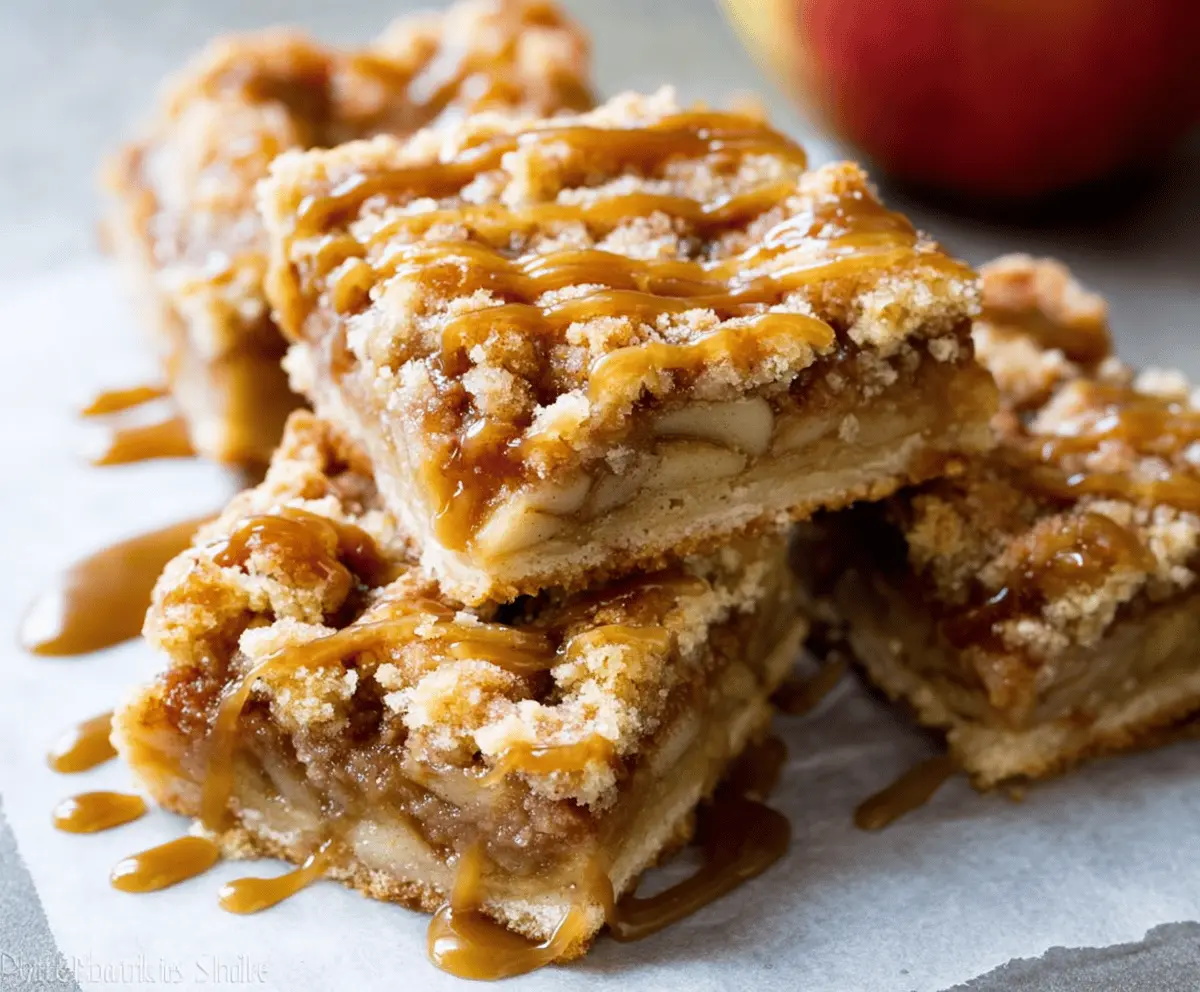
These apple pie bars are a fun twist on the classic dessert! With a buttery crust and sweet apple filling, they’re easy to make and even easier to enjoy.
Honestly, the best part is the smell that fills your kitchen while they bake. It’s like a cozy hug! I love serving these warm with a scoop of ice cream on top—yum!
Key Ingredients & Substitutions
All-Purpose Flour: This is the base for both the crust and the crumb topping. If you’re gluten-free, try a 1:1 gluten-free flour blend. I’ve found that it works well without compromising texture.
Tart Apples: Granny Smith apples are my go-to for their balance of sweetness and tartness. If they’re not available, Honeycrisp or Braeburn apples are great alternatives for that perfect flavor.
Unsalted Butter: Cold butter is key for a flaky crust! If you’re out of butter, coconut oil or a plant-based butter can be a good substitute, but the flavor will vary slightly.
Cinnamon & Nutmeg: These spices really enhance the apple flavor. I like to add a pinch of allspice for an extra warm note. If you’re not a fan of nutmeg, feel free to skip it!
How Do I Get the Perfect Crust and Topping?
The texture of the crust and topping makes a big difference in your apple pie bars. Start by keeping your ingredients cold. Cold butter helps create that flaky crust! Here’s how:
- Use a pastry cutter or your fingers to combine butter into the dry ingredients until it resembles coarse crumbs. Don’t overwork it!
- Press the crust mixture firmly into the pan—this will help it hold together when baked.
- For the crumb topping, make sure to have a few larger clumps to add texture. A little variety in size gives a nice crunch!
By following these tips, you’ll ensure a lovely crisp topping and a sturdy crust that holds up well with the sweet apple filling. Enjoy!
How to Make Apple Pie Bars
Ingredients You’ll Need:
For the Crust and Crumb Topping:
- 2 1/2 cups all-purpose flour
- 1 cup granulated sugar
- 1 teaspoon baking powder
- 1/2 teaspoon salt
- 1 cup (2 sticks) cold unsalted butter, cut into cubes
For the Apple Filling:
- 6 cups peeled and thinly sliced tart apples (such as Granny Smith)
- 3/4 cup granulated sugar
- 1 teaspoon ground cinnamon
- 1/4 teaspoon ground nutmeg
- 1 tablespoon all-purpose flour
Optional:
- Caramel sauce for drizzling
How Much Time Will You Need?
This recipe takes about 15 minutes for prep and around 50-60 minutes to bake. You’ll want to allow some time for the bars to cool completely before cutting into squares, which can take about 30 minutes. So, plan on around 1.5 to 2 hours overall from start to finish.
Step-by-Step Instructions:
1. Prepare Your Oven and Pan:
Start by preheating your oven to 350°F (175°C). Grab a 9×13 inch baking pan and either grease it or line it with parchment paper. If you line it, leave some paper hanging over the sides—this will make it easy to lift the bars out after baking.
2. Make the Crust and Crumb Topping:
In a large mixing bowl, combine 2 1/2 cups of flour, 1 cup of sugar, baking powder, and salt. Now, add in the cold, cubed butter. Use a pastry cutter or your fingers to mix everything together until it looks like coarse crumbs. Don’t worry if some butter lumps are a little bigger; they will help create a nice texture.
3. Form the Crust:
Take about two-thirds of this crumb mixture and press it firmly into the bottom of the prepared baking pan. This creates your crust which will hold all that lovely apple filling!
4. Prepare the Apple Filling:
In a separate bowl, toss the sliced apples with 3/4 cup of sugar, cinnamon, nutmeg, and 1 tablespoon of flour. Make sure the apple slices are well-coated, as this will deepen the flavor.
5. Assemble the Bars:
Spread the apple mixture evenly over the crust in the pan. Then, sprinkle the remaining crumb mixture on top of the apples to form a delicious topping.
6. Bake Them Up:
Place your pan in the preheated oven and bake for 50-60 minutes. You’re looking for a golden-brown topping and tender apples. The smell will be fantastic!
7. Cool and Serve:
Once baked, remove the pan from the oven and let it cool completely on a wire rack. This helps the bars firm up nicely. After about 30 minutes or so, you can lift the cooled bars out using the parchment paper edges. Cut them into squares.
8. Add a Tasty Drizzle:
If you like, drizzle some caramel sauce over the top for an extra sweet touch before serving. These bars taste delightful on their own or served warm with vanilla ice cream or whipped cream.
Enjoy your homemade apple pie bars—perfect for sharing at gatherings or savoring as a sweet treat anytime!
Can I Use Frozen Apples for the Filling?
Yes, you can use frozen apples! Just make sure to thaw them completely and drain any excess liquid before mixing them with sugar and spices to avoid a soggy filling.
How Can I Make These Bars Gluten-Free?
You can substitute the all-purpose flour with a gluten-free 1:1 flour blend. Make sure the baking powder you use is also gluten-free, and you’ll have a delicious gluten-free treat!
What’s the Best Way to Store Leftover Apple Pie Bars?
Store leftovers in an airtight container in the fridge for up to 3 days. You can also freeze them for up to 3 months. Just thaw them in the fridge overnight before serving!
Can I Add Nuts to the Topping?
Absolutely! Chopped pecans or walnuts can add a nice crunch. Just mix them into the crumb topping while preparing it for added texture and flavor.