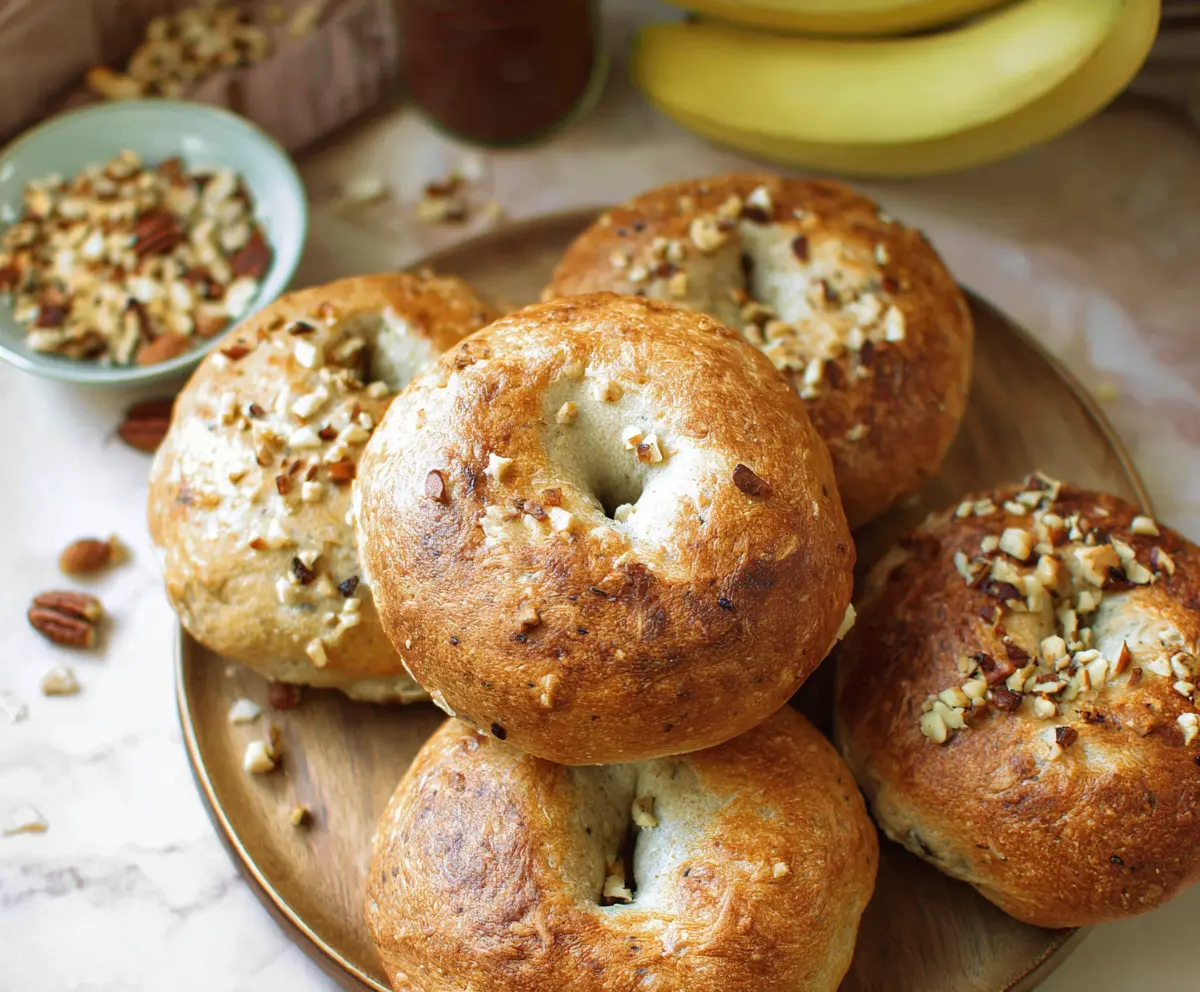
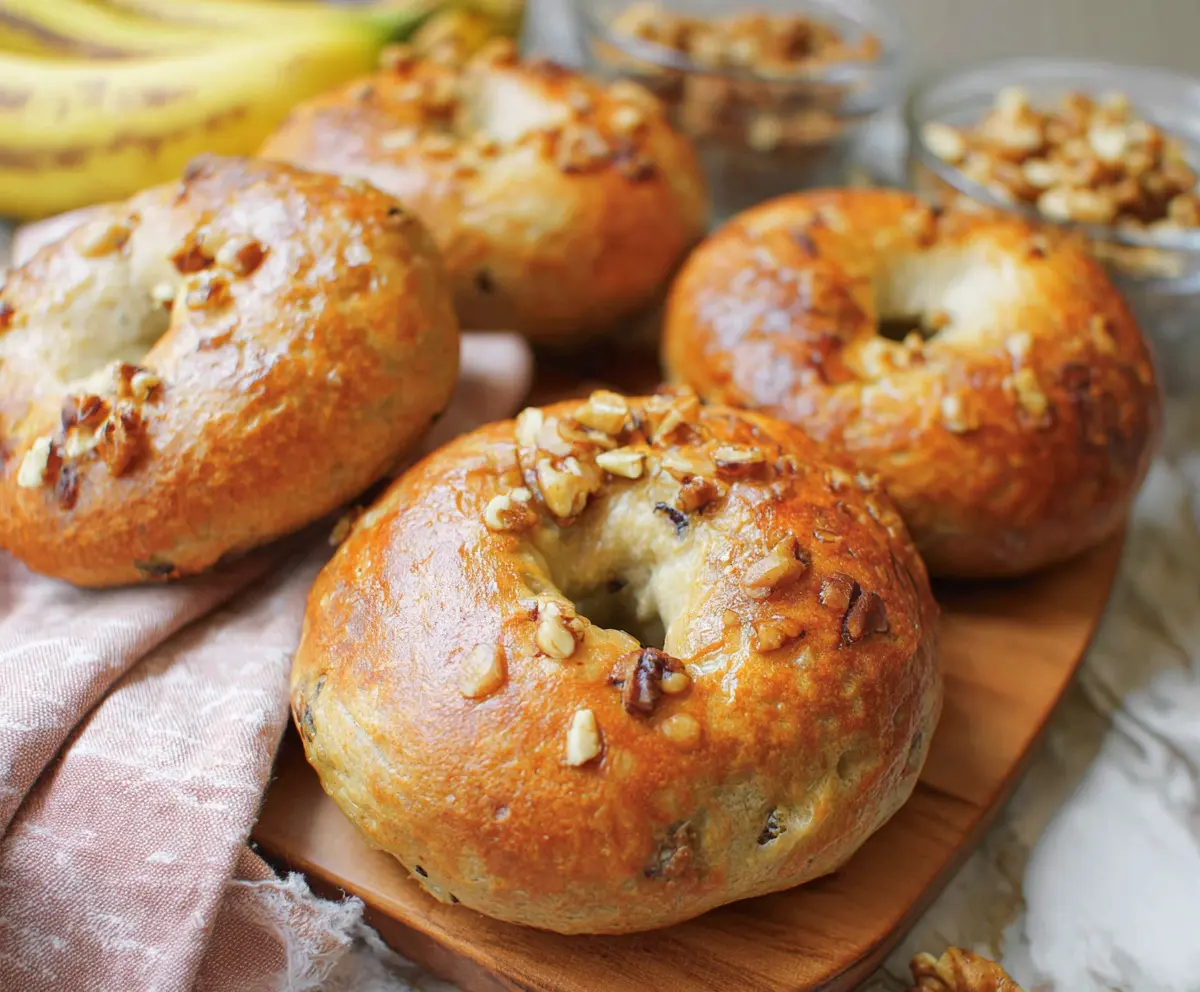
Banana Nut Bagels are a tasty twist on your regular bagels! Made with ripe bananas, crunchy nuts, and a hint of sweetness, they’re perfect for breakfast or a snack.
These bagels are not just fun to eat, but they’re also pretty easy to make. I love enjoying them fresh out of the toaster, maybe with a little cream cheese on top. Yum! 🍌🥯
Key Ingredients & Substitutions
Bananas: Ripe bananas are essential for flavor and moisture. If you don’t have ripe ones, you can use plantains, but it’ll change the flavor profile slightly. I often freeze overripe bananas for baking, so they’re always on hand!
Bread Flour: This gives the bagels a chewy texture. If you don’t have bread flour, you can use all-purpose flour, but your bagels might be a bit softer. I find that mixing a little vital wheat gluten into all-purpose flour helps mimic that chewy bite.
Instant Yeast: Instant yeast is great for convenience. If you have active dry yeast, use it instead—but you’ll need to dissolve it in warm water first before combining it. I always keep both types handy for flexibility in baking.
Chopped Mixed Nuts: Walnuts, pecans, or almonds work well, but if you’re allergic or want to skip the nuts, sunflower seeds or pumpkin seeds are great alternatives. Personally, I love the crunch of walnuts in these bagels!
Cinnamon: Adding this optional spice can elevate the flavor. I can’t resist it! If you’re not a fan, just leave it out or even replace it with nutmeg for a different twist.
How Do I Knead Dough Effectively?
Kneading is crucial for developing the dough’s gluten, which gives bagels their wonderful texture. Here’s how to do it right:
- Start with a clean, floured surface and your rough dough.
- Push the dough away from you with the heel of your hand, then fold it back over towards you.
- Rotate the dough 90 degrees and repeat for about 8-10 minutes. It should become smooth and elastic. Don’t worry if it sticks a little; just sprinkle more flour as needed.
By the end, the dough should be slightly tacky but not sticky. A good tip is to check for its elasticity by poking it; if it springs back, you’ve got it!
How to Make Delicious Banana Nut Bagels
Ingredients You’ll Need:
For the Bagel Dough:
- 2 ripe bananas, mashed
- 3 1/2 cups bread flour, plus extra for kneading
- 1 tablespoon instant yeast
- 1 teaspoon salt
- 1 tablespoon sugar or honey
- 3/4 cup warm water (adjust as needed)
- 1 cup chopped mixed nuts (walnuts, pecans, almonds)
- 1 tablespoon vegetable oil or melted butter (for greasing)
For Topping:
- Additional chopped nuts for topping
- Optional: 1 teaspoon cinnamon for added flavor
How Much Time Will You Need?
This recipe takes about 20 minutes of active preparation time, plus around 2 hours total for rising and boiling. You’ll need about 1 to 1½ hours for the first rise, 30 minutes for the second rise, and then 20-25 minutes for baking. By the end, you’ll have fresh and tasty banana nut bagels ready to enjoy!
Step-by-Step Instructions:
1. Prepare the Dough:
In a large mixing bowl, mix the bread flour, instant yeast, salt, and sugar (if you’re using cinnamon, add it here too!). In another bowl, mash the ripe bananas until smooth and then mix them with the warm water until well combined.
2. Mix Wet and Dry Ingredients:
Pour your banana-water mixture into the bowl with the dry ingredients. Stir everything together until you see a rough dough start to form. Next, add the chopped nuts into the dough and then knead it on a floured surface for about 8-10 minutes. You want the dough to be smooth, elastic, and just a little bit sticky. If it’s really sticking to your hands, sprinkle a bit more flour as needed.
3. First Rise:
Lightly grease a clean bowl with oil or melted butter. Place your dough in the bowl, cover it with a damp cloth or plastic wrap, and set it in a warm spot. Let it rise for about 1 to 1½ hours, or until it doubles in size. It’s like magic—watch it puff up!
4. Shape the Bagels:
Once the dough has risen, punch it down to release the air. Divide it into 8 equal pieces. Roll each piece into a ball, and then poke a hole in the center with your thumb. Gently stretch the ball to create a bagel shape, making a ring that’s about 2-3 inches in diameter.
5. Second Rise:
Place your shaped bagels on a greased or parchment-lined baking sheet. Cover them loosely again and let them rise for about 30 minutes. This step helps achieve that perfect bagel texture!
6. Boil the Bagels:
While the bagels are rising, preheat your oven to 425°F (220°C). In a large pot, bring water to a boil. Once it’s boiling, carefully add the bagels in batches. Boil them for about 1 minute on each side, then use a slotted spoon to remove them and place them back on the baking sheet.
7. Add Toppings:
While the bagels are still wet from boiling, sprinkle some additional chopped nuts on top. This helps them stick, and gives a nice crunch!
8. Bake:
Pop those beautiful bagels into the oven! Bake them for 20-25 minutes, or until they look golden brown and delicious. Your kitchen will smell amazing!
9. Cool and Serve:
Once they’re baked, take them out of the oven and transfer to a wire rack to cool slightly. Let them cool just a bit before serving—then enjoy your homemade banana nut bagels with cream cheese, butter, or on their own! They’re sure to be a hit!
Enjoy your fresh, homemade banana nut bagels—soft and flavorful with a crunchy nut topping!
Can I Use Overripe Bananas for These Bagels?
Absolutely! In fact, overripe bananas are perfect for this recipe as they are sweeter and more flavorful. Just make sure to mash them well before mixing into the dough.
What If I Don’t Have Bread Flour?
No worries! You can substitute all-purpose flour instead. Your bagels might be a bit softer, but they’ll still turn out tasty. If you have vital wheat gluten, adding a tablespoon can help mimic the chewiness of bread flour.
Can I Make These Bagels Without Nuts?
Yes, you can easily omit the nuts if you have allergies or prefer a nut-free version. For extra flavor and texture, consider adding seeds like sunflower or pumpkin seeds instead.
How Should I Store Leftover Bagels?
To keep your bagels fresh, store them in an airtight container at room temperature for up to 3 days. For longer storage, you can freeze them! Just make sure they’re well wrapped in plastic and placed in a freezer bag; they’ll last for about 3 months. To enjoy, simply thaw at room temperature and warm in the oven for a few minutes.