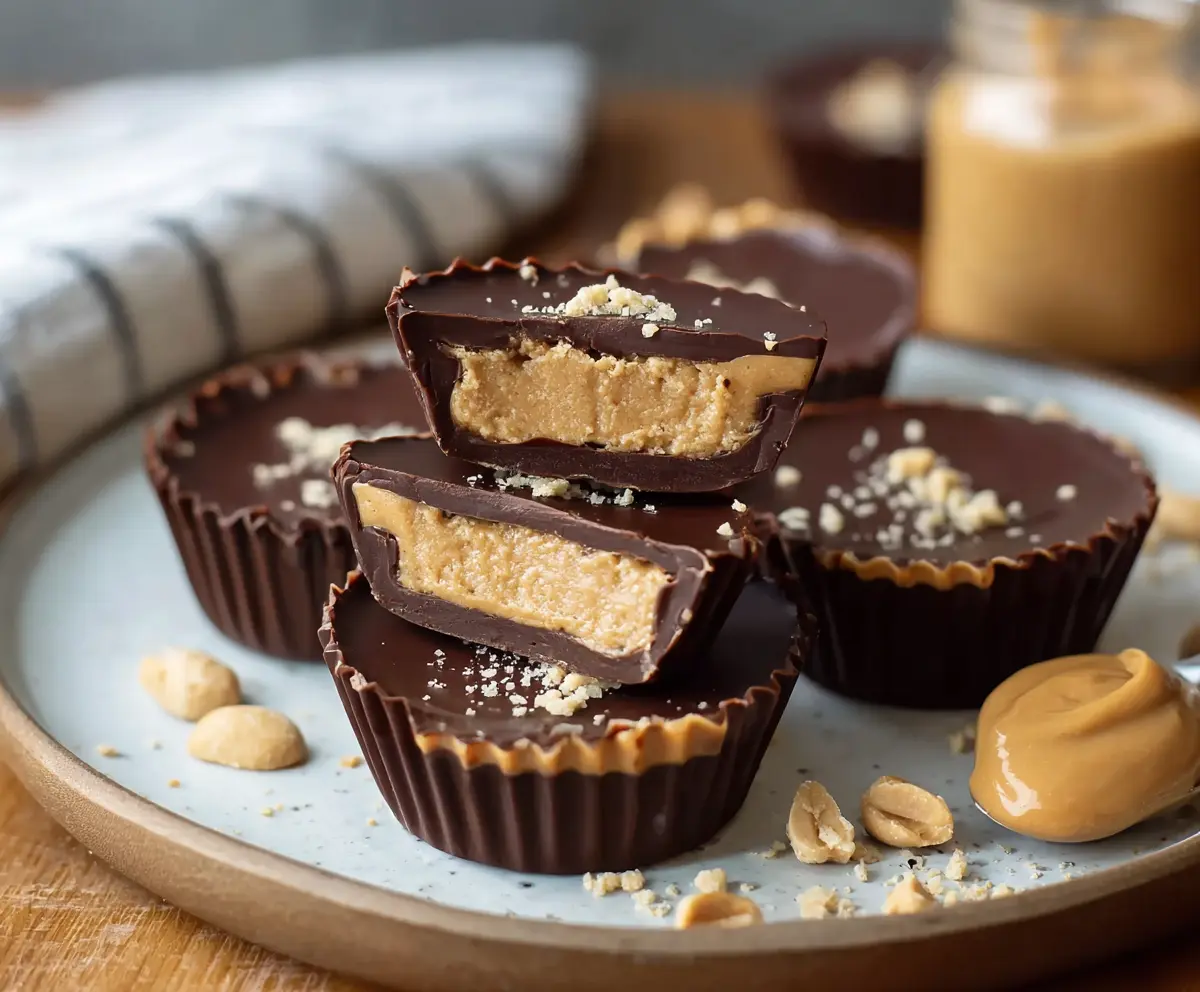
Cottage Cheese Peanut Butter Cups are a tasty twist on a classic treat! They combine creamy cottage cheese and rich peanut butter, all wrapped in chocolate for a sweet surprise.
These little cups are great for a snack or dessert. Plus, they’re easy to make! I can’t resist popping a few in my mouth while watching a movie. Who can blame me? 🍫😋
Key Ingredients & Substitutions
Cottage Cheese: Small curd works best here for a smooth filling. If you’re lactose intolerant, consider using a dairy-free alternative like silken tofu or a vegan cream cheese spread. It won’t taste the same, but it will still get you a creamy texture!
Peanut Butter: Creamy peanut butter creates that delicious texture. If you’re allergic to peanuts, almond or sunflower seed butter are great alternatives. Just note that sunflower seed butter can react with baking soda, so keep that in mind for other recipes!
Sweetener: Use honey or maple syrup depending on your preference. For a lower-calorie option, you might try stevia or agave syrup. Just adjust the amount since they can be sweeter than honey!
Chocolate: Dark chocolate chips give a rich flavor, but semi-sweet works too. If you need a dairy-free option, look for vegan chocolate chips. Just make sure to check the ingredients!
How Do I Melt Chocolate Without Burning It?
Melting chocolate is simple if done carefully. The key is to use low heat to avoid burning. Here’s how:
- Use a microwave-safe bowl. Add your chocolate chips and coconut oil if using.
- Microwave in 20-second bursts. Stir after each interval. This prevents hot spots from forming.
- Stop when the chocolate is mostly melted. Stir until smooth as the residual heat will finish melting it.
Always keep an eye on it, because burnt chocolate is not salvageable! This method ensures a perfect melt for coating and filling your cups.
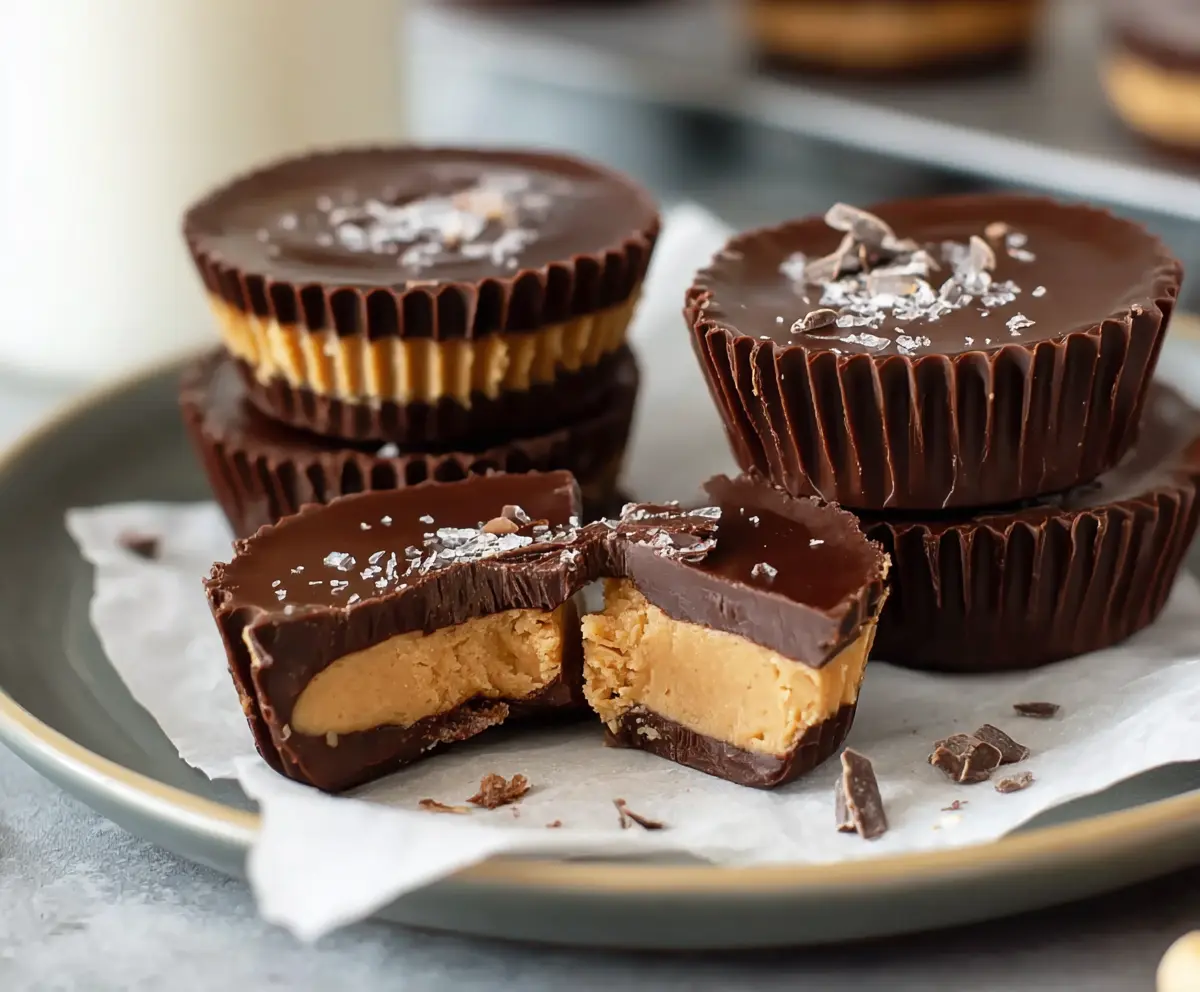
Cottage Cheese Peanut Butter Cups
Ingredients You’ll Need:
For the Filling:
- 1 cup cottage cheese (preferably small curd)
- 1/2 cup creamy peanut butter
- 2 tablespoons honey or maple syrup (adjust to taste)
- 1 teaspoon vanilla extract
For the Chocolate Coating:
- 1 1/2 cups dark or semi-sweet chocolate chips
- 1 tablespoon coconut oil (optional, for smoother chocolate)
For Garnish:
- Crushed peanuts or a pinch of salt for garnish (optional)
How Much Time Will You Need?
This recipe takes about 15 minutes to prepare, plus at least 30 minutes to chill in the freezer. In total, you’re looking at around 45-60 minutes before you can enjoy these tasty treats!
Step-by-Step Instructions:
1. Blend the Filling:
In a blender or food processor, combine the cottage cheese, creamy peanut butter, honey (or maple syrup), and vanilla extract. Blend it all together until the mixture is completely smooth and creamy. This will be your delicious filling!
2. Prepare the Pan:
Grab a mini muffin tin or some silicone cupcake liners and place them on a tray. This will make it easy to transfer them to the freezer.
3. Melt the Chocolate:
Now, you’ll need to melt the chocolate chips and coconut oil (if using) in a microwave-safe bowl. Microwave in 20-second intervals, stirring in between until it’s nice and smooth. Be careful not to burn it!
4. Coat the Cups:
Using a teaspoon, pour some melted chocolate into each muffin cup, swirling it around to coat the bottom and sides. You want a nice layer of chocolate! Then, place the tray in the freezer for about 5-10 minutes to set this layer.
5. Add the Filling:
Once the chocolate layer has set, take the tray out of the freezer. Spoon a layer of your peanut butter-cottage cheese mixture on top of the chocolate in each cup, filling them about two-thirds full. Don’t rush this part; nice and even is the way to go!
6. Top with Chocolate:
Finally, cover each filled cup with the remaining melted chocolate, ensuring that the peanut butter layer is completely sealed. You want to keep that yummy filling inside!
7. Finish and Garnish:
If you’d like, sprinkle some crushed peanuts or a pinch of salt on top of the chocolate layer for that extra crunch and flavor. It adds a nice touch!
8. Chill to Set:
Return the tray to the freezer for at least 30 minutes, or until the chocolate is fully firmed up.
9. Enjoy Your Treats:
Once set, gently remove the peanut butter cups from the liners and store them in an airtight container in the fridge or freezer. They stay deliciously fresh this way!
10. Serve and Indulge:
Serve chilled and enjoy these protein-rich, satisfying treats that are perfect for any time of day!
Enjoy your rich and creamy Cottage Cheese Peanut Butter Cups!
Can I Use Low-Fat Cottage Cheese?
Yes, low-fat cottage cheese works just fine! Just keep in mind that it might not be as creamy, but it will still provide a great texture and taste in your peanut butter cups.
How Long Do These Peanut Butter Cups Last in the Fridge?
Stored in an airtight container, these peanut butter cups will last about 5-7 days in the fridge. If you want to keep them for longer, you can freeze them for up to 3 months!
Can I Use Different Nut Butters?
Absolutely! Feel free to swap out peanut butter for almond butter, cashew butter, or even sunflower seed butter for a nut-free option. Each will bring its unique flavor to the cups!
What If I Don’t Have a Mini Muffin Tin?
If you don’t have a mini muffin tin, you can use regular muffin tins or even a silicone mold in any shape you like. Just adjust the amounts accordingly, as larger cups will require a bit more filling and chocolate.