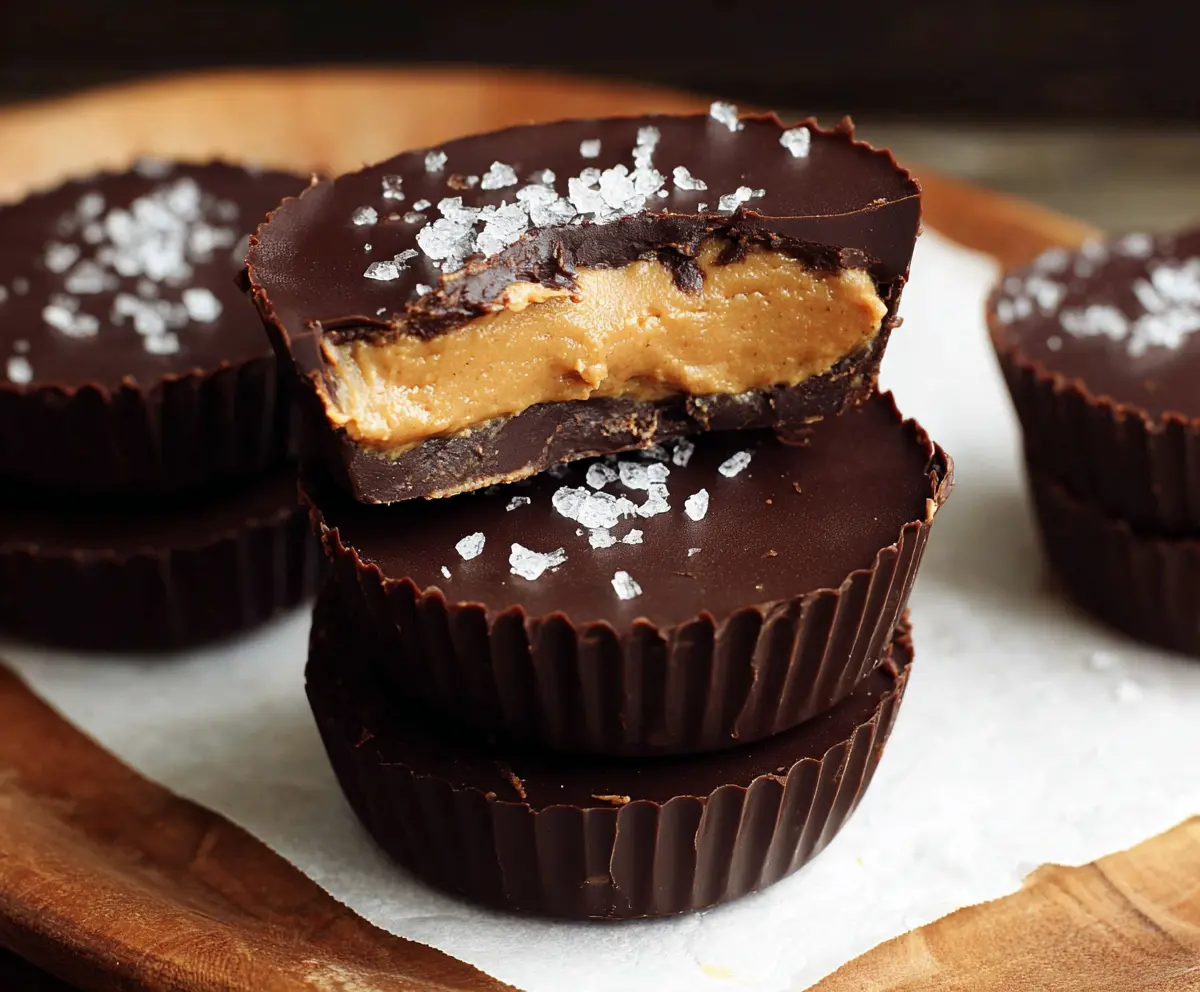
These Healthy Dark Chocolate Peanut Butter Cups are a tasty treat that won’t make you feel guilty! With creamy peanut butter filling and rich dark chocolate, they’re a match made in heaven.
Whenever I need a sweet fix, these cups are my go-to. Plus, they’re super easy to make at home. Who knew being healthy could taste so good? 😋
Key Ingredients & Substitutions
Natural Creamy Peanut Butter: Look for peanut butter that has no added sugars. You can also use almond butter or sun butter for a nut-free version. I personally love the creaminess of almond butter—it provides a nice flavor change!
Coconut Oil: This adds a nice texture and helps the chocolate set. If you’re not a fan of coconut oil, you can use unsalted butter or even a neutral oil like canola or vegetable oil for a similar effect.
Maple Syrup or Honey: Both act as natural sweeteners. If you want to keep it vegan, stick with maple syrup. Agave syrup is another option if you want something different.
Dark Chocolate Chips: Choose chocolate that’s at least 70% cocoa to keep it healthy. If you’re dairy-free, look for vegan chocolate chips. I always grab a high-quality brand for the best flavor.
How Do I Melt Chocolate Without Burning It?
Melting chocolate can be tricky! To avoid burning, I recommend using a double boiler or the microwave with caution. Here’s how to do it:
- **Double Boiler:** Fill a pot with a few inches of water and bring it to a simmer. Place a heat-proof bowl on top (make sure it doesn’t touch the water) and add your chocolate. Stir as it melts slowly.
- **Microwave:** Place chocolate chips in a microwave-safe bowl. Heat in 30-second intervals, stirring in between, until just melted. This method is faster but requires close watching to prevent burning.
Both methods ensure a smooth, glossy chocolate perfect for your cups!
Healthy Dark Chocolate Peanut Butter Cups
Ingredients You’ll Need:
- 1 cup natural creamy peanut butter (no sugar added)
- 2 tbsp coconut oil, melted (plus more for greasing)
- 2 tbsp pure maple syrup or honey
- 1 tsp vanilla extract
- 1/4 tsp sea salt (plus more for sprinkling)
- 1 1/2 cups dark chocolate chips (at least 70% cocoa)
- Optional: additional sea salt flakes for topping
How Much Time Will You Need?
This recipe takes about 15 minutes of prep time, plus 30 minutes to chill in the freezer. You’ll spend a few minutes mixing the ingredients and melting the chocolate, and then a bit of time assembling the cups. Most of the waiting time is just for freezing, but they are certainly worth it!
Step-by-Step Instructions:
1. Prepare Your Muffin Tin:
Start by lining a muffin tin with paper liners or lightly greasing silicone muffin cups with a bit of coconut oil. This ensures the cups come out easily once they’re set.
2. Mix the Peanut Butter Filling:
In a medium bowl, combine the natural creamy peanut butter, melted coconut oil, maple syrup (or honey), vanilla extract, and 1/4 teaspoon of sea salt. Stir the mixture until it’s smooth and all ingredients are well combined.
3. Melt the Dark Chocolate:
In a microwave-safe bowl or using a double boiler, melt the dark chocolate chips until they are smooth and glossy. Be careful to stir frequently while melting to prevent the chocolate from burning.
4. Create the Chocolate Base:
Spoon about 1 teaspoon of the melted chocolate into each muffin cup, spreading it around the bottom evenly. This will be the base for your cups.
5. Chill the Chocolate Base:
Pop the muffin tin into the freezer for about 5 minutes. This helps the chocolate set slightly before adding the filling.
6. Add Peanut Butter Layer:
Once the chocolate base has set, take the tin out of the freezer. Spoon about 1 tablespoon of the peanut butter mixture over each chocolate layer, spreading gently while leaving a little space at the edges.
7. Top with More Chocolate:
Next, cover each peanut butter layer with another 1-2 teaspoons of melted chocolate, ensuring that the peanut butter is completely covered.
8. Sprinkle with Sea Salt:
While the chocolate is still soft, sprinkle a few flakes of sea salt on top of each cup. This adds a deliciously salty contrast to the sweet chocolate and peanut butter.
9. Freeze Until Set:
Return the muffin tin to the freezer for about 20-30 minutes, or until the chocolate is fully set and firm to the touch.
10. Enjoy Your Treats:
Once set, remove the cups from the freezer and let them sit at room temperature for a few minutes. This makes them easier to handle when you’re ready to enjoy them!
11. Store Leftovers:
If you have any leftovers (which is unlikely!), store them in an airtight container in the refrigerator or freezer to keep the cups firm.
There you have it! These Healthy Dark Chocolate Peanut Butter Cups are sure to satisfy your sweet tooth while keeping things wholesome. The rich chocolate exterior pairs perfectly with the creamy peanut butter center, all topped with a sprinkle of sea salt for that perfect finish. Enjoy! 🎉
Can I Use Another Nut Butter?
Absolutely! If you’re not a fan of peanut butter or have allergies, feel free to substitute with almond butter, cashew butter, or sunflower seed butter for a nut-free alternative. Just ensure the consistency is similar for best results.
Can I Make These Vegan?
Yes! To make these completely vegan, use maple syrup instead of honey and opt for dark chocolate that is dairy-free. Just double-check the labels to ensure they’re vegan-friendly!
How Should I Store Leftovers?
Store any leftovers in an airtight container in the refrigerator for up to 5 days or in the freezer for up to 3 months. Just let them thaw in the fridge or at room temperature when you’re ready to enjoy them again!
What if My Chocolate Isn’t Melting Smoothly?
If your chocolate isn’t melting smoothly, it may have overheated or seized. Try adding a teaspoon of coconut oil or shortening to help create a smoother consistency. Just be sure to melt it gently and stir well!