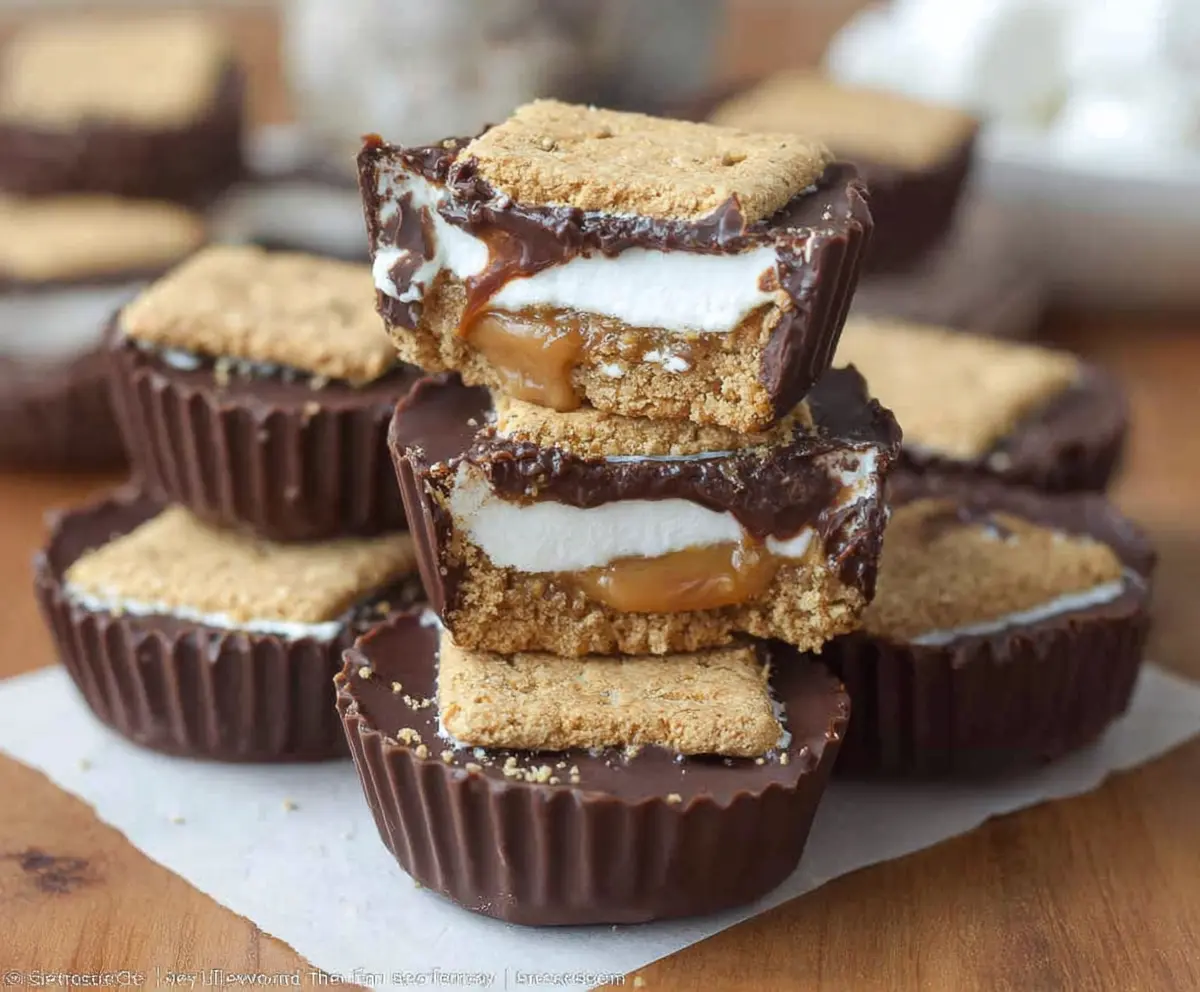
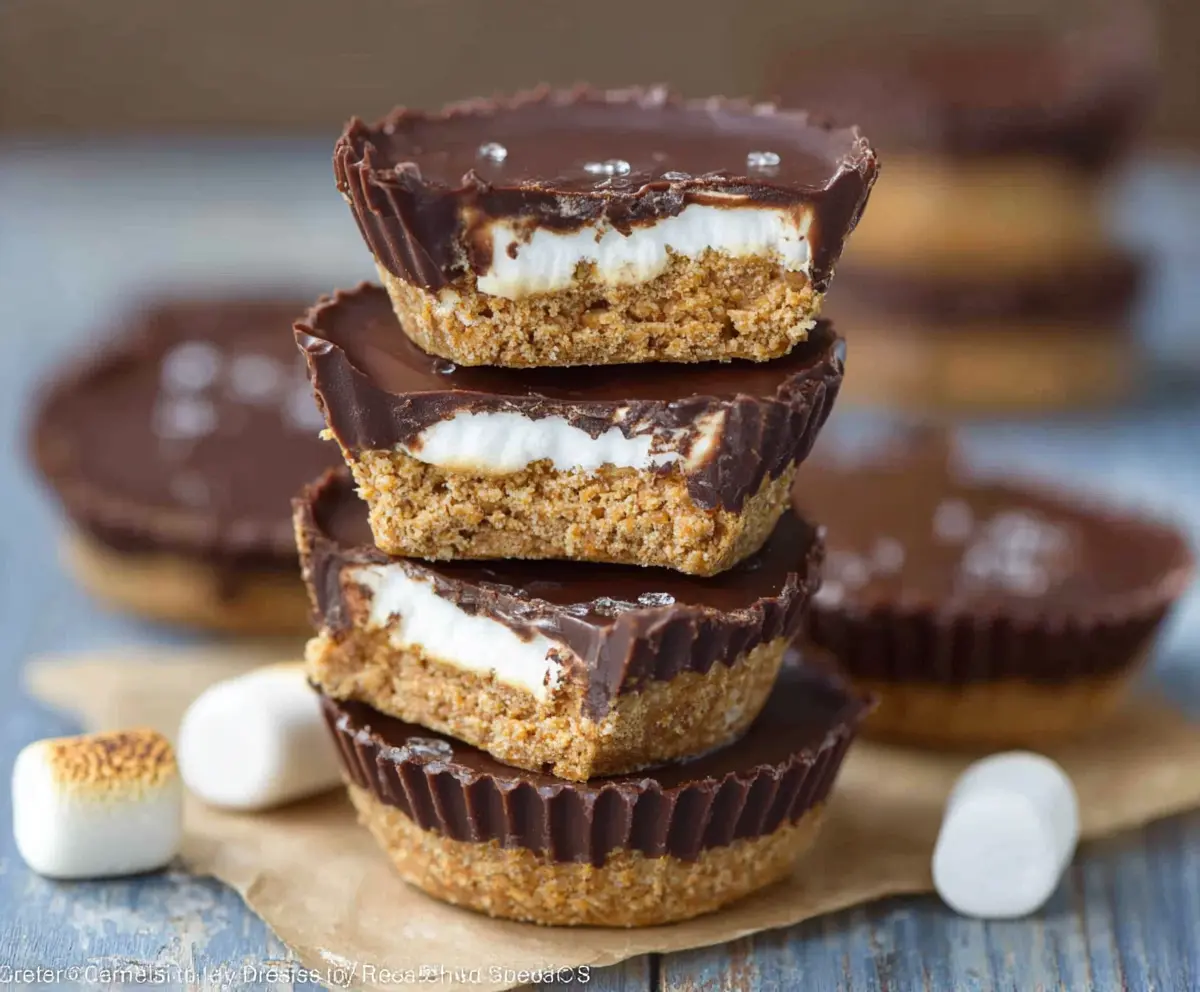
These S’mores Peanut Butter Cups are a fun twist on a classic treat! They have creamy peanut butter mixed with sweet chocolate, all wrapped with fluffy marshmallows and crunchy graham crackers.
Who knew making a s’more could be so easy? I love unwrapping these little cups—they really satisfy my sweet tooth! Perfect for sharing or just enjoying on your own!
Key Ingredients & Substitutions
Chocolate Chips: Semi-sweet or dark chocolate chips are great for this recipe, but you can use white chocolate for a different taste. Melted chocolate wafers also work well if you want a smoother finish.
Peanut Butter: Creamy peanut butter is preferred for a smooth texture, but you can use natural peanut butter too! Just note that it may be a bit more runny. If you have a nut allergy, try sun butter for a nut-free option.
Marshmallows: If you don’t have large marshmallows, marshmallow fluff is a perfect substitute! It spreads easily and gives a similar taste.
Graham Crackers: Traditional graham crackers are classic, but you can use teddy grahams or digestive biscuits for a twist. Just crush them well to mix into the peanut butter for that crunch.
What’s the Best Way to Melt Chocolate Smoothly?
Melted chocolate is essential for a smooth finish. Use a microwave-safe bowl and heat in 30-second intervals. Stir well each time; this helps prevent burning. If it’s too thick, add 1-2 tablespoons of butter or coconut oil to thin it out. Trust me, this makes handling the chocolate much easier!
- Ensure your bowl and utensils are dry; any moisture can cause the chocolate to seize.
- Consider using a double boiler for even gentler melting if you prefer. Just don’t rush it!
Taking the time to melt chocolate properly makes a huge difference in flavor and texture, ensuring your S’mores Peanut Butter Cups are a hit!
How to Make S’mores Peanut Butter Cups
Ingredients You’ll Need:
For The Base:
- 2 cups semi-sweet or dark chocolate chips (or chocolate melting wafers)
For The Filling:
- 1 cup creamy peanut butter (smooth, not chunky)
- 12 large marshmallows or 1 cup marshmallow fluff
- 12 graham cracker squares
- 6 whole graham crackers, crushed (to mix with peanut butter layer)
Optional:
- 1-2 tbsp butter or coconut oil (to thin chocolate if needed)
How Much Time Will You Need?
This delightful treat will take about 20 minutes to prepare, plus an additional 30 minutes to chill. In total, you’re looking at about 50 minutes before you can enjoy your S’mores Peanut Butter Cups! The chilling time helps the layers set perfectly, so be patient—it’s worth it!
Step-by-Step Instructions:
1. Set Up Your Muffin Tin:
First things first, grab a standard muffin tin and line it with 12 cupcake liners. This makes it super easy to remove your cups later on—and fun to eat, too!
2. Melt the Chocolate:
In a microwave-safe bowl, add 1 ½ cups of chocolate chips. Microwave them in 30-second bursts, stirring well in between until the chocolate is smooth and fully melted. If you want a silkier texture, stir in 1 tablespoon of butter or coconut oil.
3. Create the Chocolate Base:
Using a spoon, scoop about 1 tablespoon of the melted chocolate into the bottom of each cupcake liner. Spread it evenly to create a solid base. Yum!
4. Chill the Chocolate:
Pop the muffin tin in the freezer for about 10 minutes. This helps the chocolate set up nicely before adding the next layer.
5. Make the Peanut Butter Mixture:
While the chocolate is chilling, mix the creamy peanut butter with the crushed graham crackers in a bowl until it’s fully combined and holds together well. This will be the delicious filling!
6. Add the Peanut Butter Layer:
Once your chocolate base is firm, spoon about 1 tablespoon of the peanut butter mixture on top of the chocolate in each cup. Press down gently to make it flat and even.
7. Add the Marshmallow Layer:
Next, if you’re using large marshmallows, cut each in half and place a half on top of the peanut butter layer. If you opt for marshmallow fluff, just add about a teaspoon on top of each cup. Get creative!
8. Chill Again:
Place the muffin tin back into the freezer for another 5 minutes to set the marshmallow layer and help everything stick together.
9. Melt the Remaining Chocolate:
Now it’s time to melt your remaining ½ cup of chocolate chips the same way as before. Keep it nice and smooth!
10. Cover with Chocolate:
Gently spoon the melted chocolate over each cup, making sure to cover the marshmallow completely. It’s like giving your cups a cozy chocolate blanket!
11. Add a Graham Cracker Top:
Finish each cup by placing one graham cracker square on top, pressing down a little so it sticks to the melted chocolate.
12. Final Chill:
Pop the muffin tin in the fridge for at least 30 minutes. This helps everything set perfectly and makes them easier to remove.
13. Serve and Enjoy!:
Once firm, carefully remove the peanut butter cups from the liners. Enjoy your gooey, crunchy, chocolaty S’mores Peanut Butter Cups! Store any leftovers in the fridge to keep them fresh.
Happy indulging!
Can I Use Different Types of Chocolate?
Absolutely! You can use milk chocolate, dark chocolate, or even white chocolate based on your preference. Just keep in mind that the sweetness level may vary with different types.
How Do I Store Leftovers?
Store any leftover S’mores Peanut Butter Cups in an airtight container in the refrigerator for up to a week. They taste best when cooled, as the chocolate remains firm and the marshmallow is perfectly chewy!
Can I Freeze These Cups?
Yes, you can freeze them! Just place the peanut butter cups in a single layer in a freezer-safe container. They will last for up to 2 months. Thaw in the fridge for a few hours before enjoying!
What If I Don’t Have Graham Crackers?
No problem! You can use crushed cookies like vanilla wafers, digestive biscuits, or even pretzels for a salty-sweet twist. Just ensure they’re finely crushed for the best mixing with the peanut butter!