Honey balsamic chicken earns its place in the weeknight rotation because the glaze comes out glossy, tangy, and sticky enough to coat every bite without turning the chicken heavy. The Instant Pot keeps the thighs tender, but the real payoff is the sauce: it cooks down into something sweet-savory with enough sharp balsamic bite to keep it from tasting flat.
The difference here is in the layering. Searing the chicken first gives the sauce a deeper base, and deglazing with broth pulls those browned bits back into the pot instead of leaving them behind. The cornstarch slurry goes in at the end, after pressure cooking, so the glaze thickens cleanly instead of turning dull or grainy under pressure.
Below you’ll find the small details that matter most here: how to keep the sauce balanced, when to stop reducing it, and what to swap if you want to stretch the recipe without losing that lacquered finish.
The glaze thickened up beautifully after the quick release, and the chicken stayed juicy instead of shredding apart. My husband kept spooning the sauce over rice until the pan was basically wiped clean.
Save this Honey Balsamic Instant Pot Chicken for nights when you want sticky, glossy chicken thighs with a fast pressure-cooker sauce.
The Step Most People Rush: Searing Before Pressure Cooking
The sear is what keeps this chicken from tasting boiled. A few minutes per side in the Instant Pot on Sauté gives you color on the outside and leaves browned bits in the pot, which turn into the backbone of the sauce. If the chicken looks pale when it goes under pressure, the finished dish will taste flatter than it should.
Don’t crowd the pot. The thighs need direct contact with the hot surface, or they steam and release liquid instead of browning. If the pan starts smoking hard or the seasoning darkens too fast, the heat is too high for the amount of oil in the pot.
What the Balsamic, Honey, and Dijon Are Each Doing

- Balsamic vinegar — This brings the sharp, dark acidity that keeps the sauce from tasting like simple sweet chicken. A decent everyday balsamic works fine here; save the expensive stuff for finishing. If yours tastes harsh, the honey will smooth it, but don’t use a syrupy glaze because it can make the sauce too sweet once reduced.
- Honey — This gives the sauce its shine and helps it cling to the chicken after pressure cooking. It also rounds out the acidity, which matters because balsamic can turn aggressive under heat. Maple syrup can work in a pinch, but it changes the flavor and loses a little of that classic glossy finish.
- Dijon mustard — Dijon doesn’t make the dish taste mustardy; it helps the sauce emulsify and gives it a little backbone. Grainy mustard can work, but the sauce will look less smooth. Whisk it well with the balsamic and honey so it disappears into the glaze before it hits the pot.
- Chicken broth — This is mostly here to deglaze and create enough liquid for pressure cooking. Use low-sodium broth if you can, since the sauce reduces at the end and the salt concentrates. Water will work, but it leaves the sauce a little thinner and less savory.
- Cornstarch slurry — This is what turns the cooking liquid into a proper glaze after the chicken is done. Stir it in after pressure cooking, then give it a few minutes on Sauté until the sauce looks shiny and lightly coats a spoon. Add it too early and the texture gets muddy under pressure.
Building the Sauce So It Stays Glossy, Not Thin
Season and Sear the Chicken
Season the thighs with salt, pepper, and Italian seasoning before they hit the pot so the surface has flavor all the way through. Brown them for about three minutes per side until the exterior is golden and the pan shows real caramelization, not just a beige film. Pull the chicken out once it has color; if you cook it through here, it can dry out before the pressure cycle even starts.
Pull the Fond Into the Broth
Pour in the broth and scrape the bottom of the pot well. Those browned bits dissolve into the liquid and keep the burn warning away, which matters in the Instant Pot. If anything sticky is left stuck to the bottom, the pressure cooker can throw a burn notice and the sauce will taste scorched.
Pressure Cook, Then Thicken at the End
Whisk the balsamic, honey, garlic, and Dijon together, pour it over the chicken, and pressure cook on High for 10 minutes. Quick release as soon as the cycle ends so the thighs don’t keep steaming and going soft. Once the chicken is out, switch back to Sauté and stir in the cornstarch slurry; the sauce should go from thin and dark to glossy and spoonable in about 3 to 4 minutes.
Return the Chicken to the Glaze
Slip the chicken back into the pot and spoon the sauce over the top until every piece is coated. Let it sit for a minute in the hot glaze so the sauce clings instead of sliding off. Fresh thyme on top is more than decoration here; it adds a clean herbal note that cuts through the sweet balsamic finish.
How to Adapt It When You Need a Different Version
Make It Dairy-Free and Gluten-Free Without Losing the Texture
This recipe is naturally dairy-free and gluten-free as written, which makes it an easy fit for both diets. Just check your broth and Dijon label if you need strict gluten-free cooking, since some brands include additives you wouldn’t expect. The sauce still thickens the same way with cornstarch, so you don’t lose that glossy finish.
Use Chicken Breasts, But Change the Timing
Chicken breasts can work, but they need less pressure time or they turn stringy. Start with 7 to 8 minutes on High, then quick release right away. The sauce will still be the same, but thighs give you a richer result and forgive overcooking better.
Swap in Maple Syrup for a Different Sweetness
Maple syrup can replace the honey in a 1:1 swap, and the sauce will still reduce nicely. The finished flavor leans darker and less floral, with a more woodsy sweetness. It works well if you want the balsamic to stay a little more assertive.
Stretch It Into a Saucy Meal for Rice or Potatoes
Add an extra 1/4 cup broth if you want more sauce for spooning over rice, mashed potatoes, or polenta. The tradeoff is a slightly longer simmer at the end while the glaze tightens back up. This is the version I make when I want leftovers to feel like a full dinner instead of just chicken.
Storage and Reheating
- Refrigerator: Store in an airtight container for up to 4 days. The sauce will thicken more as it chills.
- Freezer: It freezes well for up to 2 months, though the glaze may look a little looser after thawing. Freeze with plenty of sauce so the chicken stays moist.
- Reheating: Warm gently on the stove or in the microwave at medium power with a splash of broth if needed. High heat can tighten the chicken and make the sauce separate.
Answers to the Questions Worth Asking
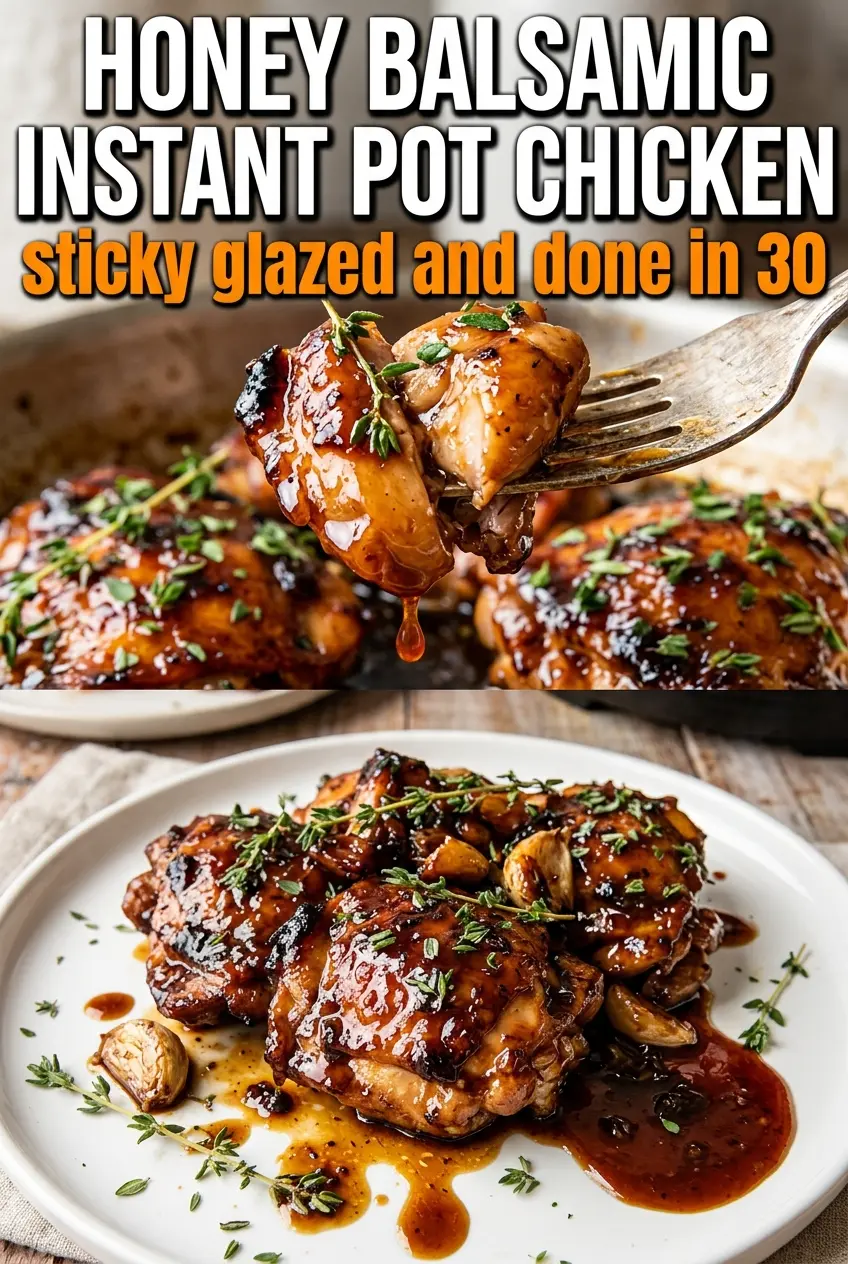
Honey Balsamic Instant Pot Chicken
Ingredients
Equipment
Method
- Season the chicken thighs with salt, black pepper, and Italian seasoning.
- Set the Instant Pot to Sauté and heat the olive oil; sear the chicken for 3 minutes per side until golden, then remove to a plate.
- Pour in the chicken broth and scrape up any browned bits from the bottom of the pot.
- Whisk balsamic vinegar, honey, minced garlic, and Dijon mustard, then pour the mixture over the chicken.
- Return the chicken to the Instant Pot, seal the lid, and pressure cook on High for 10 minutes.
- Use a quick release to remove the chicken and stop the cooking.
- Switch back to Sauté and stir the cornstarch mixed with water into the sauce, cooking 3-4 minutes until thickened.
- Return the chicken to the sauce, spoon it over the top, and garnish with fresh thyme.


