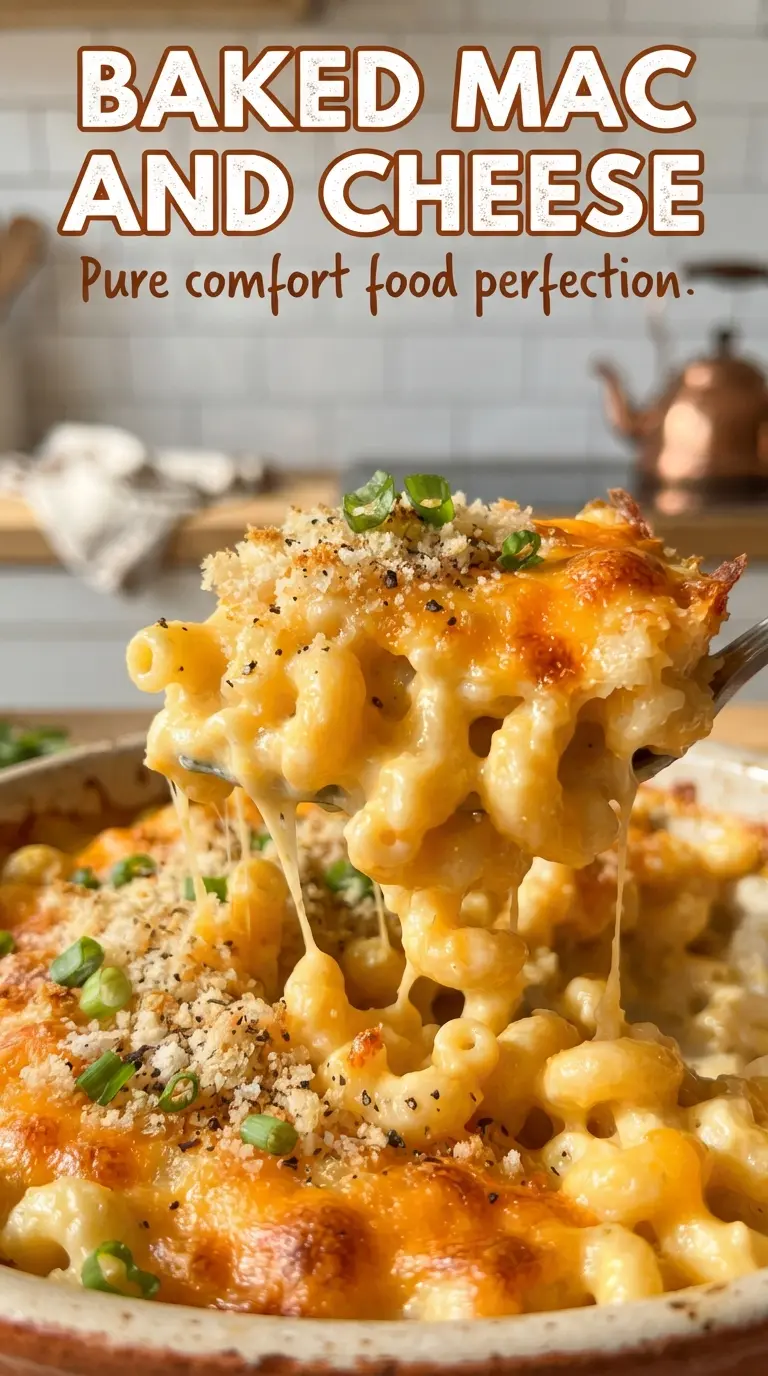
Baked mac and cheese earns its place on the table when it comes out with a creamy center, a browned cheese crust, and noodles that still have some bite under all that sauce. The best versions don’t feel heavy or gluey; they taste like sharp cheddar, a little nuttiness from Gruyere, and just enough seasoning to keep every bite interesting.
The trick is building a sauce that stays smooth after baking. That starts with a proper roux, then slow whisking so the milk thickens without lumps. Evaporated milk gives the sauce extra body and helps it stay silky, while dry mustard and smoked paprika add depth without making the dish taste spicy. Cooking the pasta just shy of done matters too, since it keeps the noodles from turning soft once they spend time in the oven.
Below you’ll find the small details that make this one reliable: how thick the sauce should look before the cheese goes in, why the topping cheese needs to be divided, and how to keep the finished dish creamy after it comes out of the oven.
The sauce came out velvety and held onto the noodles after baking, and that browned top gave it the perfect little crunch. I used the Gruyere like suggested and the flavor was way better than the usual version I make.
Save this baked mac and cheese for the nights when you want a creamy center, a crisp browned top, and no grainy sauce.
The Reason the Sauce Stays Creamy After Baking
Baked mac and cheese usually goes wrong in one of two places: the sauce turns grainy, or the pasta keeps drinking it up until the dish dries out in the oven. This version avoids both problems by thickening the milk before the cheese goes in, then stopping the pasta short of fully cooked. That way the sauce coats every noodle instead of sliding off, and the noodles finish cooking in the oven without going soft.
The other detail that matters is heat control. Cheese melts smoothly in a hot sauce only when the sauce is off the boil and not roaring on the burner. If the mixture is bubbling hard when the cheese goes in, the fat can separate and the texture turns oily. Slow, steady heat gives you a sauce that looks glossy and thick before it ever hits the baking dish.
What the Cheese Blend Is Doing Here
- Sharp cheddar — This brings the familiar mac and cheese flavor and enough saltiness to keep the sauce from tasting flat. Pre-shredded cheddar works in a pinch, but block cheese melts smoother because it doesn’t carry the anti-caking starch that can make a sauce slightly sandy.
- Gruyere or Colby Jack — Gruyere adds a nutty, grown-up edge and melts into a silky sauce. Colby Jack is the easier swap if that’s what you have; it gives you a softer, milder finish and still melts cleanly.
- Evaporated milk — This is what keeps the sauce rich without making it overly heavy. You can use all whole milk if needed, but the finished dish won’t have quite the same body or that plush, baked texture.
- Dry mustard and smoked paprika — Neither one should stand out on its own. They sharpen the cheese flavor and keep the sauce tasting layered instead of one-note.
- Macaroni — Elbows are classic because they trap sauce in the curves and hold up well in baking. Any short pasta with ridges or hollows can work, but avoid delicate shapes that collapse under the cheese sauce.
Building the Sauce, Folding the Pasta, and Baking It Just Long Enough
Cooking the Pasta Short
Boil the macaroni for about 2 minutes less than the package says, then drain it right away. It should still have a firm center, because the oven will finish the job. If you cook it all the way on the stove, the noodles can turn mushy by the time the top browns.
Making the Roux
Melt the butter, whisk in the flour, and cook it for about a minute until it smells a little nutty and looks smooth, not sandy. That brief cooking time removes the raw flour taste without darkening the base. If the roux looks lumpy, keep whisking before any liquid goes in; lumps are much easier to fix here than later.
Thickening the Milk
Add the whole milk and evaporated milk slowly while whisking constantly. The sauce will look thin at first, then start to coat the whisk and bubble lazily after 5 to 6 minutes. Pull it off the heat when it resembles loose gravy; if it gets too thick before the cheese goes in, the finished mac can turn pasty.
Melting in the Cheese
Stir in the cheddar and Gruyere a handful at a time until everything melts into a smooth sauce, then fold in the pasta. The sauce should look glossy and cling to every piece without pooling at the bottom. If it starts to look stringy or broken, the pan was too hot; take it off the burner and stir until it comes back together.
Getting the Crust Right
Pour the mixture into the buttered baking dish and top it with the remaining cheese. Bake until the edges are bubbling and the top is spotted gold, then let it rest for 10 minutes before serving. That rest matters because the sauce sets slightly as it cools, which keeps the first scoop from running all over the plate.
How to Adapt This for a Different Table
Make It Gluten-Free Without Losing the Creamy Texture
Swap the all-purpose flour for a 1:1 gluten-free flour blend that includes starches. The sauce will still thicken the same way if you whisk it well and give it a full minute in the butter before adding liquid. Use gluten-free pasta that holds its shape after boiling; some brands soften fast, so stop cooking while it’s still firm.
Use Colby Jack for a Milder, Kid-Friendly Pan
Replace the Gruyere with all Colby Jack if you want a softer, less sharp flavor. The sauce will still melt beautifully, but you’ll lose some of the nutty depth that Gruyere adds. This is the version to make when you want a classic, mellow baked mac that leans creamy instead of bold.
Add a Crispy Top When You Want Extra Crunch
Mix the reserved topping cheese with a handful of buttered breadcrumbs before baking. That gives you a sharper contrast between the creamy interior and the crust, and the crumbs brown faster than cheese alone. Keep an eye on it in the last 10 minutes so the topping doesn’t go from golden to bitter.
Make It Ahead for a Crowd
Assemble the dish up to the point of baking, then cover and refrigerate it for a few hours. If it goes into the oven cold, add a little extra time so the center heats through before the top browns. Don’t bake it until the sauce is already scorching hot or the edges will dry out before the middle is ready.
Storage and Reheating
- Refrigerator: Store covered for up to 4 days. The sauce will firm up as it chills, which is normal.
- Freezer: It freezes, but the texture is best if you freeze it before baking. Wrap tightly and thaw overnight in the fridge before baking as directed.
- Reheating: Warm covered in the oven at 325F with a splash of milk stirred in if needed. The common mistake is reheating uncovered, which dries out the pasta and hardens the cheese on top before the center heats through.
Answers to the Questions Worth Asking

Baked Mac and Cheese
Ingredients
Equipment
Method
- Preheat oven to 350F, then butter a 9x13-inch baking dish for easy release. Visual cue: the dish looks lightly coated, not streaky.
- Cook elbow macaroni 2 minutes less than package directions, then drain well. Visual cue: pasta is still firm and won’t feel fully soft.
- Melt butter, whisk in all-purpose flour, and cook for 1 minute until smooth. Visual cue: the roux looks glossy and slightly thickened.
- Slowly whisk in whole milk and evaporated milk until fully combined. Visual cue: the mixture turns creamy with no visible flour lumps.
- Simmer for 5-6 minutes until thickened, then season with salt, black pepper, dry mustard, and smoked paprika. Visual cue: sauce clings to the whisk and coats the back of a spoon.
- Stir in 3 cups shredded sharp cheddar and 1 1/2 cups Gruyere or Colby jack until melted, then fold in the pasta. Visual cue: every noodle is coated in an even, stretchy cheese sauce.
- Pour into the buttered dish and top with the remaining cheese. Visual cue: the surface is covered with a thick, even layer of cheese.
- Bake 25-30 minutes at 350F until bubbly and golden, with browned cheese at the edges. Visual cue: sauce actively bubbles around the perimeter.
- Rest 10 minutes before serving so the casserole sets. Visual cue: the center looks slightly firmer and less loose when you spoon it.