Crispy bacon, cool cream cheese, and a sharp dill pickle bite make this appetizer disappear fast. The contrast is the whole point: salty, smoky bacon on the outside, a creamy center that melts just enough, and that briny crunch underneath. When the bacon gets properly rendered, each piece eats like a little snack with a big payoff.
The trick is drying the pickles well before you stuff them. Extra moisture turns the bacon leathery and makes the filling slide around instead of staying tucked in the spear. Softened cream cheese spreads cleanly into the slit, and wrapping the bacon with a little overlap helps it tighten as it cooks instead of unraveling on the grill.
Below, I’m walking through the part that matters most: keeping the bacon crisp while the pickle stays intact. I’ve also included the swaps that work best if you want to change the filling or cook these another way.
I dried the pickles well like you said and the bacon actually crisped up instead of steaming. The cream cheese stayed put, and they vanished before the burgers even came off the grill.
Bacon Wrapped Pickles With Cream Cheese are the salty-crispy appetizer to save for game day and cookouts.
The Trick to Crisp Bacon on a Moist Pickle
This appetizer lives or dies by moisture control. Pickles hold onto brine, and that brine fights the bacon the whole way through cooking. If you wrap a damp spear, the bacon starts to steam before it crisps, and the filling can leak out before the outside has a chance to set.
Dry the pickles thoroughly, then let the cream cheese warm up just enough to spread without tearing the spear. Medium heat matters here too. Too hot, and the bacon browns before the fat renders; too low, and you end up waiting forever while the pickle gives off even more moisture.
What the Ingredients Are Doing Here
- Dill pickle spears — Use firm spears, not soft sandwich chips. Spears give you enough structure to slit, stuff, and wrap without collapsing, and their sharp brine cuts through the richness of the bacon and cream cheese.
- Cream cheese — This is the filling that holds the whole bite together. Full-fat cream cheese stays plush and stable; lower-fat versions can loosen more quickly and turn a little watery once heated.
- Bacon — Standard sliced bacon wraps more cleanly than thick-cut here because it renders fast enough to crisp in the same window that the pickle warms through. If your bacon is extra long, overlap the ends slightly so it stays put.
- Toothpicks — These aren’t optional if you want neat pieces. They keep the bacon seam closed while the fat renders, then pull out easily before serving.
Wrapping and Grilling Without Losing the Filling
Cutting the Slit
Slice a lengthwise slit down each pickle spear, stopping before the bottom so the spear stays intact like a little pocket. If you cut all the way through, the filling has nowhere to stay and the pickle will twist open when you wrap it.
Stuffing the Cream Cheese
Use softened cream cheese and press it into the slit with a small spoon or butter knife. You want the filling level with the surface, not piled high, or it will squeeze out the moment the bacon tightens around it.
Wrapping and Securing the Bacon
Wrap each spear snugly with a slice of bacon, then pin the seam with toothpicks. The bacon should overlap just enough to hold itself closed, but not so tightly that it tears through as it cooks. If the strip keeps slipping, dry the pickle again and start over; the surface has to be tacky enough for the bacon to grip.
Grilling to Crisp
Cook over medium heat for 15 to 20 minutes, turning often so the bacon browns evenly on all sides. You’re looking for deep color, crisp edges, and bacon that pulls away cleanly from the grill grates. If the bacon starts to blacken before it firms up, move the pieces to a cooler spot on the grill and let the fat finish rendering slower.
Three Ways to Change These Without Losing the Point
Jalapeño Cream Cheese Filling
Stir chopped pickled jalapeños or a pinch of cayenne into the cream cheese before stuffing. You keep the same creamy center, but the heat cuts through the bacon and pickle even harder. Drain the jalapeños first so you don’t loosen the filling.
Oven-Baked Version
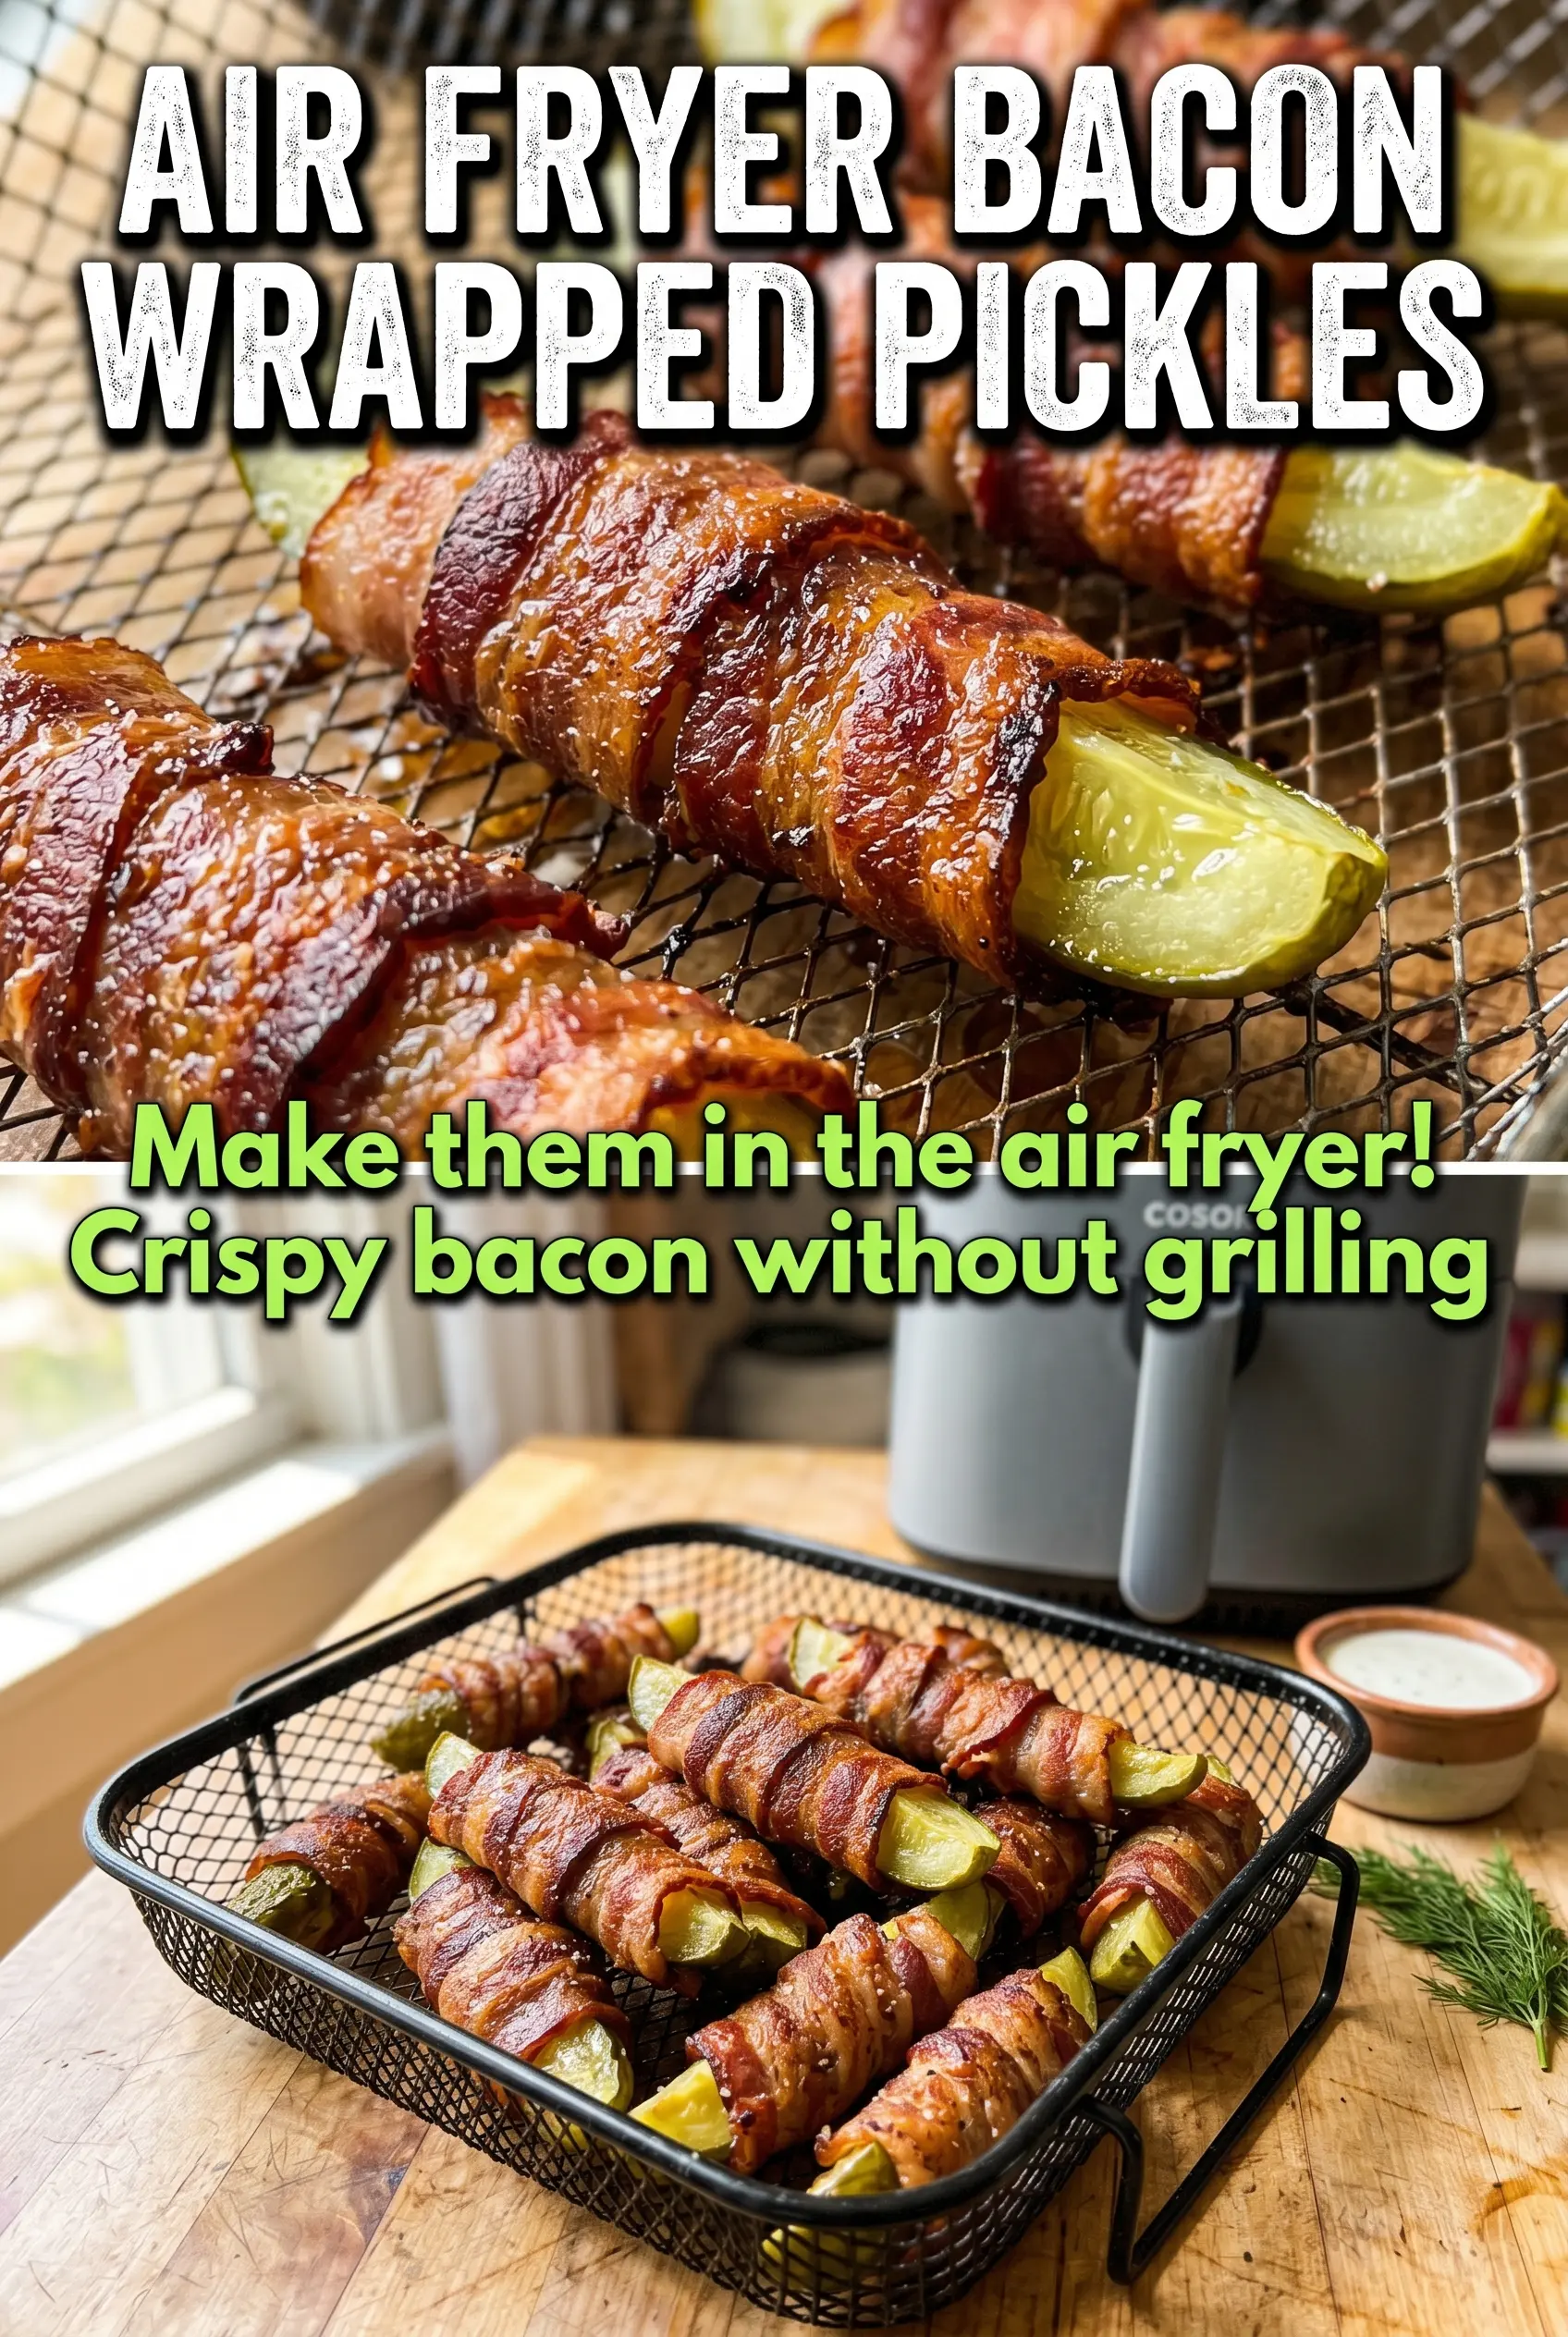
Bake at 400°F on a rack set over a sheet pan until the bacon is crisp, turning once if needed. The result is a little less smoky than grilled, but the rack helps render the fat so the bottoms don’t sit in grease. This is the better move when you’re cooking a big batch for a crowd.
Dairy-Free Option
Use a firm dairy-free cream cheese style spread that chills up well before stuffing. Some alternatives soften faster than regular cream cheese, so keep the filling low in the slit and handle the spears gently. The flavor stays rich, though the center may be a touch softer after grilling.
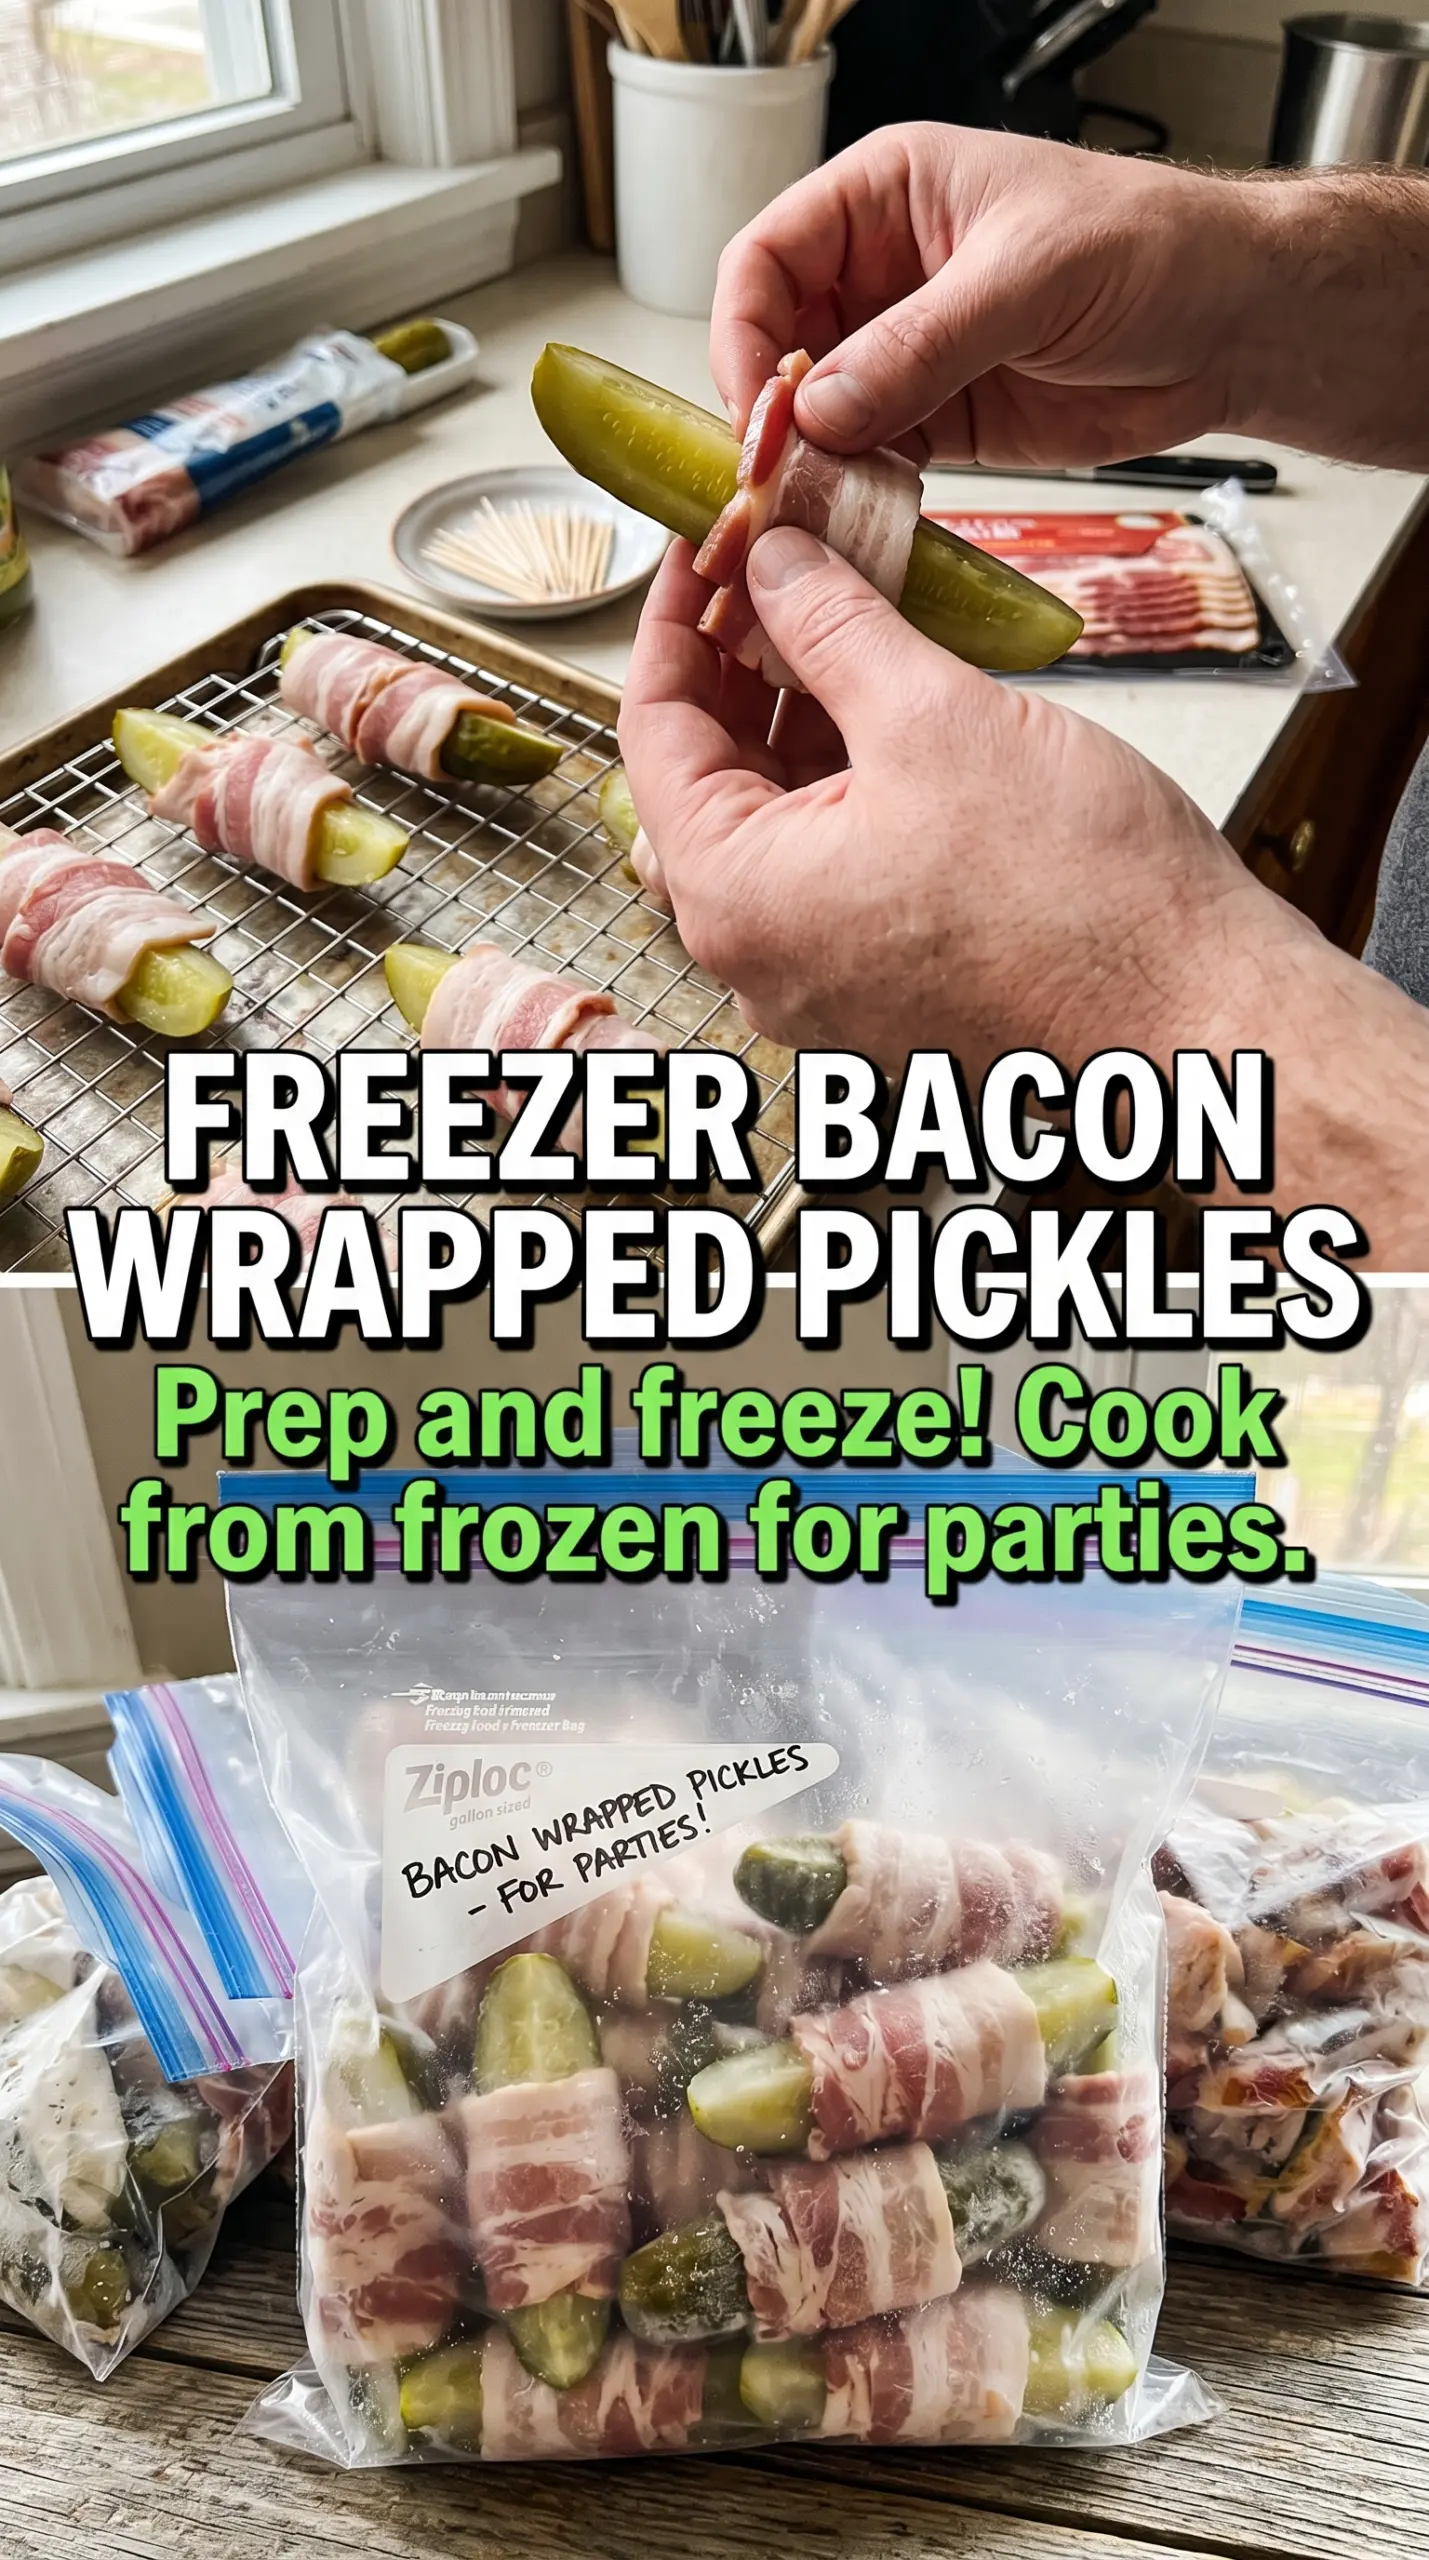
Make-Ahead Prep for Parties
Stuff and wrap the pickles a few hours ahead, then refrigerate them until grill time. They hold well, but don’t leave them overnight because the pickle keeps releasing moisture and the bacon loses its grip. Pull them out while you preheat the grill so they cook more evenly.
Storage and Reheating
- Refrigerator: Store leftovers in an airtight container for up to 3 days. The bacon will soften a bit, but the flavor holds up.
- Freezer: Not a great freezer recipe. The pickle turns watery when thawed and the cream cheese texture changes enough that the bite loses its appeal.
- Reheating: Reheat on a rack in a 375°F oven or air fryer until the bacon crisps back up. The microwave makes the bacon rubbery and pushes more moisture out of the pickle, which is exactly what you don’t want.
Answers to the Questions Worth Asking
Bacon Wrapped Pickles Stuffed With Cream Cheese
Ingredients
Equipment
Method
- Cut a slit lengthwise in each dill pickle spear without cutting all the way through, leaving the spear intact like a pocket.
- Stuff each slit with softened cream cheese, pressing gently so the filling is visible at the opening when filled.
- Wrap each cream-cheese-stuffed pickle with a slice of bacon and secure with toothpicks so the bacon overlaps slightly and stays in place.
- Grill over medium heat for 15-20 minutes, turning frequently, until the bacon is crispy and the edges look browned.
- Remove the toothpicks before serving.