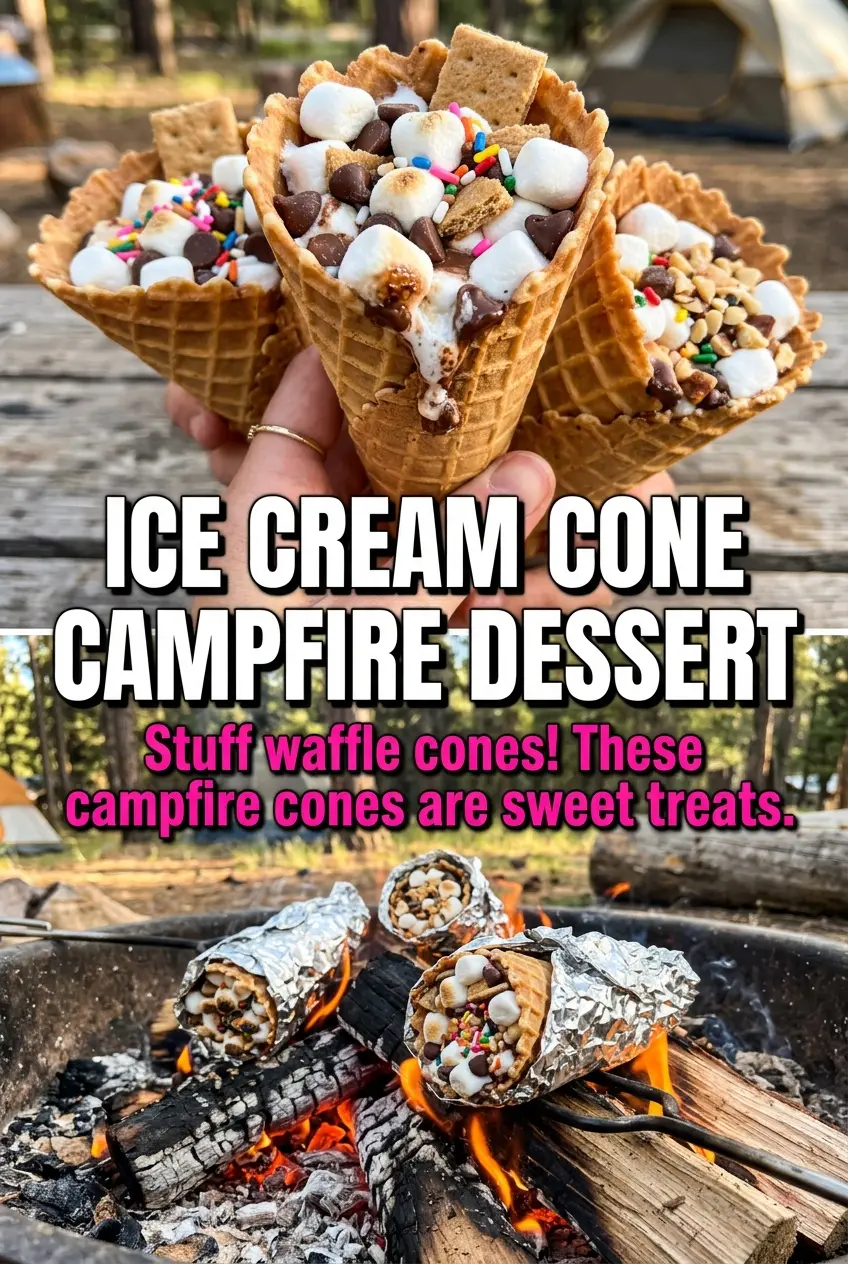
Campfire cones hit that sweet spot between playful and genuinely satisfying: warm, gooey marshmallows, melted chocolate, soft fruit, and a waffle cone that still holds its shape long enough to eat without a mess. The first bite tastes like a s’more that got upgraded with a little fruit, a little crunch, and a lot less fuss.
What makes this version work is the layering. The chocolate and marshmallows melt into the fruit instead of just sitting on top, and the graham cracker pieces keep the filling from turning one-note. Wrapping the cone tightly in foil matters more than people think; that sealed little packet traps enough heat to soften everything evenly without burning the cone before the center is ready.
Below, I’ve added the small details that keep the filling from leaking and the cone from collapsing, plus a few easy ways to change the fruit or make these work when you’re cooking for kids, a crowd, or a campfire night that needs dessert fast.
The marshmallows melted into the chocolate exactly right, and the cone stayed crisp enough to hold together after the 5 minutes on the fire. My kids loved scooping out the warm filling with a spoon.
Save these campfire cones for an easy s’mores-style dessert with melted chocolate, fruit, and a spoonable center.
The reason campfire cones don’t turn soggy if you pack them right
The biggest mistake with campfire cones is overstuffing the cone with juicy fruit and then hoping the foil will save it. It won’t. The waffle cone needs a mix of melting ingredients and a little structure, which is why the chocolate chips and marshmallows belong in the same cone with the fruit rather than all the fruit on the bottom.
Bananas help here because they soften into the filling and taste almost custard-like after heating. Strawberries add brightness, but dice them small so they warm through quickly without flooding the cone. The graham cracker pieces are not just garnish; they soak up some of the melted filling and keep every bite from turning slippery.
- Waffle cones — Use sturdy waffle cones, not sugar cones. Sugar cones crack faster over heat and don’t give you enough room for the filling.
- Mini marshmallows — Mini marshmallows melt faster and more evenly than large ones. If all you have are big marshmallows, chop them so they don’t stay stiff in the center.
- Chocolate chips — Semi-sweet chips hold their shape just long enough to create pockets of melted chocolate. Milk chocolate works too, but it runs sweeter, so I like it paired with tart strawberries.
- Fruit — Bananas are the safest choice for texture, while strawberries add a fresher finish. Keep the pieces small so they heat through before the cone gets too dark.
What each layer is doing once the foil hits the heat

- Waffle ice cream cones — The cone is the container and the final texture all at once. If they’re stale, that’s fine; they actually hold up a little better once heated.
- Mini marshmallows — They create the gooey base that helps everything cling together. They melt down faster than the chocolate, so they help spread the heat through the filling.
- Chocolate chips — Chips give you those pockets of melted chocolate instead of one flat, overly sweet layer. Use good chips if you can; cheap ones can seize into a waxier texture.
- Banana slices and strawberries — The fruit should be ripe but not mushy. Overripe bananas turn the center pasty, and watery strawberries can make the cone soft.
- Graham cracker pieces — These add the s’mores note and a little crunch, especially if you tuck some near the top where they won’t get buried under all the melted filling.
How to fill, wrap, and heat them without losing the cone
Building the layers
Start with a small layer of marshmallows and chocolate at the bottom of each cone so the heat can begin melting from the center outward. Add a few banana slices and strawberries, then repeat the layers until the cone is full but not packed hard. If you press the filling down too tightly, the cone can split when the chocolate expands and the fruit softens.
Wrapping for even heat
Wrap each cone completely in aluminum foil, sealing the top so steam and heat stay trapped inside. A loose wrap gives you dry patches and uneven melting. The foil should be snug enough to protect the cone from direct flame, but not so tight that it crushes the waffle shape.
Heating over the fire
Place the wrapped cones on a campfire grate over medium heat and rotate them every minute or so. You’re listening for the filling to soften, not scorch, and the outside should feel hot but not brittle. If your fire is running hot and fast, pull the cones to the cooler edge of the grate; high heat burns the cone before the center has a chance to melt.
The cooling pause
Let the cones rest for 2 minutes before unwrapping. That short pause keeps the molten filling from pouring out the second you open the foil. When you unwrap, do it slowly and point the steam away from your hand. A spoon is the right tool here because the filling is soft enough to scoop, not grab.
How to change campfire cones without losing the gooey center
Dairy-free version
Use dairy-free chocolate chips and keep the marshmallows plant-based if that’s important for your group. The texture stays close to the original, but the flavor is a touch less creamy, so the banana helps carry more of the richness.
Strawberry-only filling
If you want a brighter, fruit-forward cone, skip the banana and use extra diced strawberries with the chocolate and marshmallows. The result is a little juicier, so keep the fruit pieces small and don’t overfill the cone.
Extra-crunch s’mores style
Add a few more graham cracker pieces on top before wrapping. You’ll get a more pronounced cookie-like crunch, especially near the opening of the cone, but the filling will be slightly less soft and spoonable.
Make-ahead for camping
You can assemble the filled cones a few hours ahead, wrap them tightly, and keep them chilled in a cooler until you’re ready to cook. Don’t fill them the day before, because the fruit releases moisture and the cone starts softening before it ever reaches the fire.
Storage and Reheating
- Refrigerator: Best eaten right away, but leftovers can be chilled for up to 1 day. The cone softens fast and the fruit gets juicier.
- Freezer: I don’t recommend freezing these. The fruit turns watery when thawed and the cone loses its texture completely.
- Reheating: Warm leftovers in foil over low campfire heat or in a 300°F oven just until the filling loosens again. Don’t blast them with high heat or the cone will scorch before the chocolate melts.
Answers to the questions worth asking about campfire cones
Campfire Cones
Ingredients
Equipment
Method
- Fill each waffle ice cream cone with layers of mini marshmallows, chocolate chips, banana slices, strawberries, and graham cracker pieces.
- Wrap each filled cone completely in aluminum foil so the filling stays contained while it heats.
- Place the wrapped cones on a campfire grate over medium heat for 4-5 minutes, rotating occasionally until the filling looks melted.
- Remove the cones from the fire and let cool for 2 minutes so the melted filling thickens slightly.
- Carefully unwrap the foil and serve immediately with a spoon.