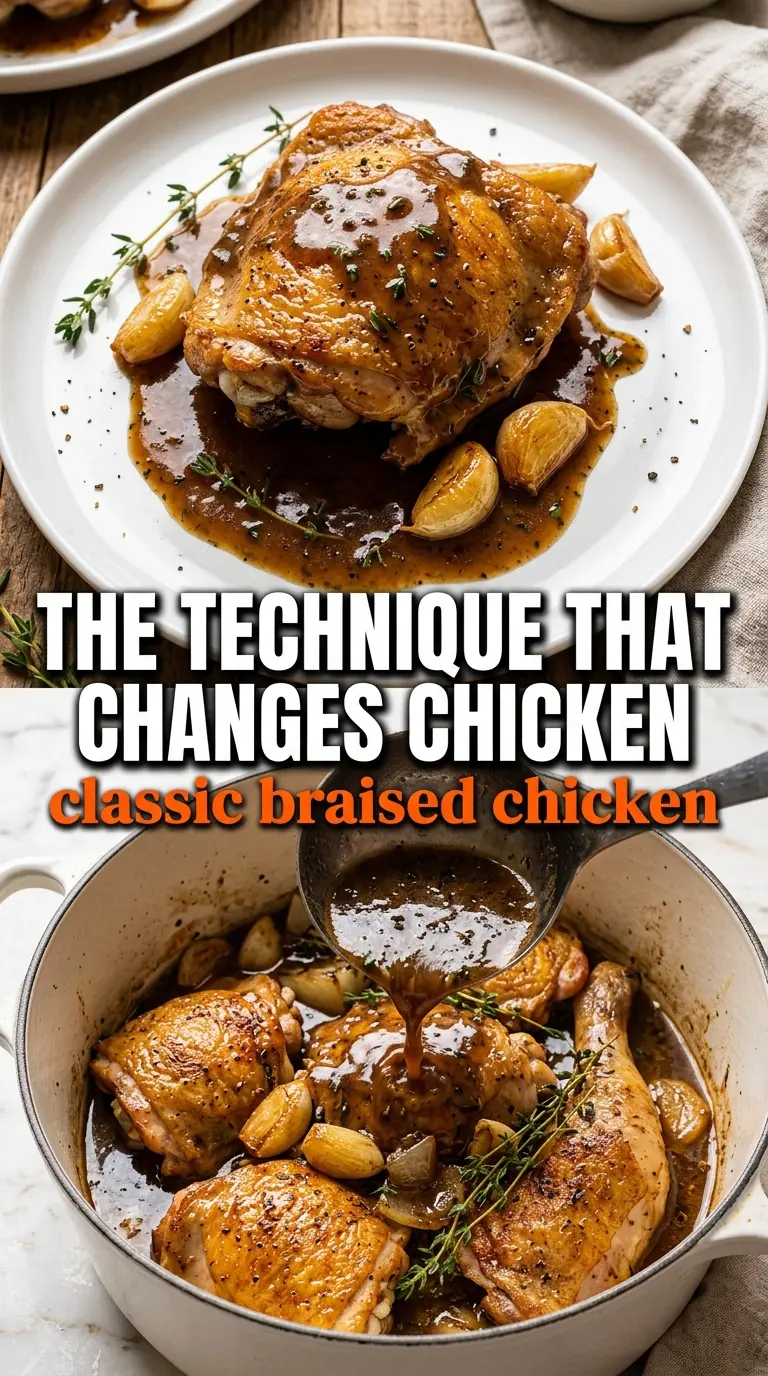
Deeply golden braised chicken thighs turn out with crisp-edged skin, tender meat, and a glossy pan sauce that tastes like it took all day. The chicken holds onto its shape while the vegetables soften into the broth, and the whole pot ends up looking and smelling like the kind of dinner people remember. It’s the sort of meal that feels sturdy and comforting without being heavy or fussy.
What makes this version work is the order. The chicken gets a hard sear first, which builds flavor and gives the skin a head start before the oven takes over. Tomato paste cooks in the pot long enough to lose its raw edge, then white wine loosens the browned bits from the bottom so they end up in the sauce instead of stuck to the pan. The broth doesn’t need to cover the chicken; it only needs to come partway up the sides so the skin stays above the liquid and doesn’t turn soft.
Below you’ll find the small details that make a braise taste deliberate instead of flat, plus a few swaps that still keep the chicken tender and the sauce rich.
The skin stayed golden even after braising, and the sauce thickened up into something I wanted to spoon over everything on the table.
Save this braised chicken for nights when you want a rich, oven-finished dinner with glossy sauce and almost no hands-on time.
The Secret to Keeping the Skin from Going Soft in the Braise
The biggest mistake with braised chicken is putting it into too much liquid. If the thighs are swimming, the skin steams and loses the deep golden texture you worked for in the skillet. The broth should come only partway up the sides of the chicken, leaving the top exposed so the oven heat can keep the skin intact while the meat turns tender underneath.
Another thing that matters here is the sear. You want the skin to be deeply browned before it ever sees the oven, because braising finishes tenderness, not color. If the pan looks crowded, work in batches. Steam is the enemy of crisp skin, and crowding the pot is how you get pale chicken and a thin sauce.
- Chicken thighs — Bone-in, skin-on thighs hold up best in the oven and bring enough fat to keep the braise rich. Boneless thighs work in a pinch, but they cook faster and won’t give you the same deep sauce or texture.
- Dry white wine — This is doing more than adding flavor. It lifts the browned bits from the pan and gives the sauce a little brightness so the final dish doesn’t taste heavy. Use something dry and plain; there’s no need to open an expensive bottle.
- Tomato paste — Cooking it for a minute or two before the liquid goes in removes the tinny raw taste and gives the sauce body. If you skip that step, the braise can taste sharp instead of rounded.
- Fresh herbs — Thyme, rosemary, and bay leaf bring the savory backbone. Dried herbs work, but use less and expect a flatter aroma. Fresh parsley at the end matters too; it wakes the whole pot up after the long braise.
- Butter — Swirled in at the end, it gives the sauce a silky finish. Don’t add it early, or it can separate during the long bake.
What Each Ingredient Is Actually Doing in This Chicken Dish
- Chicken (pat dry for browning) — Room temperature cooks more evenly. Even pieces ensure uniform doneness.
- Oil or butter (the browning medium) — High-heat oil essential for proper searing. Creates pan flavor.
- Seasonings (salt, pepper, spices) — Apply generously. Chicken carries the entire flavor profile.
- Aromatics (garlic, ginger, herbs) — Cook with fat to bloom flavors. Become the foundation.
- Sauce or braising liquid (if using) — This keeps chicken moist. Balance richness with acid.
- Vegetables (if using) — Layer by cooking time so everything finishes together.
- Acid (vinegar, wine, lime, or pineapple) — This brightens and prevents one-dimensional flavor.
- Proper doneness (165°F internal temperature) — Use thermometer for accuracy. Overcooked is dry.
Building the Braise So the Sauce Turns Rich, Not Watery
Getting the chicken skin truly golden
Season the chicken generously before it hits the pan, then lay it skin-side down in hot oil and leave it alone until the skin releases on its own. If it sticks, it needs more time. You’re looking for deep amber color, not just a little browning at the edges. Pull the chicken out once the skin is crisp and set; it will finish cooking in the oven, so don’t chase a full doneness in the skillet.
Cooking the vegetables and tomato paste
Once the chicken is out, the onion and carrots go into the same pot so they pick up the drippings left behind. Cook them until the onion starts to turn translucent and the carrots lose their raw edge. Stir in the garlic and tomato paste and let the paste darken slightly; that little bit of caramelization gives the sauce depth and keeps it from tasting flat or sweet.
Deglazing and braising in the oven
Add the wine and scrape the bottom of the pot with a wooden spoon until the browned bits dissolve. Those bits are packed with flavor, and they need the liquid to come loose. Return the chicken skin-side up, add the broth and herbs, then cover and move the pot to the oven. The braise is done when the meat yields easily with a fork and pulls back from the bone a little, not when the clock says it should be.
Finishing with butter and parsley
Take the pot out of the oven, remove the herbs, and swirl in the butter off the heat. That last step gives the braising liquid a glossy finish and softens any sharp edges from the wine. Sprinkle parsley over the top right before serving so the color stays bright and the flavor tastes fresh against the rich sauce.
Three Ways to Make Braised Chicken Fit What You’ve Got
Make it dairy-free
Leave out the butter and finish the sauce with a spoonful of olive oil instead. You’ll lose a little of the silky finish, but the braise still tastes full and balanced because the chicken skin and wine already bring plenty of richness.
Skip the wine
Use an equal amount of extra chicken broth plus 1 tablespoon of lemon juice or apple cider vinegar. The acid replaces the brightness the wine would have added, though the sauce will taste a little rounder and less sharp.
Use boneless thighs or chicken breasts
Boneless thighs work best if you want faster cooking with less fuss. Chicken breasts can be used, but they need a shorter oven time and are easier to overcook, so pull them the moment they reach 165°F and keep them skinless only if that’s what you have.
Add more vegetables
Mushrooms, parsnips, or celery fit right in. Add firmer vegetables with the carrots so they soften in time, and add mushrooms after the onions have started to cook so they can brown instead of releasing a puddle of liquid.
Storage and Reheating
- Refrigerator: Store in an airtight container for up to 4 days. The sauce thickens as it chills, and the skin softens, but the flavor gets deeper by the next day.
- Freezer: Freezes well for up to 3 months. Cool completely first and freeze the chicken with plenty of sauce so the meat doesn’t dry out on thawing.
- Reheating: Warm covered in a 325°F oven until hot through, or reheat gently on the stove over low heat. Don’t blast it over high heat or the sauce can split and the chicken can turn stringy before the center is heated.
Questions I Get Asked About This Recipe

Braised Chicken
Ingredients
Equipment
Method
- Preheat the oven to 325F, then season the chicken thighs generously with salt and pepper.
- Heat the olive oil in a Dutch oven over medium-high heat until shimmering.
- Sear the chicken skin-side down for 6-7 minutes until deeply golden, then remove to a plate.
- Sauté the diced onion and sliced carrots for 4 minutes.
- Add the smashed garlic and tomato paste, then cook for 2 minutes.
- Deglaze with the dry white wine and simmer for 2 minutes.
- Add the chicken broth, fresh thyme, fresh rosemary, and bay leaf, then return the chicken skin-side up.
- Cover and braise in the oven for 35-40 minutes, until the chicken is very tender.
- Swirl in the unsalted butter to enrich the braising liquid.
- Remove the bay leaf and herbs, then garnish with fresh parsley before serving.