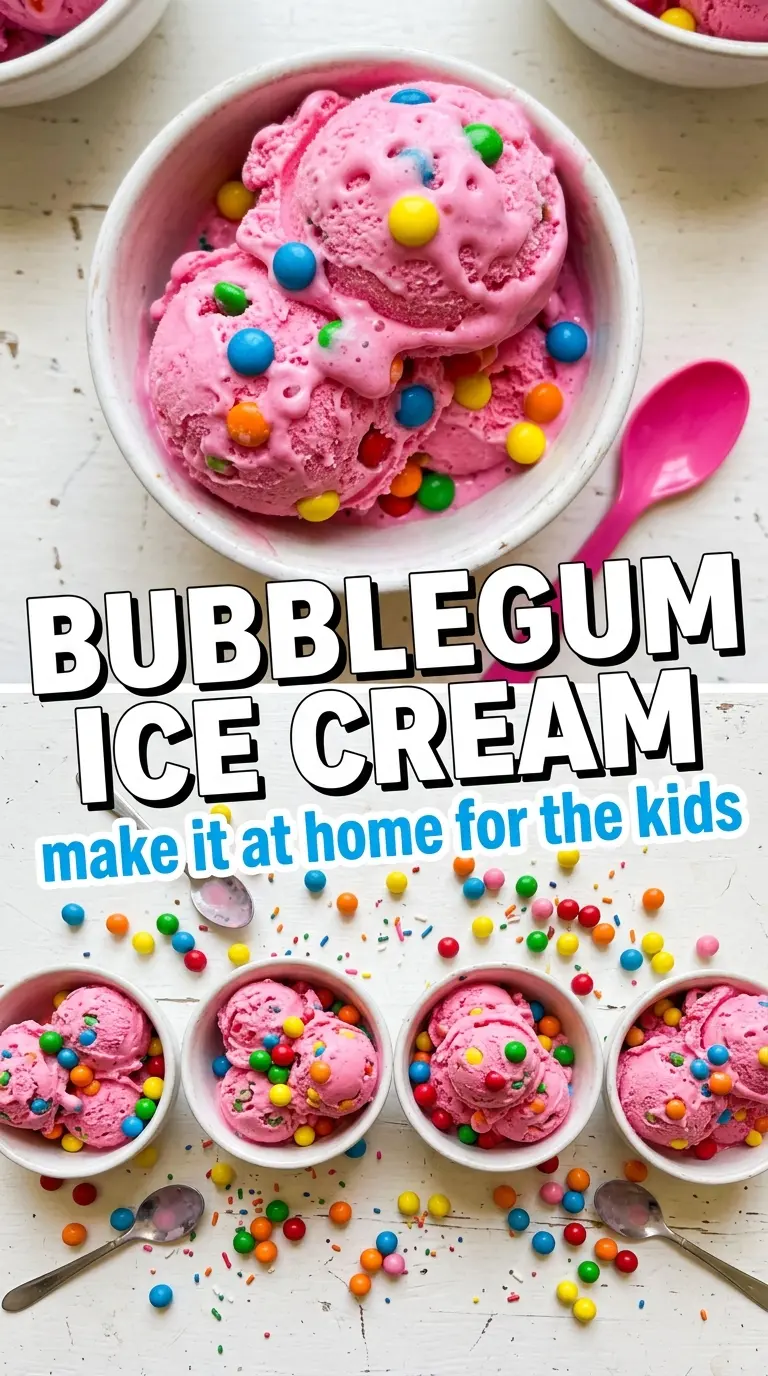
Vivid pink bubblegum ice cream earns its place in the freezer because it tastes playful without turning icy or flat. The custard base gives it a smooth, scoopable texture, and the bubblegum flavor lands as sweet, nostalgic, and unmistakable instead of tasting like scented sugar water. Rainbow sprinkles add little pops of color and crunch, which is exactly what this kind of ice cream needs.
The trick is treating it like a real custard first and a fun dessert second. Egg yolks, cream, and milk build that rich body, while the flavoring goes in after cooking so it stays bright instead of fading on the stove. Pink food coloring is there for the look, but the texture comes from the cooked base, not from extra sugar or shortcuts. That’s what keeps it creamy after freezing.
Below, I’ve included the part that matters most: how to keep the custard from scrambling, when to add the sprinkles, and how to get that classic birthday-party color without overdoing it.
The custard chilled up thick and silky, and the bubblegum flavor was spot on without tasting fake. I folded the sprinkles in at the end like you said, and they stayed bright instead of bleeding everywhere.
Save this bubblegum ice cream for the bright-pink, sprinkle-packed dessert that tastes like a real ice cream shop treat.
The Custard Base Is What Keeps This Ice Cream Creamy After Freezing
Bubblegum flavor can turn thin and sharp if it’s mixed into a plain no-cook base. The cooked custard gives this ice cream body, which means it scoops cleanly instead of freezing into a hard block. The egg yolks also help carry the flavor so the bubblegum note tastes rounder and more like the ice cream you remember from a scoop shop.
The part that trips people up is heat. If the custard gets too hot, the yolks scramble and you end up with little bits in the base. Keep the heat gentle, stir constantly, and pull it as soon as it reaches 175F. At that point it should coat the back of a spoon and feel thick enough to cling without looking curdled.
What the Flavoring, Color, and Mix-Ins Are Each Doing
- Bubblegum flavoring extract — This is the main event, and it needs to go in after the custard is off the heat. Cooking it too long can flatten the flavor, and the finished ice cream will taste more muted than nostalgic.
- Heavy cream — This gives the ice cream its lush texture. Don’t swap in lower-fat cream here unless you want a harder, icier scoop.
- Whole milk — Whole milk keeps the base from becoming overly rich. You can use half-and-half in a pinch, but the final texture will be heavier and the flavor less balanced.
- Pink food coloring — This doesn’t change the taste, but it does make the dessert read as bubblegum at a glance. Add it a drop at a time until you hit the shade you want; the color deepens a little as the base chills.
- Rainbow sprinkles — Fold them in at the very end of churning so they stay distinct. If you add them too early, they bleed color into the base and lose that fun confetti look.
- Bubblegum pieces — These are optional, and I only add them if I want a playful, chewy finish. Use small pieces and fold them in at the last minute so they don’t get torn up by the machine.
Building the Base Without Scrambling the Yolks
Heat the Dairy Until It’s Steaming
Warm the cream and milk just until you see steam and tiny bubbles around the edge of the pan. You don’t want a full boil, because that can make the mixture climb too fast once it hits the yolks. The goal is hot dairy that can temper the eggs gently.
Whisk in the Yolks Slowly
Beat the egg yolks with the sugar until they look pale, then whisk in the hot dairy in a thin stream. If you pour it in too fast, the yolks can seize and cook in streaks. Slow and steady here gives you a smooth custard that thickens evenly on the stove.
Cook to the Right Thickness
Return everything to the saucepan and cook over low to medium-low heat, stirring constantly with a spatula or wooden spoon. The custard is ready at 175F, or when it lightly coats the spoon and you can drag a finger through it without the line filling in right away. If it starts to look grainy, pull it off the heat immediately and strain it.
Chill Before Churning
Stir in the bubblegum flavoring, vanilla, salt, and coloring off the heat, then strain the base and chill it completely. Warm custard churns poorly and freezes less smoothly, which is why the full 4-hour rest matters. The base should be cold all the way through before it goes into the ice cream maker.
Fold in the Sprinkles at the End
Churn until the ice cream reaches soft-serve texture, then add the sprinkles and bubblegum pieces in the last 2 minutes. That keeps the colors bright and the candy pieces from getting chopped up. Transfer it to a freezer container and freeze until firm enough to scoop.
How to Adjust This Bubblegum Ice Cream for Different Needs
Dairy-Free Version
Use full-fat coconut milk and a rich unsweetened dairy-free cream in place of the milk and cream. The ice cream will still churn well, but it will taste a little coconut-forward, so the bubblegum flavor should be a touch more pronounced to balance it.
No-Churn Shortcut
If you don’t have an ice cream maker, whip 2 cups cold heavy cream to soft peaks and fold it into a cooled, sweetened bubblegum custard base that has been fully chilled. The texture won’t be as dense or smooth as churned ice cream, but it will still freeze up creamy if you keep the mix cold before freezing.
Extra Fun Party Color
Add the pink coloring in tiny drops and stop before the base looks neon in the bowl. The color deepens once it freezes, so a shade that looks slightly lighter in liquid form usually lands perfectly in the finished scoop.
Storage and Reheating
- Refrigerator: Not applicable once frozen ice cream is finished; the base can be refrigerated up to 24 hours before churning if needed.
- Freezer: Freeze in an airtight container for up to 2 weeks. Press parchment or wax paper directly on the surface to slow ice crystals.
- Reheating: Not needed. Let it sit at room temperature for 5 to 10 minutes before scooping so the edges soften first, which keeps the texture smooth instead of forcing it into icy shards.
Answers to the Questions Worth Asking

Bubblegum Ice Cream
Ingredients
Equipment
Method
- In a saucepan, heat the heavy cream and whole milk until steaming, stirring occasionally. Keep the heat gentle so it steams but does not boil, and remove from heat as soon as steam rises.
- In a bowl, whisk the egg yolks with the granulated sugar until smooth and slightly thickened. Slowly pour the steaming dairy into the yolks while whisking to prevent scrambling.
- Return the mixture to the saucepan and cook, stirring constantly, until it reaches 175°F. Cook to the exact temperature, then immediately remove from the heat.
- Strain the custard into a clean container and stir in the bubblegum flavoring extract, vanilla extract, and salt. Mix until fully combined and glossy.
- Add pink food coloring a little at a time until you reach your desired vivid pink color. Then cool the custard completely.
- Refrigerate the cooled custard for 4 hours to fully chill. Chill until cold throughout before churning.
- Churn the custard in an ice cream maker until thickened, then fold in the rainbow sprinkles and small bubblegum pieces during the last 2 minutes of churning. Watch for the mixture to turn fluffy and scoopable as you add the mix-ins.
- Transfer the churned ice cream to a container and freeze until firm. Freeze until it holds its shape when scooped.


