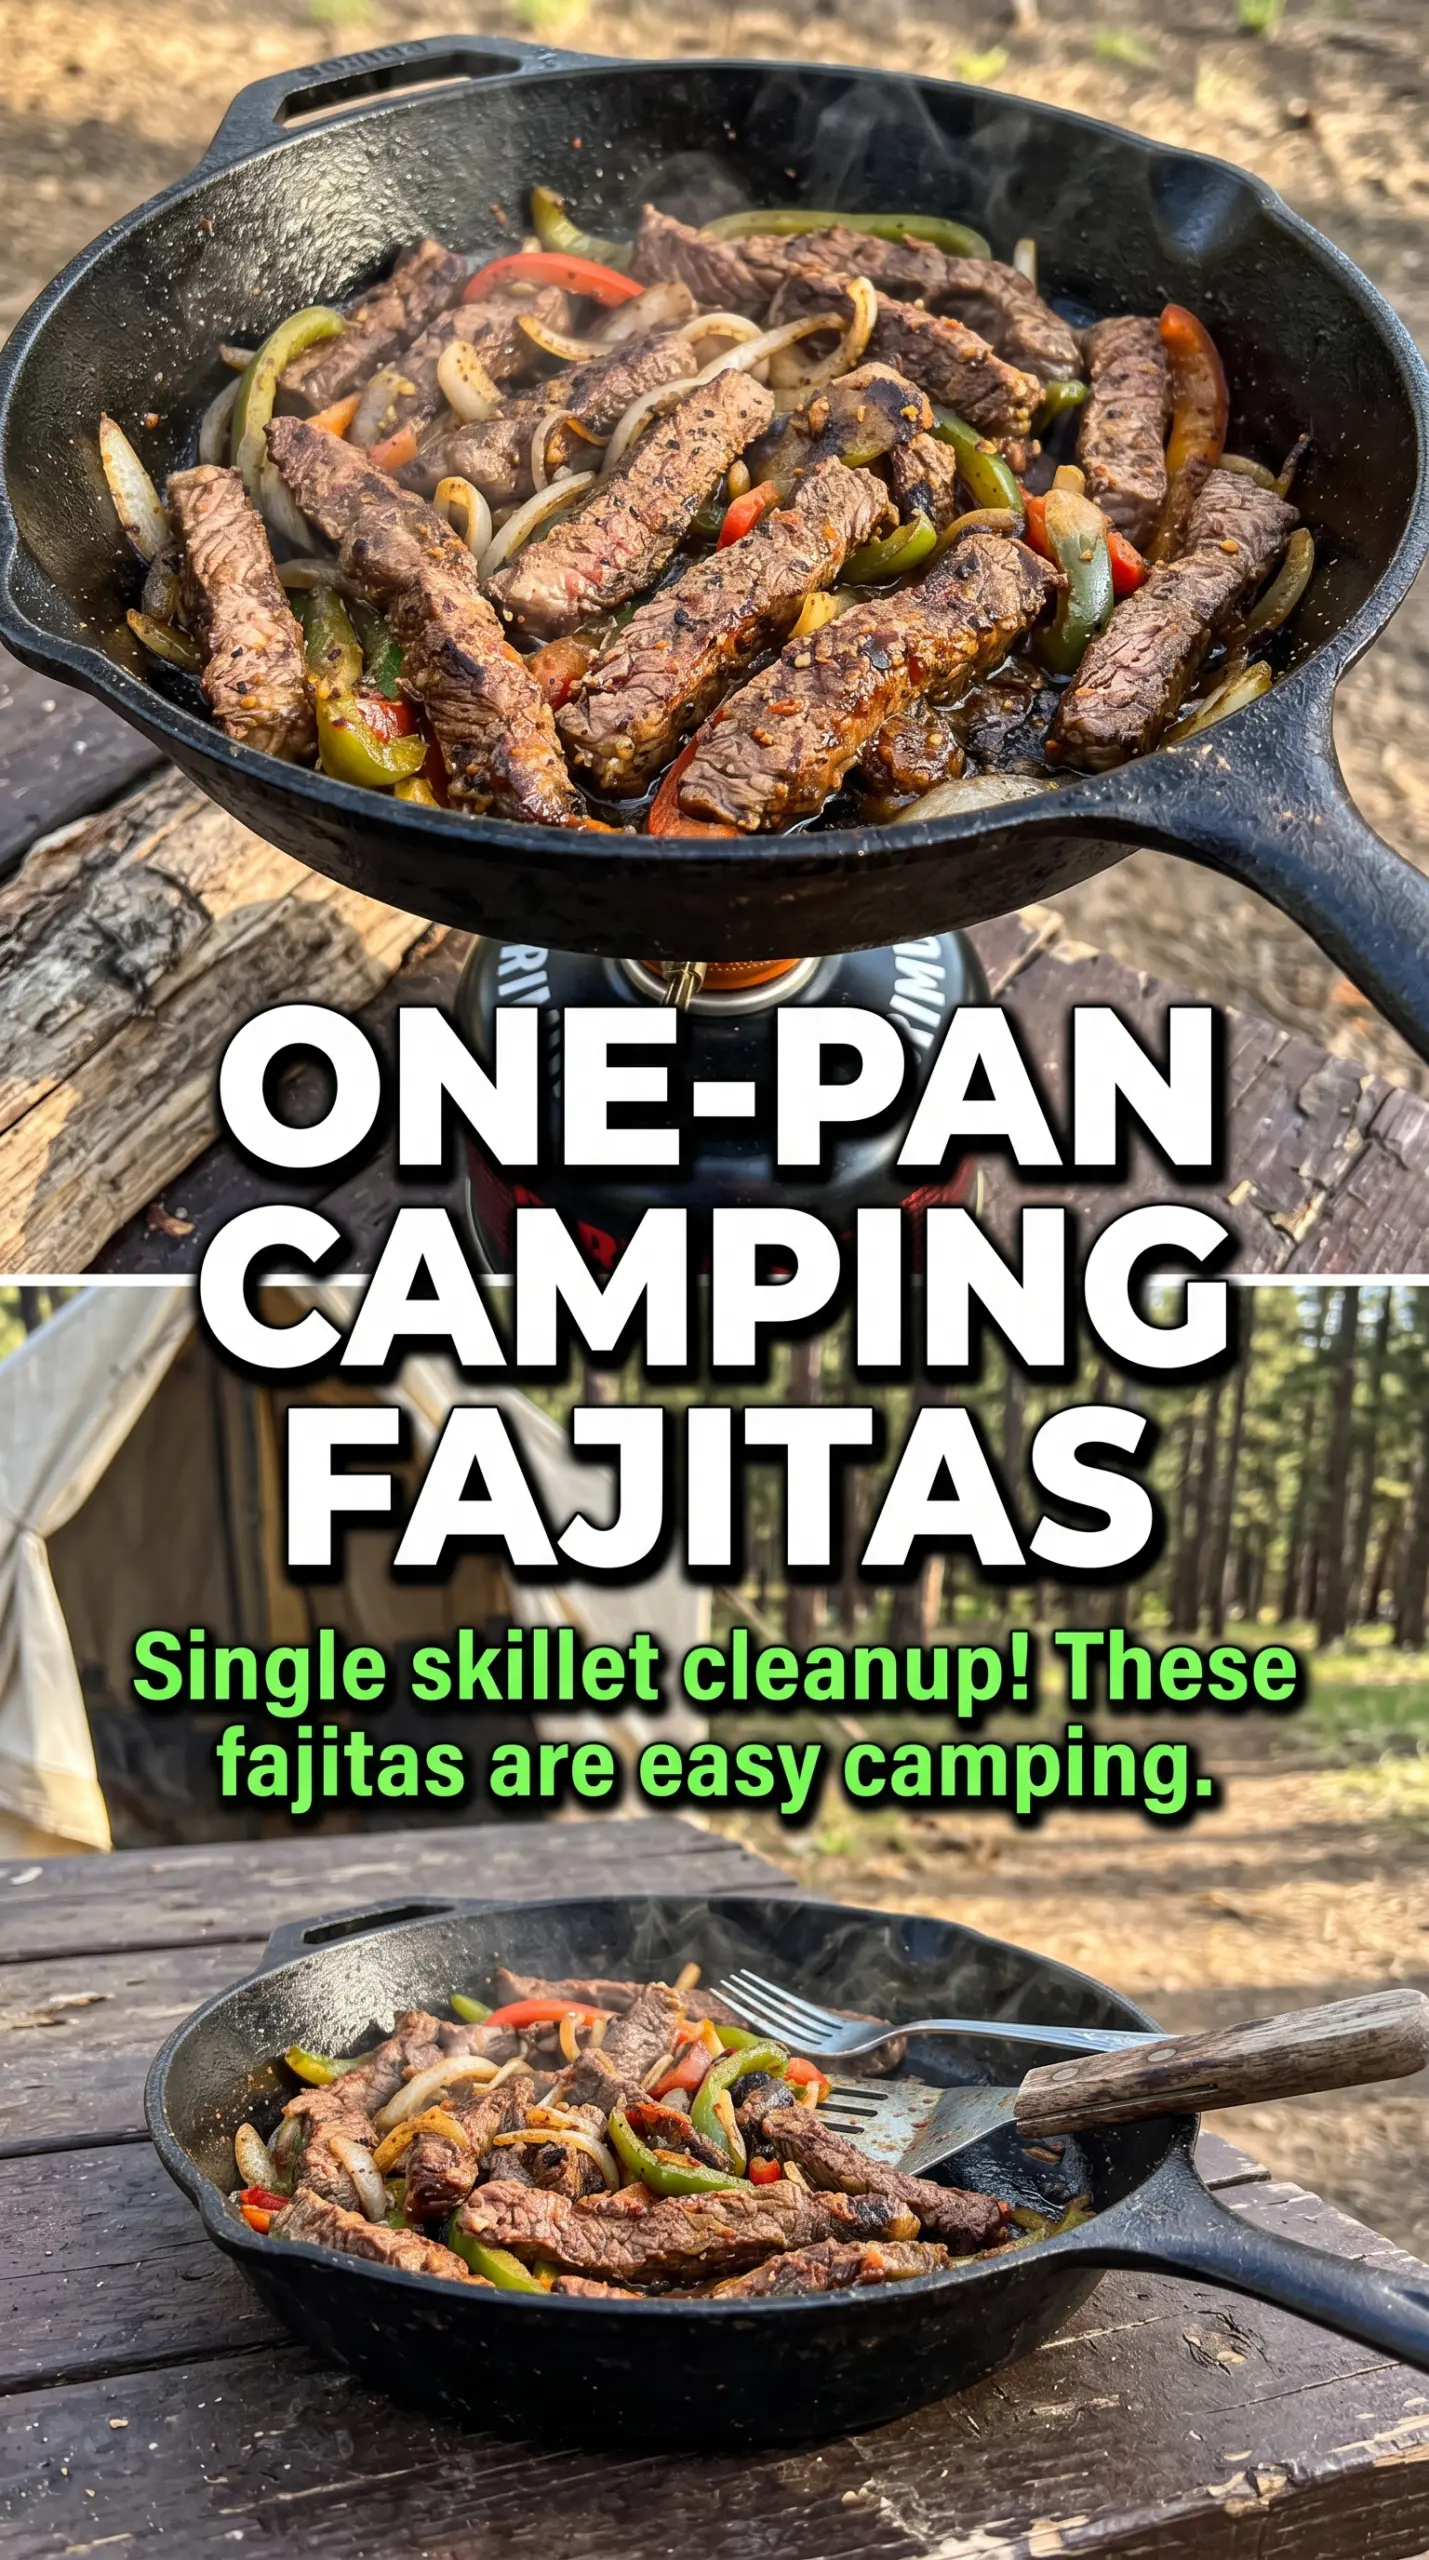
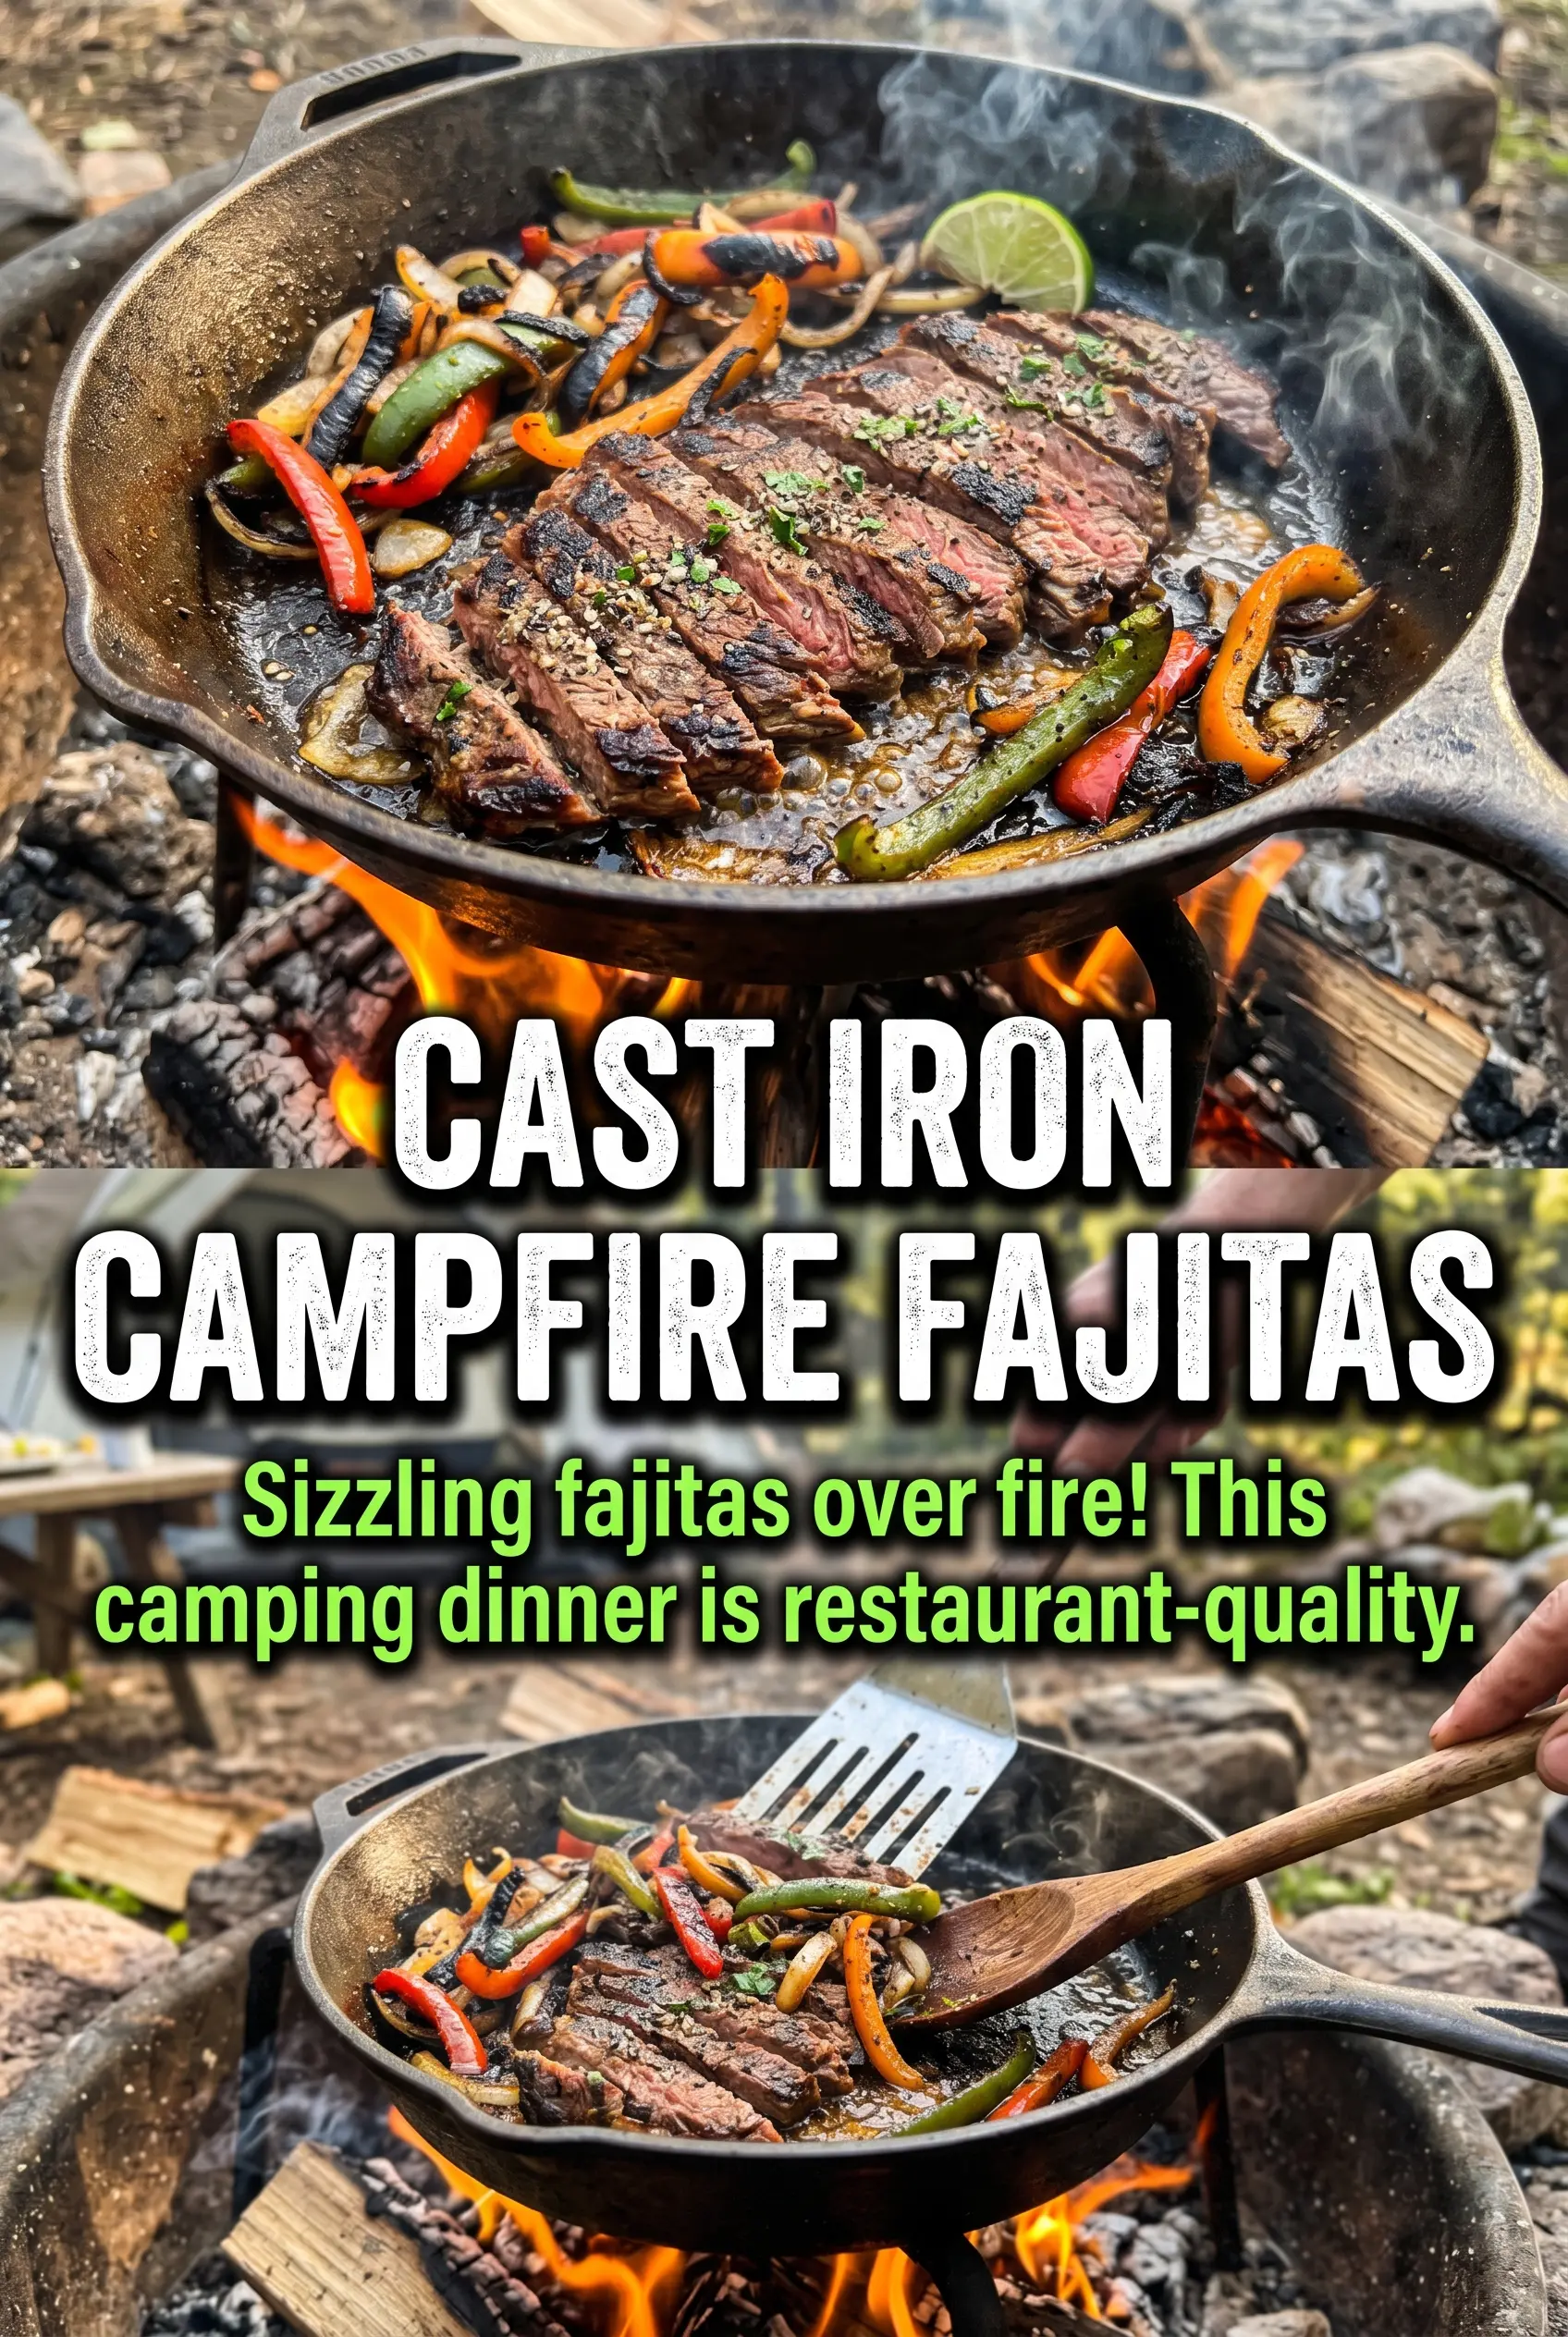
Sizzling campfire fajitas hit the table with the kind of energy that makes people drift back for seconds before they’ve finished the first tortilla. The meat stays juicy, the peppers and onions pick up a little char, and the whole skillet smells like smoke, citrus, and toasted spice. It’s the sort of dinner that feels big without asking for much more than one pan and a steady flame.
The trick is cooking the meat fast in a hot cast iron skillet, then getting the vegetables just far enough to soften without losing their edges. If you crowd the pan or start with lukewarm metal, everything steams and the fajitas go soft instead of sizzling. A good fajita seasoning does the heavy lifting here, but timing matters just as much as the blend itself.
Below, I’ve included the little details that matter most over a campfire, including how to manage the heat, what to do if you’re cooking for a mix of chicken and steak eaters, and how to keep the tortillas warm until everyone is ready to build their own.
The meat stayed tender and the peppers got that perfect smoky edge without turning mushy. I was nervous about cooking over the fire, but the timing was spot on and the tortillas warmed up beautifully right on the grate.
Campfire fajitas with smoky charred peppers are the kind of skillet dinner you’ll want to make every time the grate is hot.
The part that keeps campfire fajitas sizzling, not steaming
The biggest mistake with fajitas over an open fire is treating the skillet like a slow cooker. Cast iron needs time to get hot enough to sear the meat, and the fire needs to be steady enough that the pan stays there. If the pan is only warm, the chicken or steak releases moisture, the vegetables soften too early, and you lose that sharp edge fajitas need.
Cook the meat in a single layer and leave it alone long enough for browning to start. The same goes for the peppers and onions: they need contact with the skillet to pick up char, not a gentle toss around the pan. If your fire is running hot and uneven, move the skillet off direct flame for a minute rather than letting the outside scorch while the inside stays underdone.
- Hot cast iron — This is what gives you the quick browning that makes fajitas taste cooked over fire instead of merely heated.
- Thinly sliced meat — Thin slices cook fast and stay tender. Thick pieces take too long and dry out before the vegetables are ready.
- Separate the meat and vegetables — Pulling the meat out before the peppers go in keeps the protein juicy and prevents the skillet from getting overcrowded.
What each ingredient is doing in the skillet
- Chicken breast or steak — Both work, but they behave differently. Chicken breast stays lean and takes seasoning well, while steak gives you a deeper, beefier finish. Slice either one thin so it cooks fast over campfire heat.
- Bell peppers — A mix of colors makes the skillet look and taste brighter. They need enough heat to soften and blister, but not so much that they collapse into mush.
- Onions — They bring sweetness once they hit the hot pan. Slice them thick enough to hold some shape, since paper-thin onions disappear fast over high heat.
- Fajita seasoning — This is where the smoke, spice, and salt balance comes from. A store-bought blend is fine here, but if it’s salt-heavy, use a light hand and season the meat before it hits the skillet.
- Flour tortillas — Soft tortillas hold up best for loading with hot filling. Warm them over the fire just until pliable and lightly blistered so they don’t crack when folded.
- Lime wedges and toppings — Lime wakes up the whole skillet, and cool toppings like sour cream or guacamole balance the heat. Add them at the table, not in the pan, so the fajita filling stays bold and hot.
Building the skillet so the vegetables char instead of collapse
Getting the pan hot enough first
Set the cast iron skillet directly over the campfire and let the oil heat until it shimmers. If the oil looks still and flat, the pan isn’t ready. Add the meat too early and it will sit in the oil instead of searing, which leaves you with pale, tough pieces instead of browned edges.
Cooking the meat in a single layer
Season the sliced meat, then lay it into the skillet with a little space between pieces. You want a quick sear and a little browning on the edges, not a crowded pile that traps steam. Stir only after the first side has had time to color; if you keep moving it, you’ll lose the crust.
Letting the peppers and onions take over
Pull the meat out once it’s cooked through, then add the peppers and onions to the same pan. The leftover browned bits coat the vegetables and deepen their flavor, so don’t wipe the skillet clean. Cook until the onions soften and the peppers show a few dark spots at the edges. That’s the signal they’ve picked up enough heat without turning soggy.
Bringing everything back together
Return the meat to the skillet and toss just until everything is hot again. This final step should be quick. If you leave the meat in too long after the vegetables are done, the protein can dry out and the peppers will lose their fresh bite.
Make it with steak for a deeper, smokier finish
Steak gives the skillet a richer flavor and better browning on the edges. Cut it thin against the grain so it stays tender, and don’t overcook it while the vegetables finish. If you like a stronger campfire taste, steak usually gives you more payoff than chicken.
Swap in chicken thighs for a juicier result
Chicken thighs stay more forgiving over open flame than breast meat. They won’t dry out as quickly if your fire runs hotter than planned, and they hold up well to bold seasoning. The texture is a little richer and less lean, which works especially well if you’re serving a crowd.
Make it dairy-free without losing the finish
Skip the sour cream and cheese and lean on guacamole, salsa, and extra lime instead. You still get the cool contrast and bright finish without changing the skillet method at all. This is the easiest version to serve for mixed groups because the base recipe is already naturally dairy-free until toppings go on.
Use corn tortillas if that’s what you have
Corn tortillas bring a little more corn flavor and a sturdier bite, but they’re less flexible than flour tortillas. Warm them carefully so they don’t crack, and stack them in a towel as they come off the fire. They’re a good choice if you need a gluten-free option, as long as you check the seasoning blend too.
Storage and Reheating
- Refrigerator: Store the fajita filling in an airtight container for up to 3 days. The peppers will soften a little more as they sit, but the flavor holds well.
- Freezer: The meat freezes well, but the peppers and onions turn softer after thawing. If you want to freeze it, pack the cooked filling in a sealed container for up to 2 months and expect a looser texture when reheated.
- Reheating: Reheat the filling in a hot skillet over medium heat until it’s steaming and the edges start to sizzle again. Don’t microwave it too long or the vegetables turn limp and the meat tightens up.
Answers to the questions worth asking before you cook these over a fire
Campfire Fajitas
Ingredients
Equipment
Method
- Heat the oil in a large cast iron skillet over the campfire until it’s hot and shimmering.
- Season the sliced chicken breast or steak with fajita seasoning, then add it to the hot skillet and spread into an even layer.
- Cook for 8-10 minutes, stirring occasionally, until browned and cooked through, then remove the meat and set aside.
- Add the bell peppers and onions to the skillet and cook for 8-10 minutes, stirring occasionally, until tender and slightly charred with browned edges.
- Return the cooked meat to the skillet and toss to combine with the peppers and onions so the mixture is sizzling and evenly coated.
- Warm the flour tortillas over the fire until pliable and lightly toasted, stacking them as they heat.
- Serve the fajita mixture with warm tortillas and top each serving with sour cream, guacamole, salsa, cheese, cilantro, and lime wedges as desired.