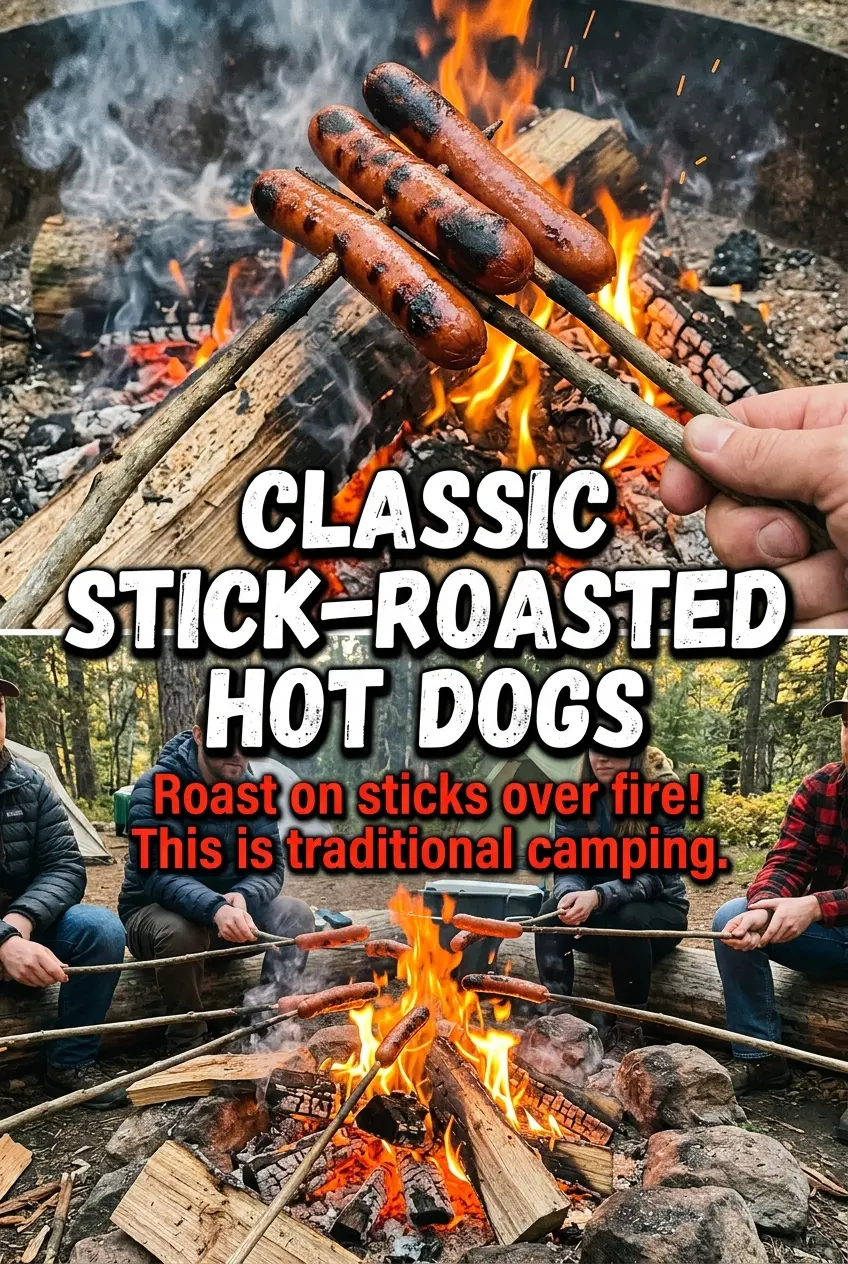
Hot dogs over a campfire have a way of making dinner feel a little more earned. The outside picks up those dark, smoky spots fast, while the inside stays juicy and hot enough to steam when you bite in. With a toasted bun and a few good toppings, this turns into the kind of meal nobody complains about after a long day outside.
What makes this version work is the order and the heat. A hot dog doesn’t need a roaring flame the whole time; it needs steady turning so the casing blisters without splitting wide open. Coals give you the most even cook, but flames add those charred patches that make campfire hot dogs taste like campfire hot dogs. The buns only need a quick kiss of heat, or they’ll dry out before the dogs are ready.
Below, I’ve included the small details that help keep the hot dogs from falling off the stick, the buns from burning, and the whole setup easy to manage when you’re cooking outdoors with limited tools.
We made these over the fire at the campsite and the dogs came out perfectly charred on the outside without splitting. Toasting the buns for just a minute was the best tip — they stayed soft but picked up a little crunch.
Save these campfire hot dogs for your next outdoor dinner when you want a no-fuss meal with smoky char and toasted buns.
The Trick to Keeping Hot Dogs from Splitting Over the Fire
The biggest mistake with campfire hot dogs is leaving them too close to a big flame for too long. The outside bursts before the center warms through, and then you lose juices instead of getting that snap you want. Rotating them often keeps the heat even, and it gives you control over the browning instead of letting one side burn while the other stays pale.
If you’re cooking over coals, the process is calmer and more forgiving. If you’re working over open flames, hold the sticks a little higher and keep them moving. The goal is a lightly blistered skin with a few charred spots, not a blackened shell.
What the Hot Dogs, Buns, and Toppings Are Doing Here
- Hot dogs — Standard beef or all-beef hot dogs hold up best over the fire because they stay juicy and keep their shape. If you use a softer, cheaper dog, it can wrinkle and split faster, so just keep the heat gentler and the turning frequent.
- Hot dog buns — Fresh buns matter more than fancy ones here. A dry bun tears when you load it, and a stale one turns tough once it gets warm. Toasting is optional, but only for a few seconds.
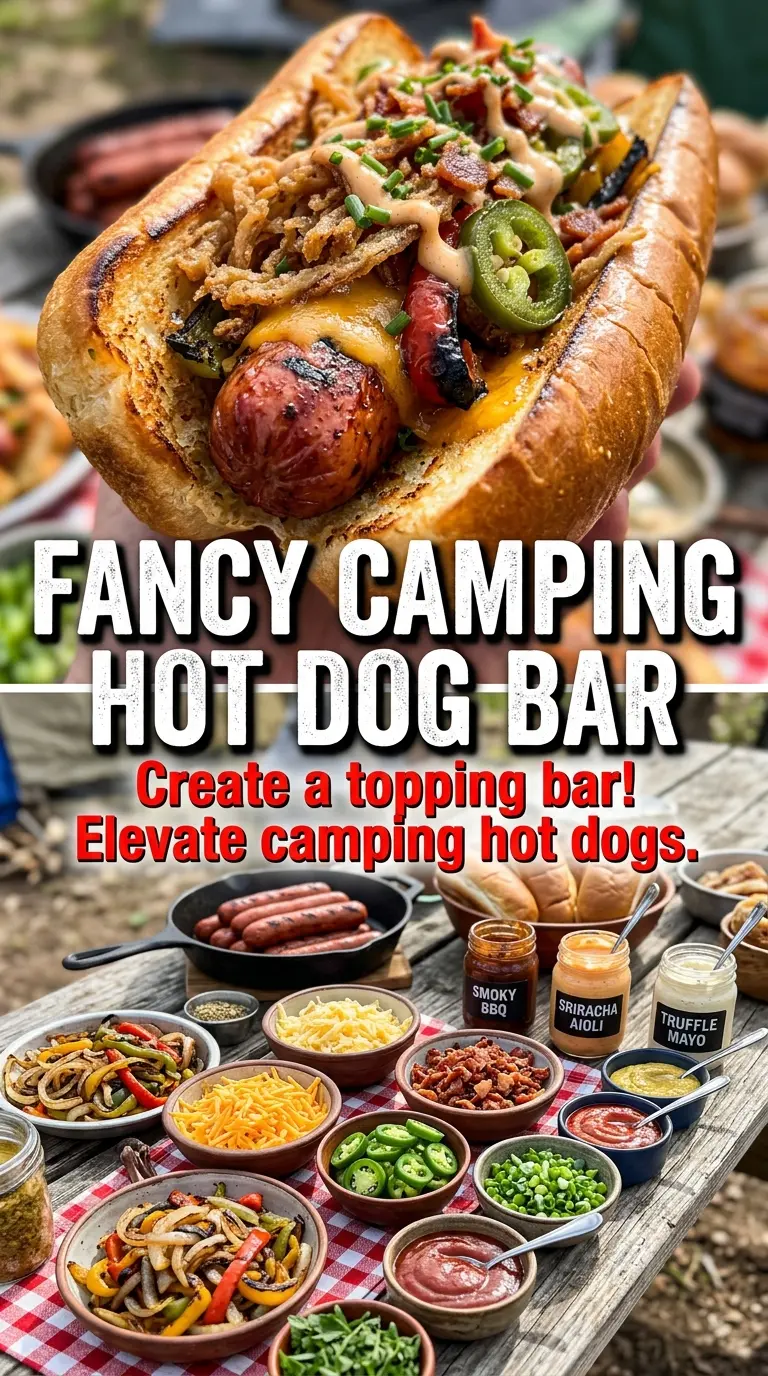
- Condiments — Ketchup, mustard, and relish are the classic base because they add moisture and sharpness against the smoky dog. Use what you like, but keep the toppings balanced so the bun doesn’t collapse under too much sauce.
- Shredded cheese, onions, chili, sauerkraut, jalapeños — These toppings add heft and personality, but they work best when the hot dog is already cooked and the bun is already in hand. Chili and sauerkraut bring the most moisture, so drain them well before adding them.
How to Roast Them So the Skin Blisters, Not Bursts
Skewer the Hot Dogs Securely
Run each hot dog lengthwise on a roasting stick or long fork so it sits firmly and doesn’t spin around on you. If the skewer only catches the surface, the dog will slide or tear when you turn it. A snug hold makes the whole cook easier, especially over a lively fire.
Hold Them at the Right Distance
Place the hot dogs over flames or hot coals and keep them moving every few seconds. If the fire is roaring, lift them higher instead of forcing them through the hottest part. You’re looking for steady browning and a little blistering, not a fast burn that leaves the inside underheated.
Toast the Buns at the End
Set the buns near the fire only long enough to warm them and pick up a little color. They go from soft to brittle fast, especially over direct flames. If the edges start to curl or darken aggressively, pull them back immediately and let carryover heat finish the job.
Build and Serve Right Away
Slide each hot dog into a bun as soon as it comes off the heat, then add condiments and toppings while everything is still hot. This is not a dish that waits politely on the table; the bun softens, the dog cools, and the best texture disappears fast. Serve immediately while the casing is still snappy.
How to Adapt These for Different Campsites and Eaters
Gluten-Free Campfire Hot Dogs
Use gluten-free buns or serve the hot dogs straight from the stick with toppings in a bowl on the side. The filling and cooking method stay the same, but the bun texture will be more delicate, so toast it only briefly or skip toasting altogether.
Vegetarian Campfire Dogs
Swap in plant-based hot dogs and cook them a little more gently, since many meatless versions split or dry out faster over high heat. They still pick up great smoky flavor, but they need less time and a little more distance from the flame.
Making Them Heartier with Chili
Warm the chili before you head outside so you’re not trying to heat a cold topping over an open fire. Thick chili makes these more filling and turns them into a full meal, but watery chili will soak the bun fast, so keep it thick enough to spoon cleanly.
When You Need to Feed a Crowd Fast
Set up a topping line before the fire is even ready so people can build their own as the hot dogs finish. This keeps the cooked dogs from cooling while you hunt for condiments, and it makes serving much smoother when everyone wants different toppings.
Storage and Reheating
- Refrigerator: Store leftover cooked hot dogs and buns separately for up to 3 days. The buns soften quickly once assembled, so keep everything apart.
- Freezer: Cooked hot dogs freeze fine for about 1 month, wrapped tightly, though the texture softens a bit after thawing. Buns don’t freeze as well and are better replaced fresh.
- Reheating: Warm the hot dogs in a skillet, over low campfire heat, or in the microwave until hot through. High heat dries them out and makes the casing tough, so gentle reheating works best.
Questions I Get Asked About This Recipe
Camping Hot Dogs
Ingredients
Method
- Skewer each hot dog lengthwise on a roasting stick or long fork.
- Hold the hot dogs over campfire flames or coals, rotating frequently, for 8-10 minutes until heated through and slightly charred, with visible browned, charred spots.
- Toast hot dog buns briefly over the fire if desired, until lightly warm and just starting to get golden, watching closely to avoid burning.
- Place hot dogs in buns and add desired condiments and toppings, layering them while the dogs are hot so toppings warm and melt where needed.
- Serve immediately while hot, with charred spots still visible on the hot dogs.