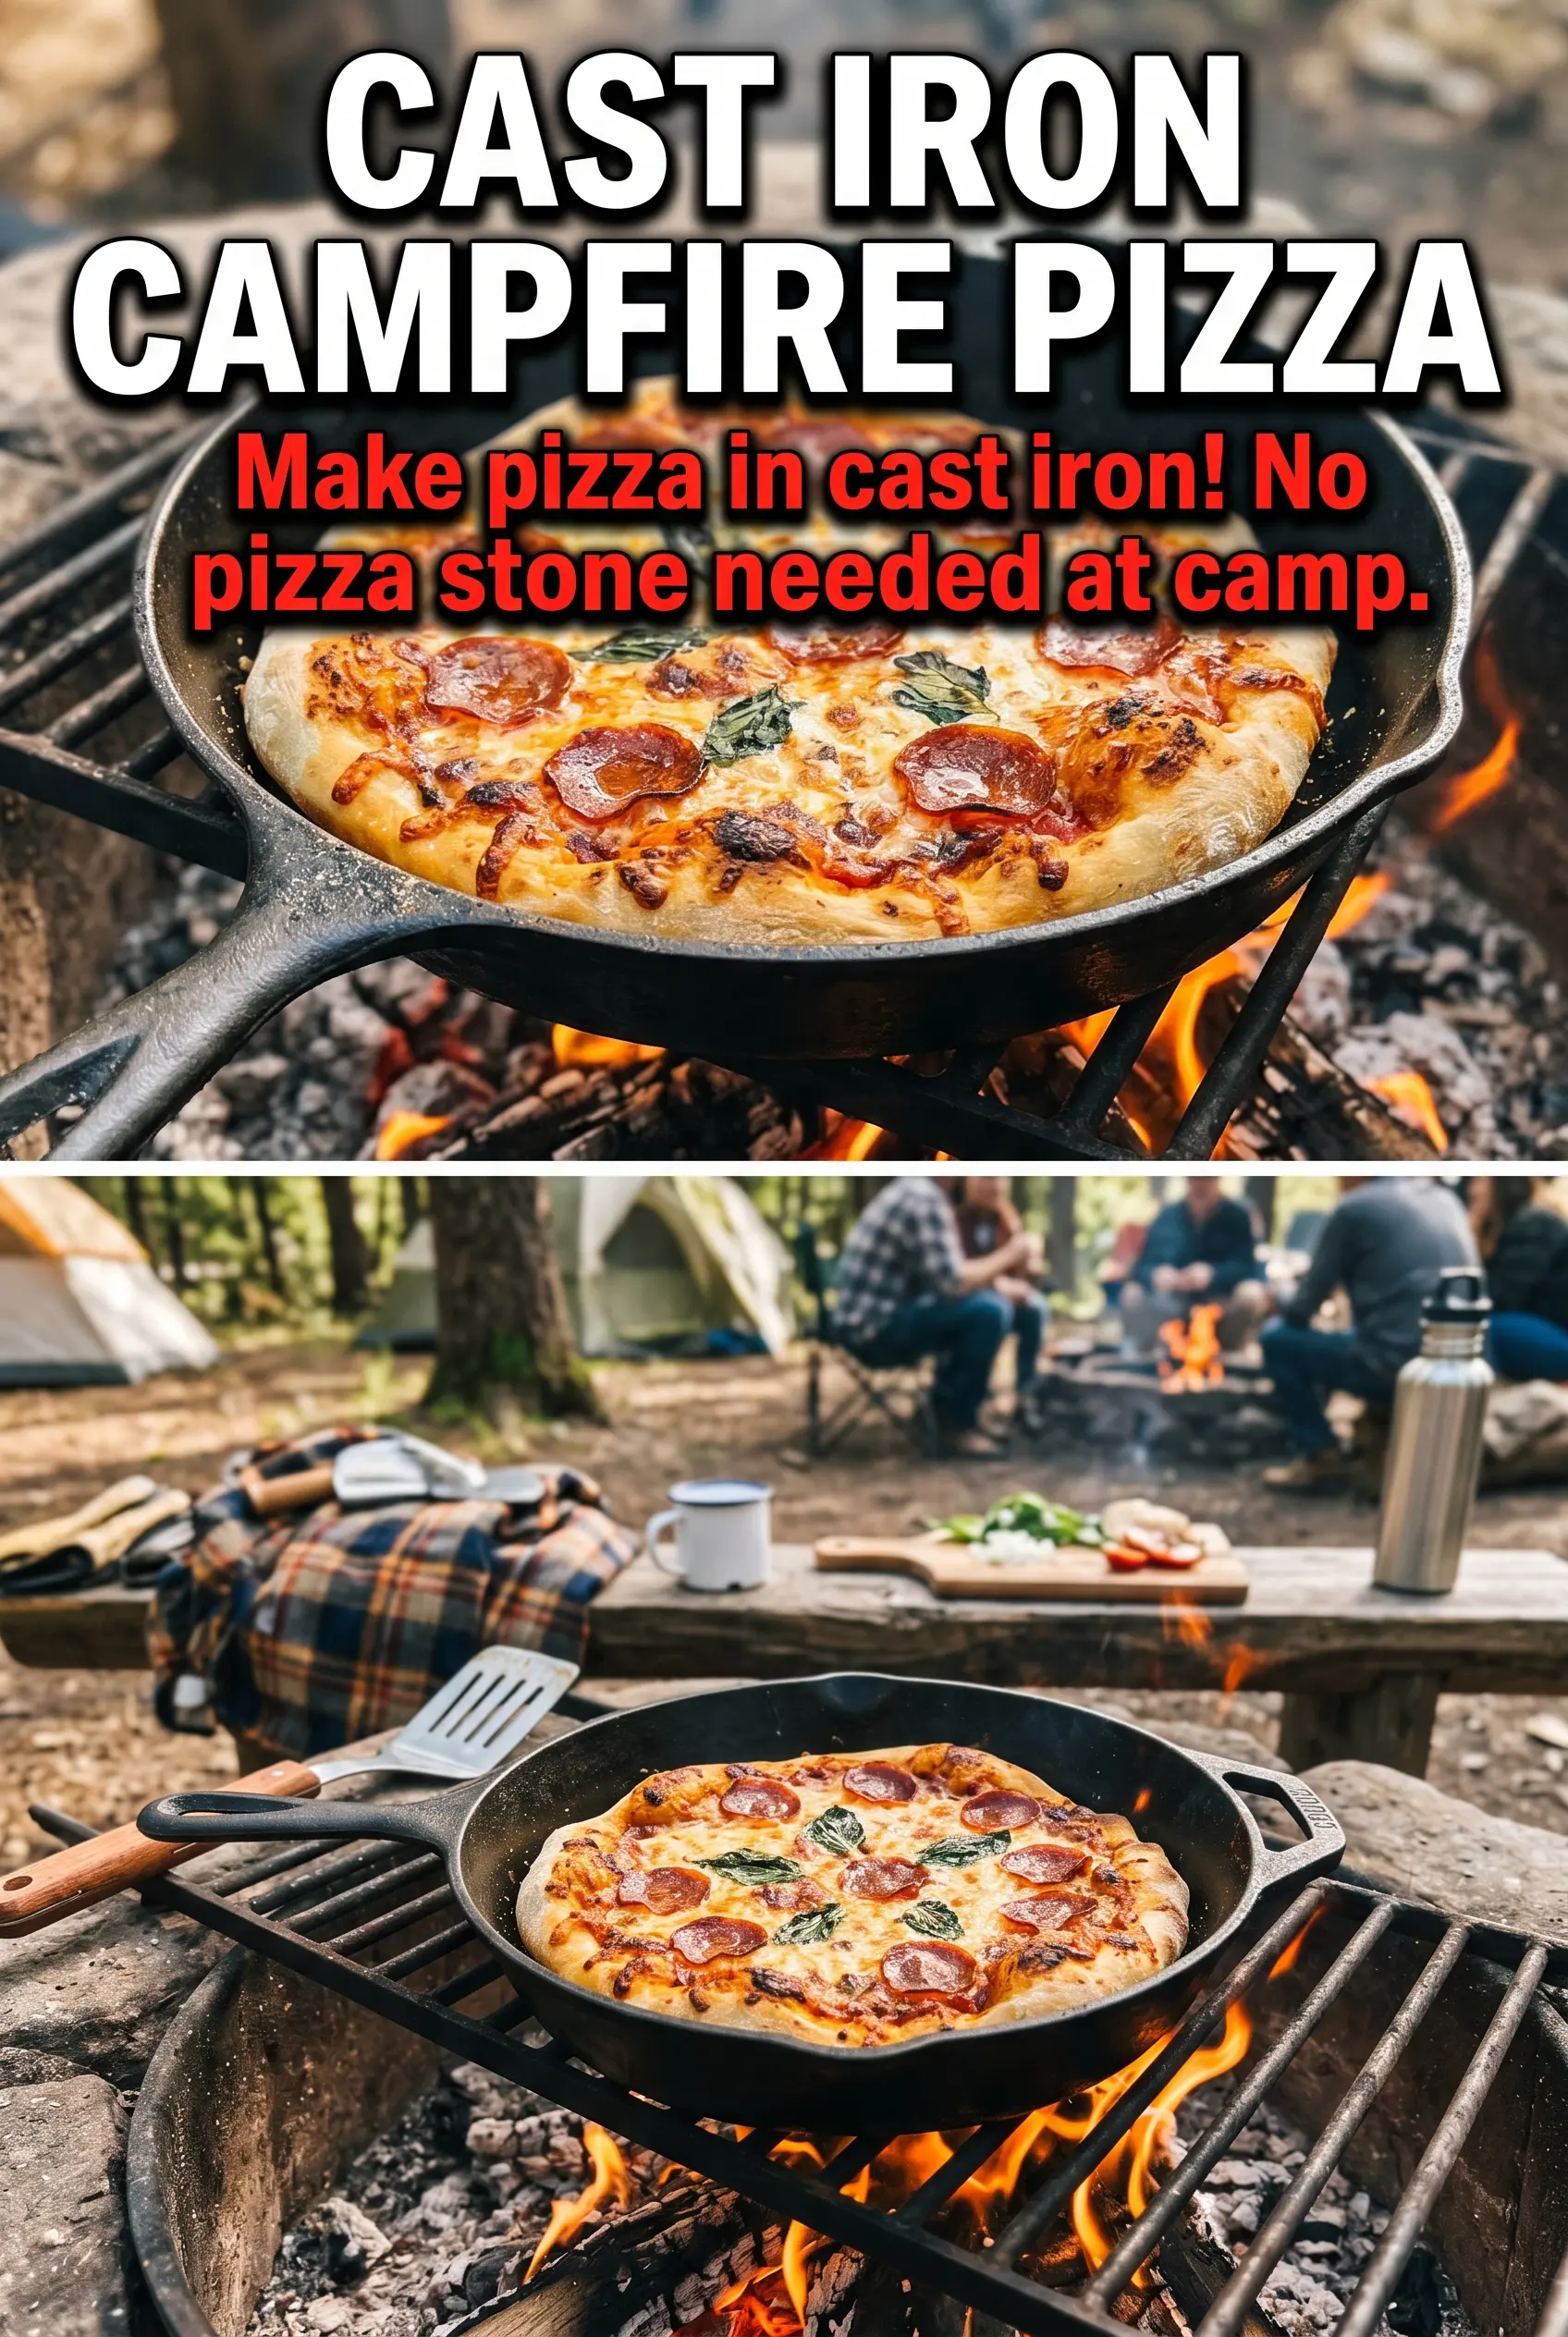
Charred crust, bubbling mozzarella, and that smoky edge you only get from cooking over open heat make grilled campfire pizza the kind of dinner people hover around before it even hits the table. The dough turns crisp in spots and stays tender in the middle, while the sauce and cheese melt together fast enough that you’re not babysitting dinner for long.
The trick is grilling the dough first on one side, then flipping it and building the pizza on the already-cooked surface. That keeps the toppings from soaking into raw dough and gives you a sturdier base than most campfire pizzas end up with. A thin stretch of dough, a light brush of oil, and a hot grate are doing most of the work here.
Below, I’ll show you how to keep the crust from sticking, when to add toppings, and how to adjust the heat if your fire is running hotter than expected. There’s also a simple way to handle extra dough so every pizza comes off the grate with a clean bottom and melted cheese on top.
I was worried the dough would fall through the grate, but brushing one side with oil first made all the difference. The crust got those perfect char marks, and the cheese melted by the time the second side was crisp.
Love the charred crust and melty cheese on this grilled campfire pizza? Save it to Pinterest for your next outdoor pizza night.
The Part of Campfire Pizza That Usually Goes Wrong
Most grilled pizzas fail for one simple reason: people try to top raw dough before the crust has had a chance to set. Over open heat, that usually means a soft middle, toppings sliding around, and dough that sticks before it ever gets a real crust. This version flips that order. The first side cooks bare, which gives you structure before the sauce and cheese ever touch the dough.
The other thing that matters is heat control. Medium heat is the sweet spot. If the grate is screaming hot, the bottom burns before the cheese melts. If it’s too cool, the dough dries out before it gets those blistered spots that make grilled pizza worth doing in the first place.
- Thinly stretched dough — The thinner you stretch it, the faster it cooks and the less likely it is to sag in the middle. Thick dough can work, but it needs more time and is much harder to move cleanly on a grate.
- Oil on the first side — The oil gives you insurance against sticking and helps the crust brown instead of drying out. Don’t skip this if you’re cooking over a campfire grate.
- Lid or foil cover — The cover traps heat so the cheese melts before the bottom overcooks. Without it, you’ll often end up with crisp crust and unmelted toppings.
What Each Ingredient Is Actually Doing in This Pizza
- Pizza dough — This is the base of the whole recipe, and store-bought dough works fine here as long as it’s relaxed enough to stretch without snapping back. If the dough keeps shrinking, let it rest for 10 to 15 minutes before you try again.
- Olive oil — This helps the dough release from the grate and encourages browning. A light coating is enough; too much oil can cause flare-ups.
- Pizza sauce — Use a thicker sauce so it doesn’t flood the crust after you flip it. Thin sauce can make the center slippery and weaken the bottom before the cheese sets.
- Mozzarella — Low-moisture shredded mozzarella melts evenly and gives you that stretchy, pizza-shop finish. Fresh mozzarella is delicious, but it releases more liquid and can soften the crust faster than you want over a fire.
- Toppings — Keep them cooked or quick-cooking. Raw sausage won’t cook through in this short window, and heavy toppings can drag the center down.
- Parmesan and basil — Add these after grilling so they stay fresh and sharp. Parmesan gives salt and depth, while basil brings a clean finish that cuts through the smoke.
How to Build the Pizza So the Bottom Gets Crispy Before the Top Burns
Stretching the Dough for the Grate
Divide the dough into four portions and stretch each one into a thin round. You want even thickness more than a perfect circle, because a thick edge and a thin center will cook unevenly over live fire. If the dough keeps pulling back, let it rest for a few minutes and try again instead of forcing it. Forced dough tears, and tears turn into toppings leaking through the grate later.
Grilling the First Side
Brush one side of each round with olive oil and place it oil-side down on the grate over medium heat. In 2 to 3 minutes, the bottom should be charred in spots and firm enough to lift without drooping. If it sticks, leave it alone for another 20 to 30 seconds; dough usually releases when the crust has browned enough. A raw-looking bottom is a sign it needs more time, not a sign to pry harder.
Flipping and Topping Fast
Once the first side is set, flip the dough and work quickly on the grilled side. Spread on the sauce, add the mozzarella, and layer on toppings while the crust is still hot. Don’t pile everything on thick, or the center will stay wet while the edges finish. The goal is a light, even layer that can melt and heat through before the crust goes too far.
Finishing Under a Cover
Cover the pizza with a lid or foil and cook for 3 to 5 minutes more. That trapped heat is what melts the cheese without forcing the bottom to burn. You’ll know it’s ready when the cheese is bubbling, the toppings are heated through, and the underside feels crisp when you lift a corner. Pull it off the fire as soon as the crust is cooked, because carryover heat keeps working for a minute or two after it leaves the grate.
Three Ways to Make This Work Around the Fire You Actually Have
Gluten-Free Dough Swap
Use a gluten-free pizza dough that’s meant to be rolled and grilled, not a wet batter-style crust. It won’t blister quite the same way as wheat dough, but the oil-first method still helps it set without sticking. Work a little more gently when flipping, because gluten-free dough tends to crack at the edges if it’s stretched too thin.
Dairy-Free Pizza Night
Swap in your favorite meltable dairy-free mozzarella and keep the toppings lighter than usual. Some dairy-free cheeses melt slower, so the covered finish matters even more here. A little extra Parmesan-style topping after grilling can add back the salty finish you’d normally get from cheese.
Vegetarian Topping Combo That Won’t Weigh It Down
Use vegetables that cook fast or are already tender, like thin-sliced peppers, mushrooms, onions, or spinach. Raw watery vegetables can steam the center and soften the crust, so slice them thin and keep the layer light. A few well-chosen toppings beat a heavy pile every time on a grill.
Storage and Reheating
- Refrigerator: Store leftovers in an airtight container for up to 3 days. The crust softens a bit, especially under the sauce, but it still reheats well.
- Freezer: Freeze slices wrapped tightly for up to 1 month. Reheat from frozen in the oven or toaster oven rather than thawing first, or the crust turns soggy.
- Reheating: Warm slices in a skillet over medium-low heat or in a hot oven until the bottom crisps back up. The biggest mistake is microwaving first, which softens the crust and makes the cheese greasy instead of melted.
The Questions People Ask After the First Pizza Comes Off the Grate
Grilled Campfire Pizza
Ingredients
Equipment
Method
- Divide the pizza dough into 4 portions and stretch each portion into a thin round. Aim for even thickness so the crust chars uniformly.
- Brush one side of each dough round with olive oil. Keep the oiled side ready for the grate to help it crisp quickly.
- Place the dough oil-side down on the campfire grate over medium heat and cook for 2-3 minutes until the bottom is charred and crispy. Watch for dark char spots and a firm, set surface.
- Flip the dough and quickly add sauce, mozzarella cheese, and toppings to the grilled side. Work fast so the cheese starts melting before the crust cools.
- Cover with a lid or foil and cook for 3-5 minutes until the cheese melts and the bottom is crispy. Look for bubbling cheese and a crisp, browned underside.
- Remove from the grill, top with Parmesan and basil, slice, and serve. Serve immediately while the cheese is stretchy.