Jalapeno poppers with bacon disappear fast because they hit all the marks at once: creamy, smoky, salty, and just spicy enough to keep people reaching for another one. The bacon turns crisp in the oven while the cheese filling bubbles up underneath, and that contrast is what makes these worth the tray space. When they’re done right, the jalapenos stay tender without collapsing, so each bite holds together instead of turning mushy.
The trick is in the balance. Softened cream cheese gives the filling body, sharp cheddar adds real flavor instead of just richness, and smoked paprika nudges the whole thing toward that cookout taste without needing a grill. A wire rack helps the bacon render evenly, which matters here because thick, pale bacon leaves the peppers greasy and the bottoms soggy. Thin-cut bacon is the safer choice.
Below, I’ve included the small details that make these come out cleanly and a few smart ways to adjust them for different crowds. If you’ve ever had poppers that were limp, bland, or impossible to handle, the fixes here will help.
The bacon crisped up beautifully on the rack, and the filling stayed creamy instead of leaking out. I made them for game night and the tray was gone before halftime.
Crispy bacon jalapeno poppers with bubbling cheddar filling are the kind of appetizer that never makes it to the table intact.
The Part Most People Get Wrong: Bacon Before the Cheese Can Set
The filling needs to be thick enough to stay put before the bacon starts rendering. If the cream cheese is cold, the mixture stays lumpy and the cheddar doesn’t distribute evenly, which makes some peppers leak and others taste flat. Softened cream cheese folds together cleanly with the cheddar, and that smooth base helps the filling stay anchored inside each jalapeno half.
The other place these go wrong is the bacon. If it’s too thick, it won’t crisp in time, and the peppers overcook before the outside catches up. Thin-cut bacon wrapped snugly and tucked underneath gives you better coverage and a cleaner finish. The wire rack matters too, because it lifts the poppers out of the rendered fat instead of letting them fry on the pan.
What Each Ingredient Is Actually Doing in These Poppers
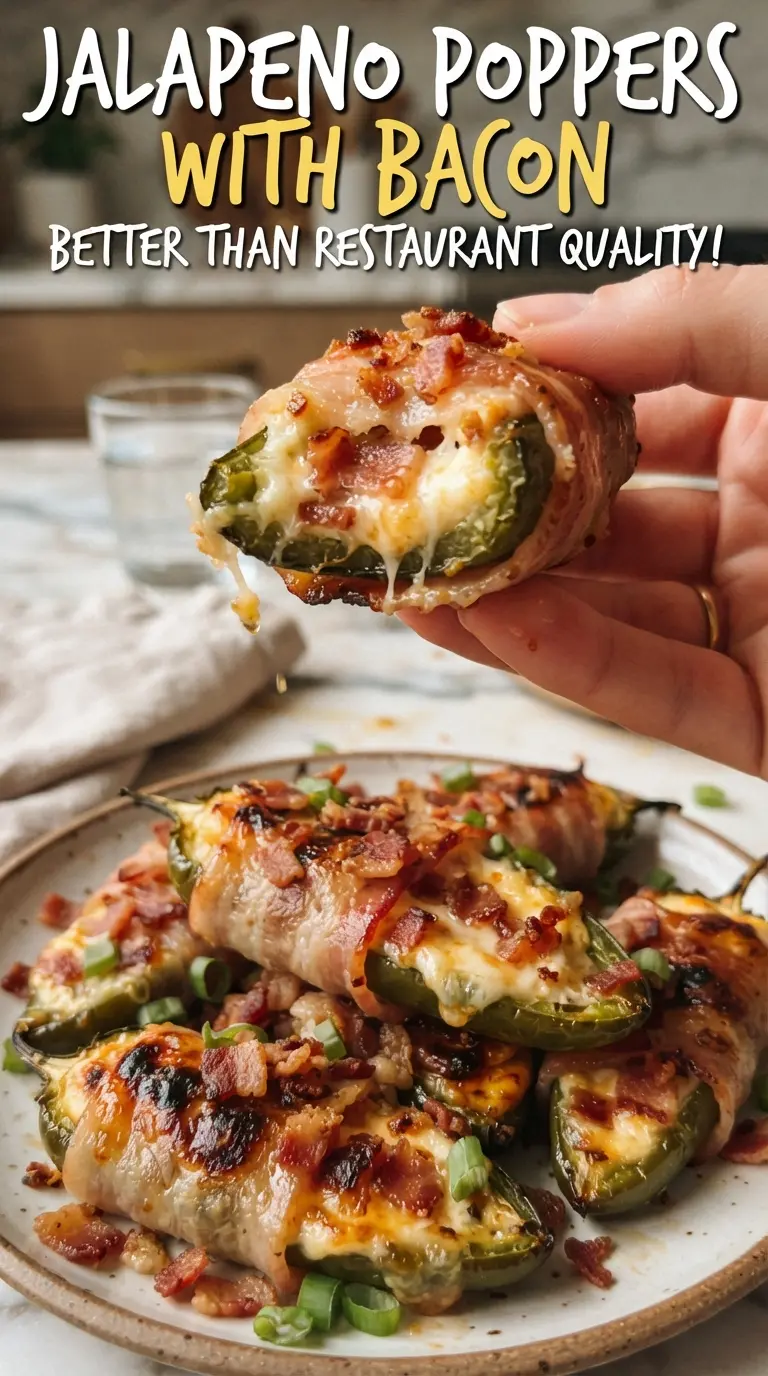
- Jalapenos — Large peppers are easier to fill and wrap, and halving them lengthwise gives you stable little boats. Remove the seeds and inner membranes if you want milder heat; leaving some behind keeps the poppers sharper and spicier.
- Cream cheese — This is the binder that keeps the filling lush and scoopable. It needs to be softened so it mixes smoothly; cold cream cheese leaves little white pockets that don’t melt evenly.
- Sharp cheddar — Sharp cheddar gives the filling enough bite to stand up to the bacon. Pre-shredded works in a pinch, but block-grated cheese melts more smoothly because it doesn’t carry anti-caking agents.
- Thin-cut bacon — Thin-cut bacon renders and crisps in the same time it takes the peppers to soften. If all you have is thick-cut, par-cook it first or it’ll stay chewy while everything else is done.
- Smoked paprika and garlic powder — These season the filling from the inside, so the poppers taste seasoned all the way through, not just salty on the outside. Smoked paprika is worth using here because it reinforces the bacon instead of competing with it.
- Green onions — They keep the filling from tasting heavy and add a fresh bite that cuts through the richness. Slice them fine so they disappear into the cheese instead of falling out when you bite in.
How to Get Crisp Bacon and a Bubbling Center at the Same Time
Mixing the Filling
Start with softened cream cheese and mix until it’s smooth before adding the cheddar, paprika, garlic powder, and green onions. The texture should be thick and spoonable, not loose or runny. If the mixture looks wet, the peppers will leak more as they bake. A quick stir is fine, but don’t beat it until airy; air pockets can make the filling puff and spill.
Stuffing and Wrapping
Fill each jalapeno half generously, then wrap it with half a slice of bacon and tuck the ends underneath. The bacon should overlap just enough to cover the filling without bunching up, because thick folds refuse to crisp. If a piece springs loose, it’ll curl away from the pepper instead of hugging it in the oven, so press it down firmly as you place it on the rack.
Baking Until the Bacon Catches Up
Bake at 400°F on a wire rack set over a lined sheet pan. That setup lets hot air circulate around the bacon and keeps the bottoms from steaming. Pull the tray when the bacon is crisped and the filling is visibly bubbling at the edges; if the bacon still looks pale in spots, give it a few more minutes rather than underbaking it, because limp bacon ruins the texture.
Cooling Before Serving
Let the poppers rest for about 5 minutes before serving. The filling is molten straight from the oven, and that short rest gives it enough structure to stay inside the pepper when picked up. Skip the rest and the first bite often slides apart, which is how people end up with cheese on the plate instead of in the popper.
How to Adapt These for Different Crowds
Make Them Milder for Kids or Heat-Shy Guests
Scrape out every seed and the white inner ribs, since that’s where most of the heat lives. Using the largest jalapenos helps too, because the flavor stays peppery without turning aggressive. You’ll lose a little of the classic bite, but the poppers stay balanced and crowd-friendly.
Make Them Gluten-Free Without Changing the Texture
This recipe is naturally gluten-free as written, so there’s nothing to replace. Just check the bacon and spices if you’re cooking for someone who needs strict label reading, since some packaged seasonings can carry hidden fillers. The texture stays exactly the same because the filling doesn’t depend on breading.
Swap the Cheddar for a Sharper, Saltier Finish
Pepper jack gives the filling a little extra warmth, while gouda makes it milder and smokier. Parmesan can be added in a small amount for a saltier edge, but don’t replace all the cheddar with it or the filling turns dry and pasty instead of creamy. Keep the total cheese amount the same so the poppers still bake into a smooth filling.
Storage and Reheating
- Refrigerator: Store leftovers in an airtight container for up to 3 days. The bacon will soften a little, but the filling keeps its shape.
- Freezer: They freeze best before baking. Assemble the poppers on a tray, freeze until firm, then transfer to a freezer bag and bake from frozen, adding a few extra minutes.
- Reheating: Reheat on a wire rack in a 375°F oven or air fryer until the bacon re-crisps. Microwaving turns the bacon chewy and makes the peppers waterlogged, so skip it unless you don’t mind soft texture.
Questions I Get Asked About This Recipe
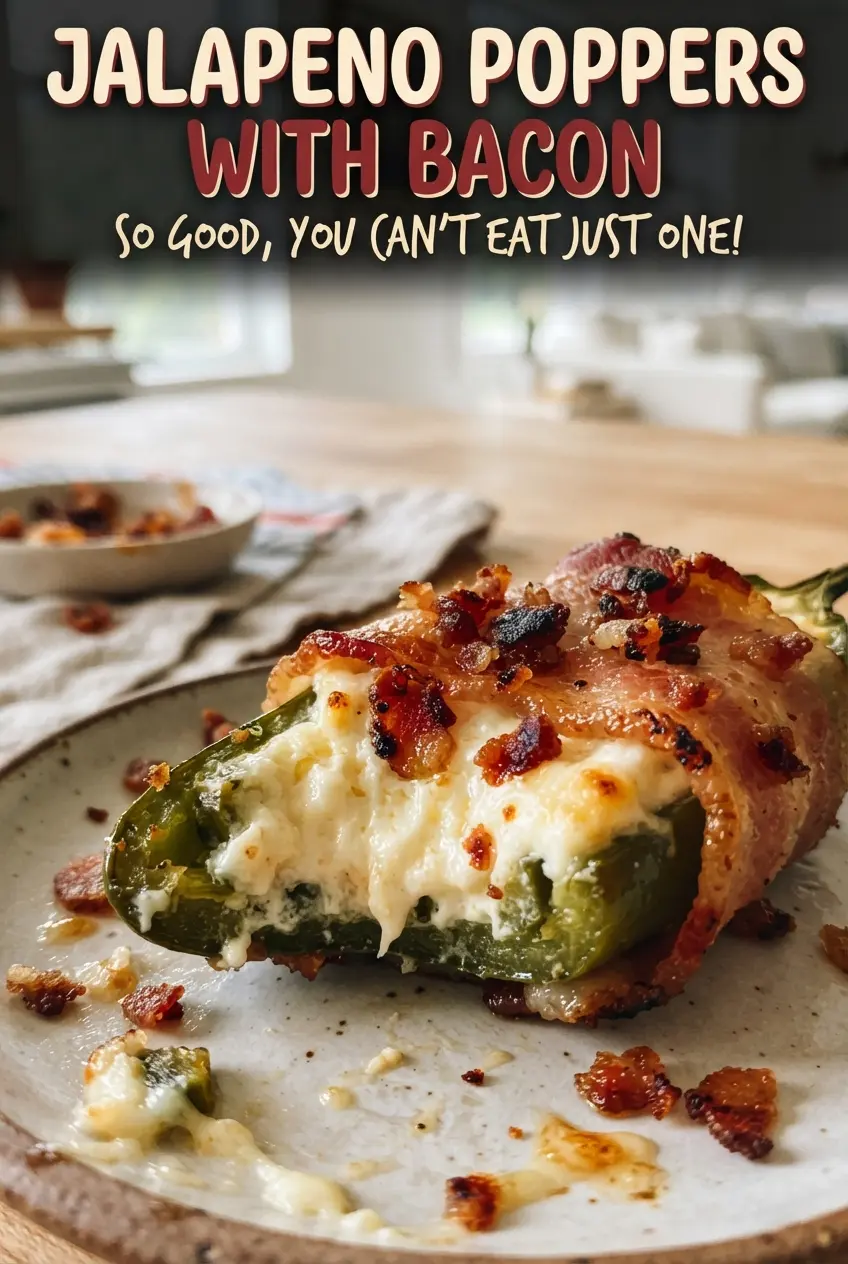
Jalapeno Poppers with Bacon
Ingredients
Equipment
Method
- Preheat the oven to 400°F, then set a wire rack over a lined baking sheet for crisping. You should see the rack positioned so hot air can circulate under each popper.
- Mix the softened cream cheese, shredded cheddar, garlic powder, smoked paprika, and green onions until evenly combined. The mixture should look uniform with no dry pockets of seasoning.
- Fill each jalapeno half with the cheese mixture. The filling should dome slightly above the cut sides so it can bubble during baking.
- Wrap each jalapeno half with a piece of bacon, tucking the ends underneath. Make sure the bacon covers the stuffed pepper snugly so it stays in place.
- Arrange the jalapeno poppers on the rack with space between them. They should sit upright and not crowd so the bacon crisps evenly.
- Bake at 400°F for 20-22 minutes, until the bacon is crisp and the filling is bubbling. Look for bubbling at the edges and a browned, crisp bacon surface.
- Cool for 5 minutes before serving. The filling will thicken slightly as it rests so it’s easier to eat without sliding.