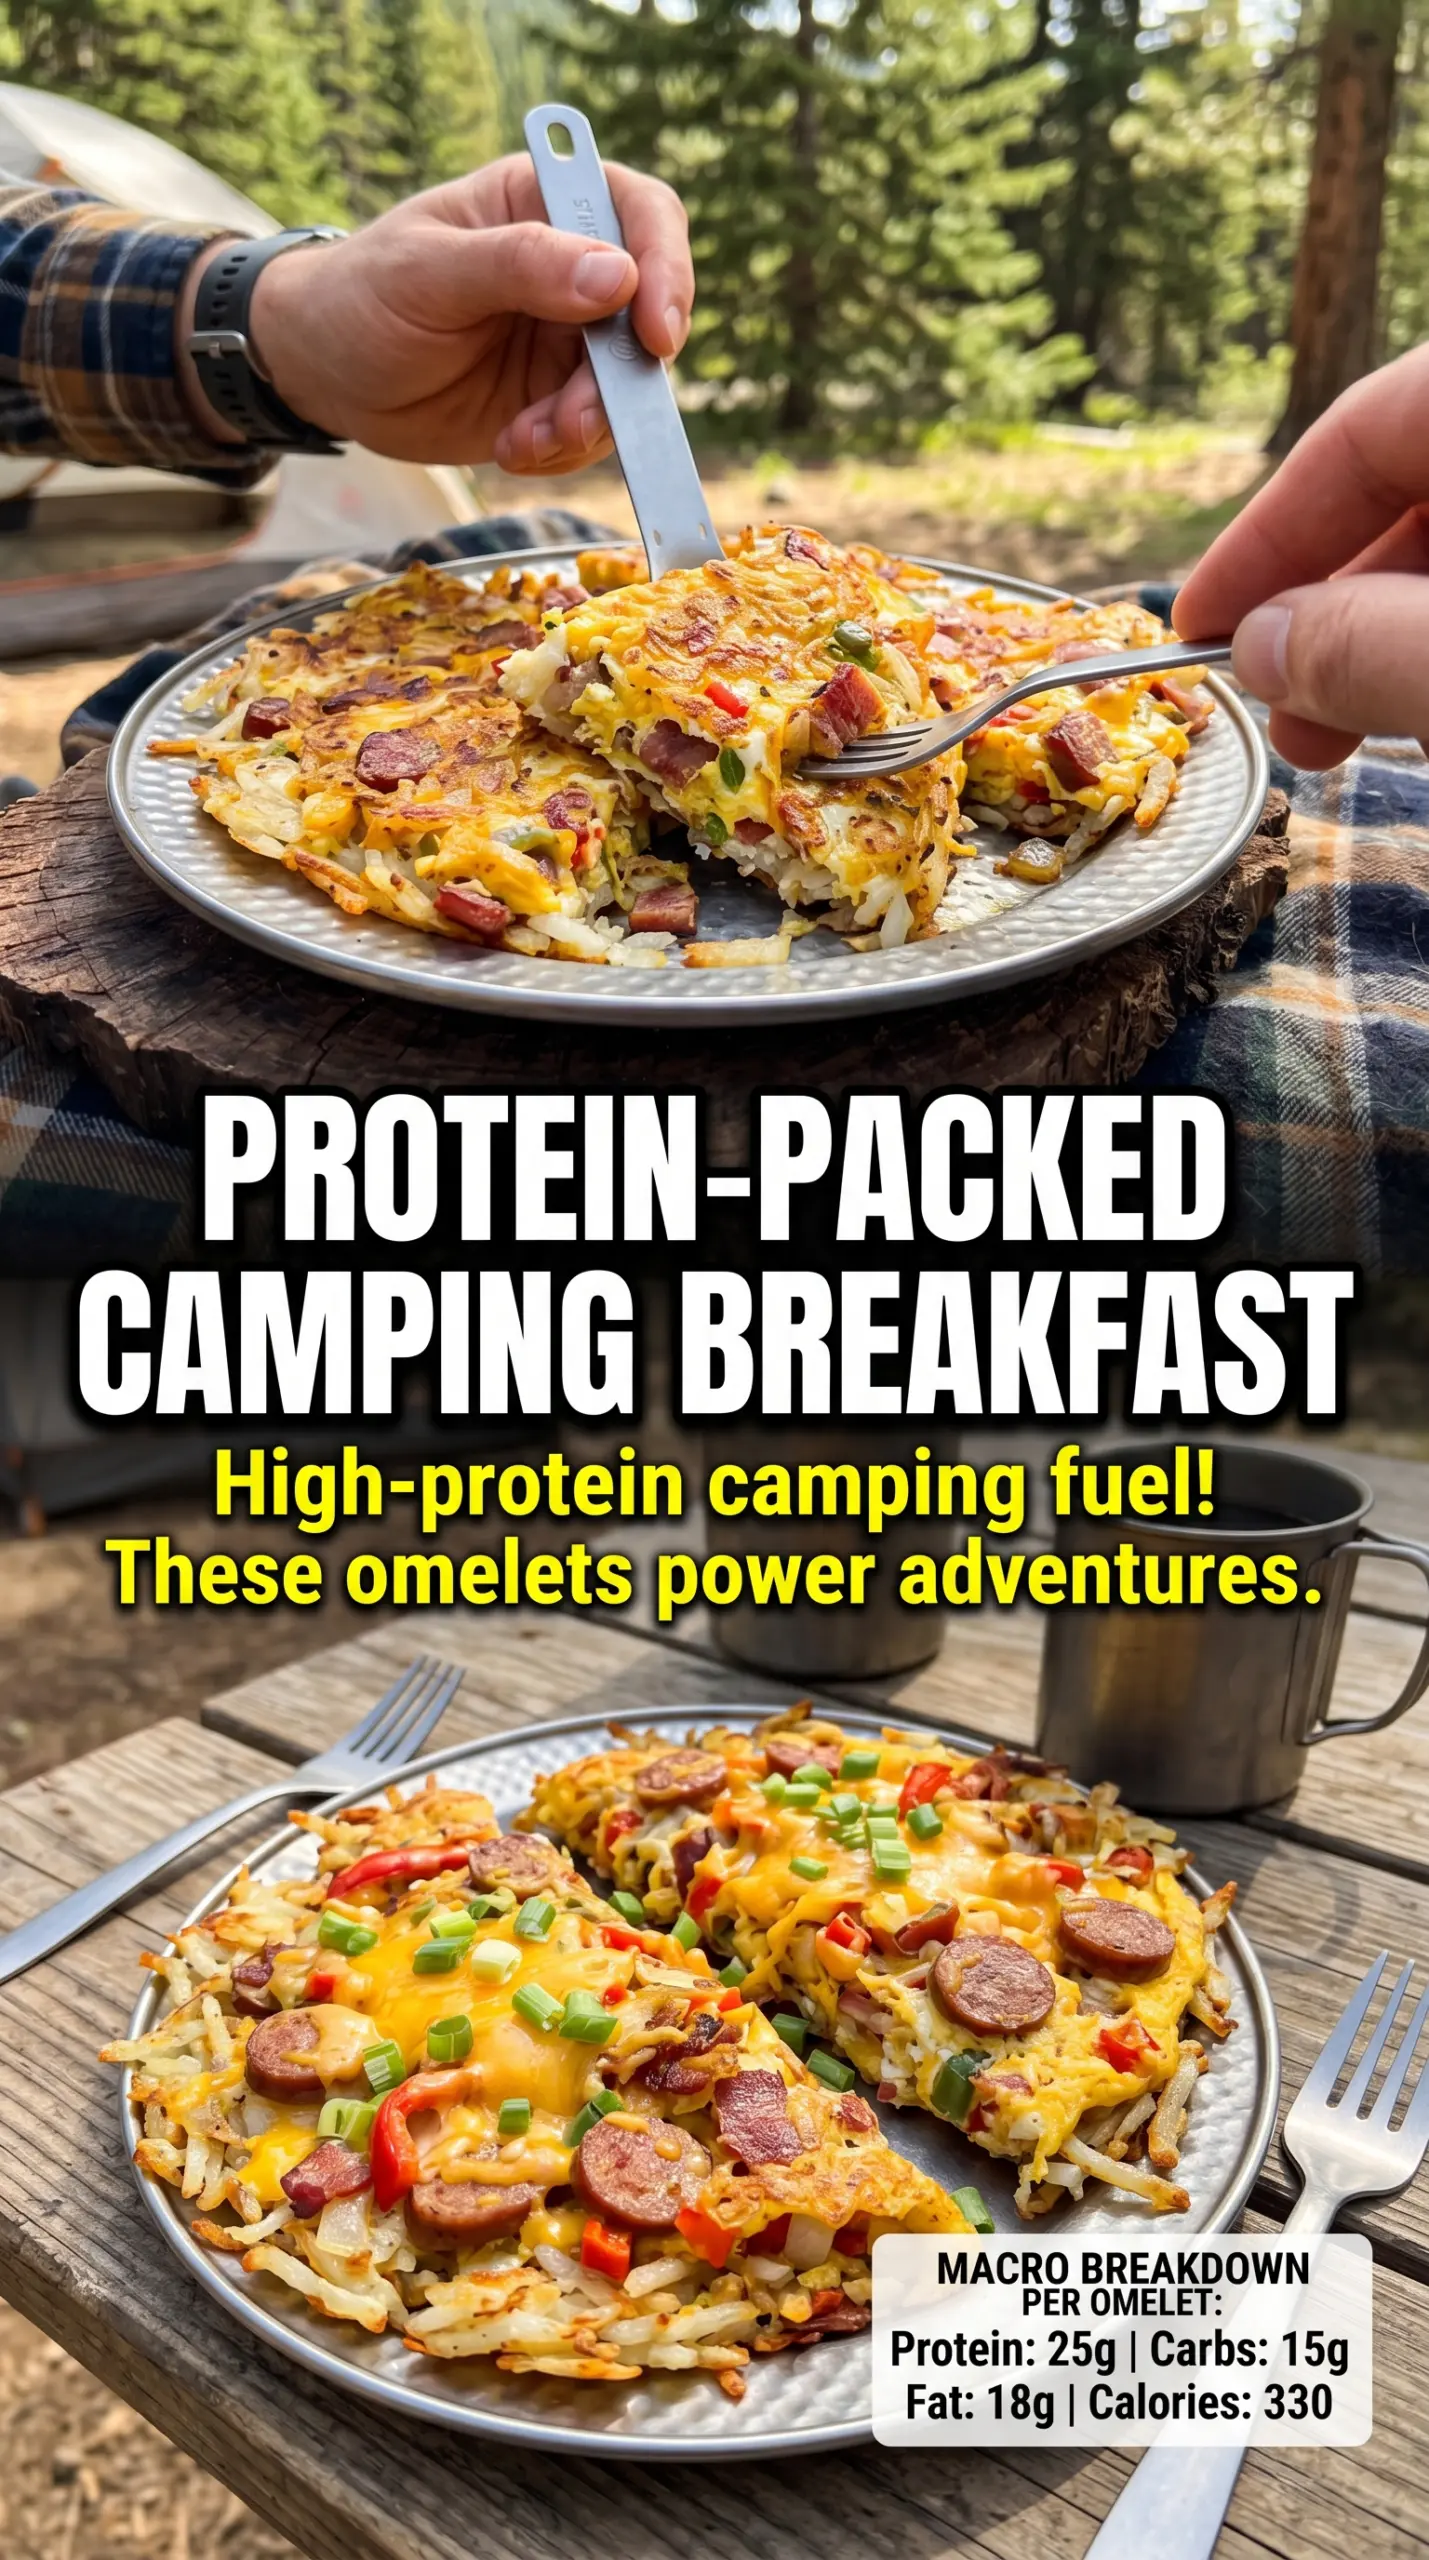
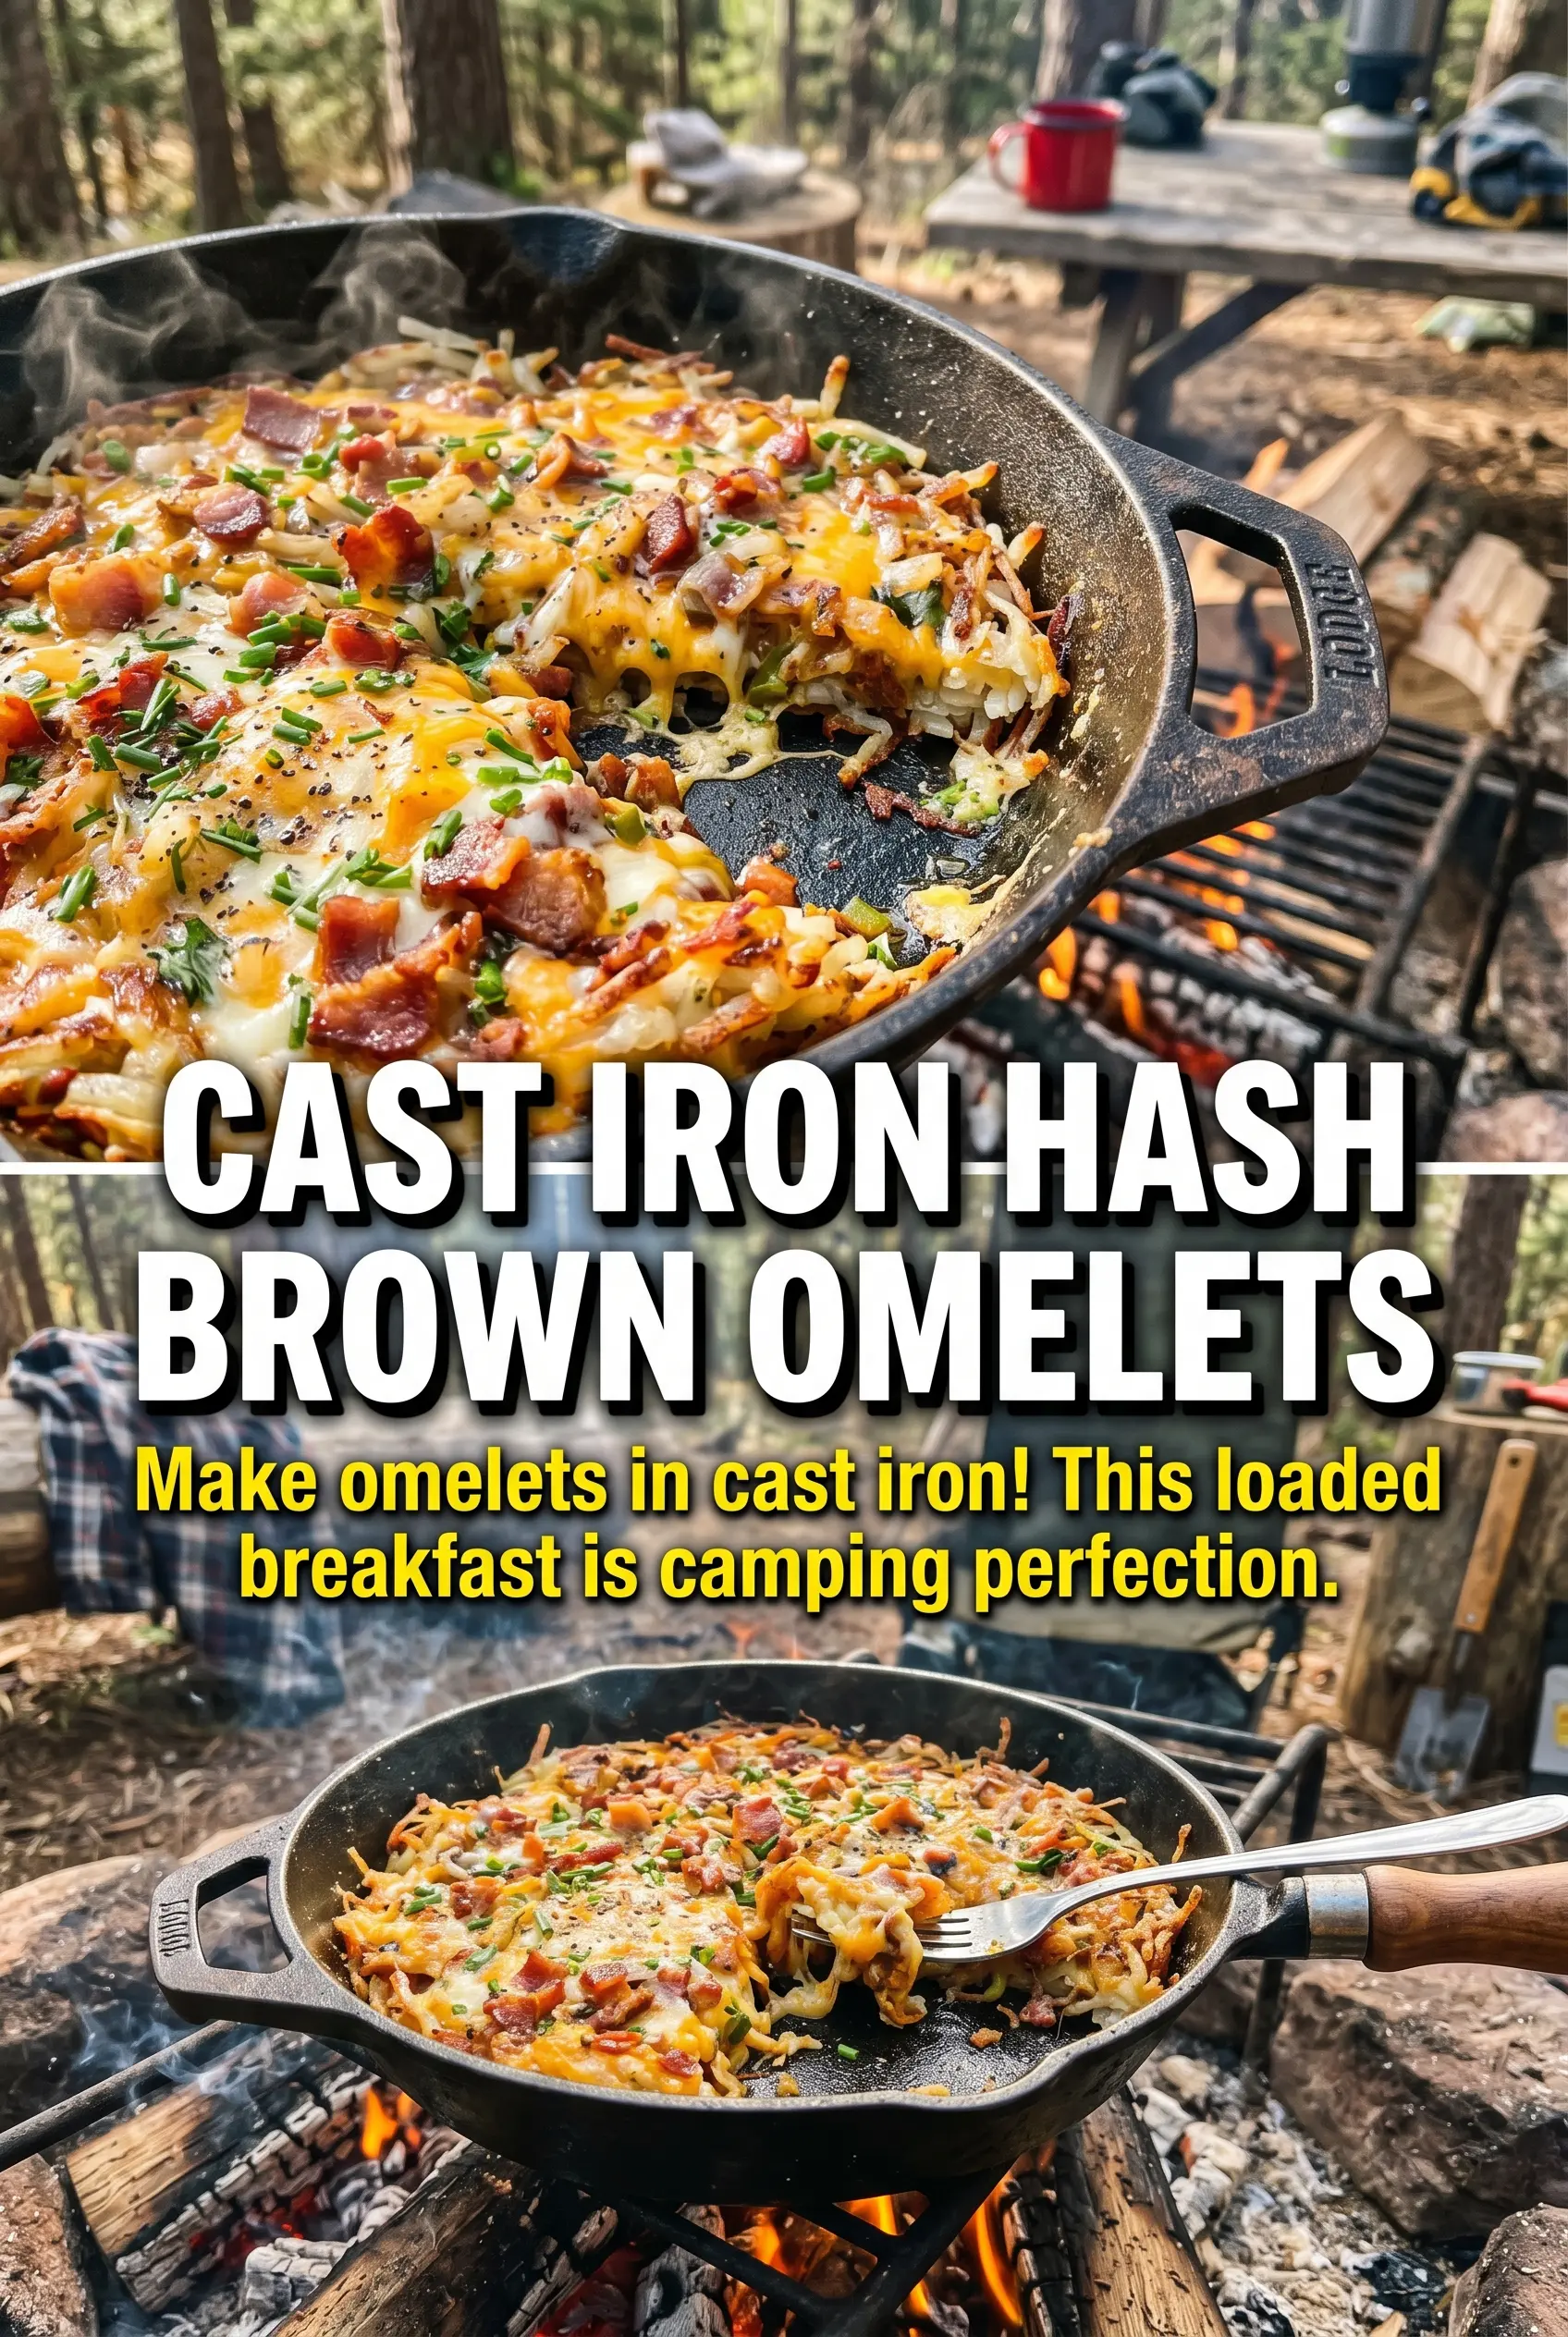
Crispy hash browns wrapped around tender eggs and melty cheese make this omelet feel bigger, heartier, and a lot more satisfying than a standard skillet breakfast. The outside gets a real golden crust, the center stays soft and loaded, and every bite brings bacon, peppers, and green onion together in one forkful. It’s the kind of breakfast that disappears fast, whether you’re cooking at the campsite or just feeding a hungry crew at home.
The trick is treating the hash browns like the bread on a grilled sandwich: they need time to brown before you start fussing with the eggs. A cast iron skillet helps a lot here because it holds steady heat and gives you that crisp base without scorching it too quickly. Thawed hash browns matter too. If they’re icy or wet, they steam instead of crisp, and the whole omelet turns soft in the wrong way.
Below I’ve included the little details that keep the crust intact, plus the best way to flip or fold this without ending up with scrambled filling on the fire ring.
The hash brown layer got crisp all the way across, and the eggs set up perfectly without drying out. I used the fold-in-half method and it held together great for serving.
Save these loaded grilled hash brown omelets for the mornings when you want crisp edges, melty cheese, and a breakfast that eats like a full meal.
The Crisp Layer Has to Set Before the Eggs Go In
The most common mistake with hash brown omelets is rushing the first side. If the potatoes haven’t had time to turn deeply golden, they’ll stick, tear, or break apart when you add the filling. Let them sit in the skillet until they release with a little resistance and you can see the edges turning lacy and brown.
That first layer is doing more than adding texture. It’s also giving the omelet a built-in structure, which matters when you’re flipping or folding a heavy filling. Once the bottom is crisp, the eggs have something solid to set against instead of soaking into loose potatoes.
- Golden edges matter. Pale hash browns taste fine, but they won’t hold the same shape or flavor.
- Cast iron helps. It keeps the heat steady enough to brown the potatoes without burning the butter.
- Don’t crowd the pan. A loose, even layer crisps better than a thick mound.
What the Main Ingredients Are Really Doing Here
- Frozen hash browns — These are the backbone of the dish. Thawed potatoes crisp much better than fresh grated potatoes for this style because they’re already cut small and dry out in the pan faster. If you only have shredded potatoes, squeeze them dry in a towel before cooking.
- Eggs — They bind the filling and give the center that soft, custardy texture. Beat them until the yolks and whites are fully mixed so you don’t get streaks that cook unevenly.
- Cheddar cheese — Sharp cheddar gives you the strongest flavor and melts into the eggs without disappearing. Mild cheese works, but it tastes flatter and needs more seasoning.
- Bacon, peppers, and green onions — Bacon brings salt and smoke, peppers add sweetness and a little bite, and green onions keep the whole thing from tasting heavy. Cook the bacon first and dice the peppers small so they heat through before the eggs set.
- Butter or oil — Butter gives the best browning and flavor, but oil is the safer choice if you’re cooking over a hotter fire. Use enough to coat the pan edges so the crust doesn’t weld itself to the skillet.
Building the Omelet Without Breaking the Crust
Getting the First Hash Brown Layer Golden
Start by heating the butter in the skillet until it shimmers, then spread in half the hash browns in an even layer. Press them lightly so they make contact with the pan, but don’t pack them down hard or they’ll steam instead of crisp. Give them the full five minutes unless the edges are clearly turning deep gold sooner. If they stick when you try to lift them, they’re not ready yet.
Adding the Eggs and Filling at the Right Moment
Pour the beaten eggs over the hot hash browns while the pan is still at a steady medium heat. Scatter the cheese, bacon, peppers, and green onions over the eggs right away so they settle into the surface instead of sitting on top and rolling around. The eggs should look loose at this point. That’s right. They’ll set from the bottom up while the cheese melts into the filling.
Finishing with the Top Layer and Steam Control
Top everything with the remaining hash browns and add the rest of the butter around the edges so it can work its way underneath. Covering the pan traps just enough heat to set the eggs through the middle, but if the lid is too tight and the heat is too high, the bottom will darken before the center cooks. Listen for a gentle sizzle, not an aggressive crackle.
Flipping or Folding Without Losing the Filling
Once the eggs are set and the bottom is crisp, slide a wide spatula underneath and lift carefully. If you’re confident, flip it in one piece; if not, fold it in half and cut into wedges. Either way, let it sit for a minute before serving so the cheese settles and the filling doesn’t spill out the first time you slice into it.
How to Adapt These Omelets for Different Camps and Kitchens
Make It Vegetarian Without Losing Heft
Skip the bacon and add an extra handful of cheese plus a few sautéed mushrooms if you have them. You lose the smoky saltiness, so bump up the pepper and add a pinch more salt at the eggs. The result is still filling, just a little softer in flavor.
Dairy-Free with Oil Instead of Butter
Use oil for the skillet and swap in your favorite dairy-free shredded cheese if it melts well. The crust will still crisp, but you’ll lose the buttery finish and a little of the richness in the filling. Choose a cheese substitute that melts, not one that just softens.
Extra Crispy for a Skillet Breakfast at Home
Cook the first hash brown layer a minute or two longer before adding the eggs, and use a little less filling so the omelet stays thinner. You’ll get a crunchier result and cleaner slices. This version is the one I’d make when I want the potatoes to be the main event.
Storage and Reheating
- Refrigerator: Store leftovers in an airtight container for up to 3 days. The hash brown crust softens, but the flavor holds up well.
- Freezer: It freezes best in wedges wrapped tightly and tucked into a freezer bag for up to 1 month. The texture won’t stay fully crisp, but it’s still usable for a quick breakfast.
- Reheating: Warm slices in a skillet over medium-low heat or in a 375°F oven until heated through. The mistake is blasting it in the microwave, which makes the potatoes soggy and the eggs rubbery.
Answers to the Questions Worth Asking
Loaded Grilled Hash Brown Omelets
Ingredients
Equipment
Method
- Heat 2 tablespoons butter or oil in a large cast iron skillet over a campfire until melted and shimmering, indicating it’s ready for browning.
- Spread half the frozen hash browns in the skillet and cook for 5 minutes until golden, using visible crisp edges as your cue.
- Pour the beaten eggs over the hash browns and season with salt and pepper, then wait until the top looks partially set.
- Add the shredded cheddar cheese, cooked bacon, bell peppers, and green onions over the eggs so the filling evenly covers the omelet.
- Top with the remaining frozen hash browns and add the remaining butter around the edges, which should sizzle as it warms.
- Cover and cook for 12-15 minutes until the eggs are set and the bottom is crispy, checking that the center no longer jiggles.
- Flip carefully or fold in half, then cut into wedges so the layers show in cross-section.
- Serve immediately with the crispy golden hash brown exterior and loaded filling inside.