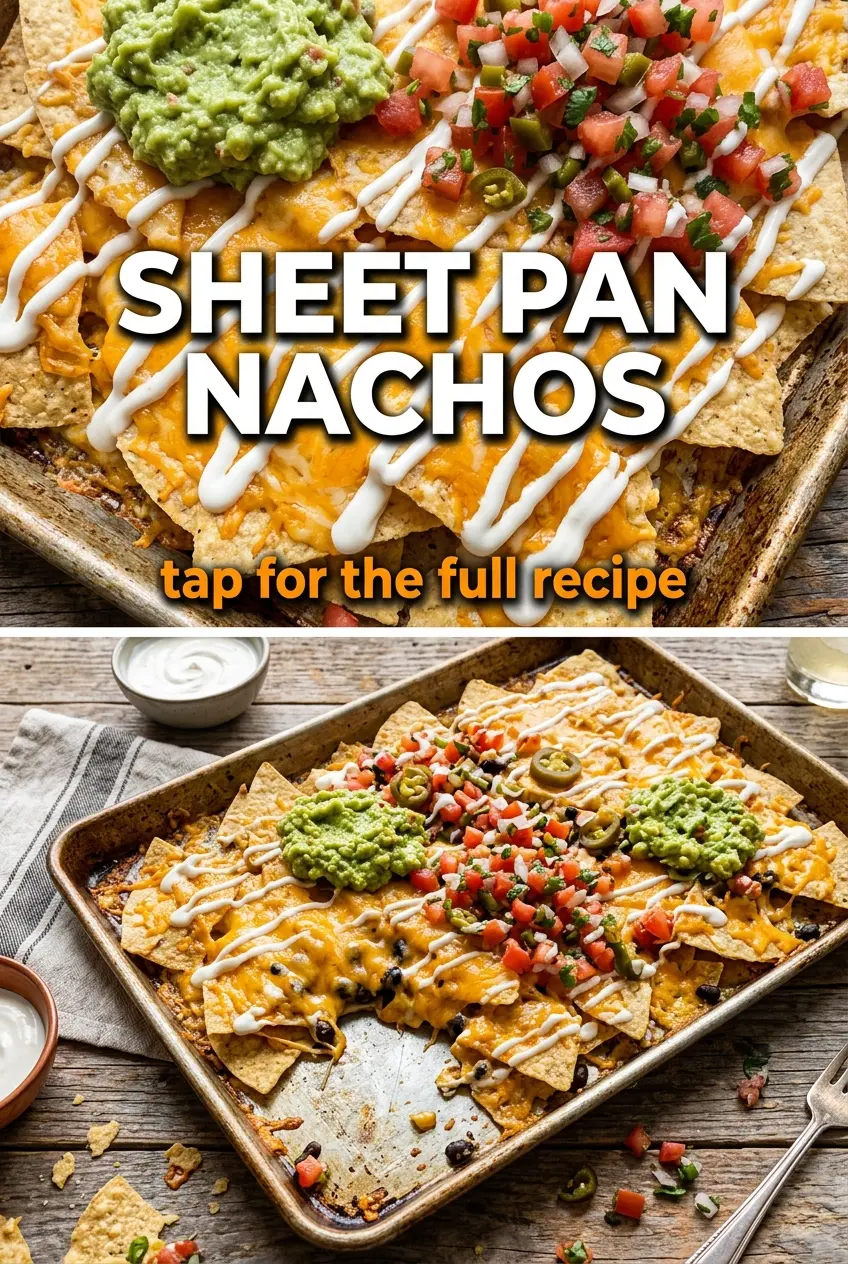
Golden chips covered edge to edge with melted cheese and loaded toppings turn a casual snack into the kind of tray people crowd around before you’ve even set out plates. Sheet pan nachos work because every chip gets a little of everything: crunchy edges, savory beef or chorizo, creamy avocado, cool sour cream, and enough heat from jalapeños to keep each bite interesting.
The trick is building the tray in layers instead of dumping everything on top and hoping for the best. A first pass of chips and filling gives the cheese something to cling to, then the second layer of cheese seals the toppings in and helps the tray hold together when it comes out of the oven. Foil on the pan also keeps cleanup easy, which matters when the dish disappears fast and there’s barely anything left to scrape up.
Below, I’ll walk through the small choices that keep the chips crisp, how to get even coverage without soggy spots, and the easiest ways to adapt this for a crowd, a weeknight snack, or whatever toppings you already have in the fridge.
The chips stayed crisp under all that cheese, and layering the meat with part of the cheese kept everything from sliding off when I scooped it. My husband kept going back for the pieces with the jalapeños and red onion on top.
These sheet pan nachos stay crisp, cheesy, and easy to pile high, which makes them perfect for game night or any time you need a fast tray of party food.
The One Thing That Keeps Nachos Crisp Instead of Soggy
The mistake most people make with sheet pan nachos is treating them like a casserole. Once the chips sit under a wet layer of toppings for too long, they soften fast and the whole tray turns limp in the middle. The fix is to use cooked fillings, keep the wet stuff for after baking, and give the cheese a direct job: hold the chips together while it melts.
Another small but important detail is the chip layout. A single, even layer matters more than piling up a thick mound. Chips buried under a mountain of toppings never get hot enough to stay snappy, while the exposed chips on top stay dry and the tray feels uneven.
- Tortilla chips — A sturdy, thick chip handles the weight of the cheese and meat better than thin restaurant-style chips. If all you have are thinner chips, reduce the toppings a little so the bottom layer doesn’t collapse.
- Cheddar cheese — Sharp cheddar gives you stronger flavor, but any good melting cheese works. Pre-shredded cheese melts fine here, though freshly shredded cheese usually blankets the chips more smoothly.
- Ground beef or chorizo — This is the savory backbone of the tray. Chorizo brings more spice and fat, while ground beef gives a milder, classic nacho base.
- Black beans — They add body and make the tray feel fuller without extra meat. Rinse and drain them well so they don’t bring extra moisture onto the chips.
- Sour cream and salsa — These belong on at the end, not before baking. Hot oven time breaks them down and adds moisture where you don’t want it.
Building the Tray So Every Bite Gets Cheese
Set Up the Chips First
Line the sheet pan with foil, then spread the chips in a single layer that reaches the corners and edges. Any bare spot is a missed bite, and any deep pile turns into a soggy pocket. If the pan looks too crowded, use two pans instead of forcing everything onto one.
Add the Savory Layer Before the Cheese Finishes the Job
Scatter the cooked beef or chorizo and the black beans over the chips, then add half the cheese. That first layer of cheese helps anchor the fillings so they don’t slide off as soon as someone lifts a chip. Keep the toppings evenly distributed, especially in the center of the pan, because that’s where people usually find the bare spots first.
Finish With Heat, Then Top While It’s Hot
Bake just until the cheese is melted, glossy, and bubbling around the edges, which usually takes 10 to 12 minutes. Pull the pan as soon as the cheese is fully melted; waiting for deep browning usually means the chips underneath are overdone. Add sour cream, salsa, cilantro, avocado, and lime immediately after the pan comes out so the cold toppings soften the heat without watering down the whole tray.
What to Change When You Want a Different Kind of Nacho Tray
Make It Vegetarian Without Losing the Hearty Bite
Skip the meat and double the black beans, or swap in seasoned sautéed mushrooms for a deeper, meatier texture. Beans alone make the tray lighter and a little softer; mushrooms add more chew and better browning, which keeps the nachos from feeling flat.
Go Dairy-Free With a Better Melt
Use a dairy-free shreds blend that’s made for melting, not a hard cheese-style block that just dries out. The texture won’t be exactly the same as cheddar, but the tray still works if the topping melts into the chips instead of sitting in dry little clumps.
Turn It Into a Spicier, More Border-Style Tray
Use chorizo instead of ground beef and add extra jalapeños before baking. Chorizo gives the tray more rendered fat and stronger seasoning, which means you can keep the rest of the toppings simple and still get a bold result.
Storage and Reheating
- Refrigerator: Store leftovers in an airtight container for up to 2 days. The chips soften, so the texture shifts, but the flavor still holds.
- Freezer: Don’t freeze assembled nachos. The chips go stale and the dairy toppings separate.
- Reheating: Reheat the cheesy chips and toppings on a sheet pan in a 375°F oven until warmed through. Avoid the microwave if you want any crunch left at all; it turns the chips soft in minutes.
Questions I Get Asked About This Recipe
Sheet Pan Nachos
Ingredients
Equipment
Method
- Preheat the oven to 400°F and line a large sheet pan with foil so the chips bake evenly without sticking.
- Arrange the tortilla chips on the prepared sheet pan in a single layer to keep them crisp under the melted cheese.
- Scatter the cooked ground beef or chorizo, black beans, and half of the shredded cheddar cheese over the chips.
- Top with the remaining shredded cheddar cheese, then scatter the diced jalapeños and diced red onion on top.
- Bake at 400°F for 10-12 minutes until the cheese is melted and bubbly.
- Remove the sheet pan from the oven and immediately dollop with sour cream and salsa so they stay creamy and fresh.
- Garnish with fresh cilantro and avocado slices for bright flavor and color.
- Serve with lime wedges and additional salsa and sour cream on the side.