Green bean bundles hit that sweet spot between a side dish and a little event on the plate. The beans stay bright and tender, the bacon turns crisp at the edges, and the brown sugar garlic butter settles into a sticky glaze that clings to every bundle. It’s the kind of dish people notice first and keep reaching for after everything else is gone.
The part that makes these work is the blanching. Three minutes in boiling water sets the beans so they finish tender in the oven without going dull or stringy, and the ice bath locks in that fresh green color. Wrapping the beans in half slices of bacon keeps the bundles compact, while the glaze melts together in the oven instead of burning on the surface.
Below, I’ve included the little details that matter most: how to keep the bundles tight, what to look for when the bacon is done, and a few swaps for when you want to adjust the sweetness or make the dish fit a different table.
The beans stayed crisp-tender and the bacon got perfectly crisp on the bottom where it touched the pan. I spooned the glaze over the top before serving and it tasted like something from a holiday dinner, not a weeknight side.
These green bean bundles bake up with crisp bacon and a sticky brown sugar garlic glaze that belongs on your holiday table.
The Blanching Step That Keeps the Beans Bright Instead of Mushy
Green beans need a head start before they go into the oven. If you skip the blanching, the bacon finishes before the beans do, and you end up with wrinkled beans that taste flat and overcooked. The three-minute boil followed by an ice bath gives the beans enough structure to hold their shape, stay bright, and finish tender in the oven without turning limp.
Drying the beans after the ice bath matters more than most people think. If they go into the bacon wrap wet, the bacon slips and the glaze thins out as it bakes. A quick drain and pat dry gives you tighter bundles and a better finish on the pan.
What the Bacon, Butter, and Brown Sugar Are Each Doing

- Fresh green beans — Use fresh beans here, not canned or frozen. Fresh beans keep their snap after baking, which is what stops this side from going soft under the glaze.
- Bacon — Half slices wrap neatly around 8 to 10 beans without overwhelming them. Thick-cut bacon can work, but it takes longer to crisp, so the bundles may need a few extra minutes in the oven.
- Butter — Melted butter helps the glaze coat the bundles and keeps the brown sugar from clumping. If you want the glaze to taste richer, use real butter rather than a spread.
- Brown sugar — This is what turns the pan juices into a sticky glaze. Light brown sugar gives a balanced sweetness; dark brown sugar makes the finish deeper and more molasses-heavy.
- Soy sauce and garlic — The soy sauce cuts the sweetness and gives the glaze a savory edge, while garlic keeps it from tasting one-note. Garlic should be minced fine so it disperses evenly and doesn’t scorch.
How to Keep the Bundles Tight and the Glaze Sticky
Blanching and Chilling the Beans
Bring the water to a full boil before the beans go in, then count three minutes from the moment they hit the pot. They should turn a little brighter and start to soften without losing their bite. The ice bath stops the cooking fast, which is what protects the texture. Drain them well after chilling; excess water is the fastest way to dilute the glaze.
Wrapping Without Loosening the Bundle
Gather 8 to 10 beans per bundle, then wrap each one with a half slice of bacon and set it seam-side down in the baking dish. That seam position helps the bacon stay put as it renders. If your bundles seem loose, use fewer beans per bundle rather than overstuffing them, because tightly packed bundles bake more evenly and hold their shape better.
Baking Until the Bacon Browns and the Glaze Bubbles
Pour the glaze evenly over the bundles before they go into the oven so it can work its way under and around the bacon. Bake until the bacon is crisp at the edges and the glaze is bubbling in the dish, about 25 to 30 minutes. If the bacon is still soft but the sauce looks done, give it a few more minutes; underbaked bacon is the most common problem here. Spoon the pan glaze over the top right before serving so every bundle gets that glossy finish.
How to Adapt These Green Bean Bundles for Different Tables
Make Them Less Sweet
Cut the brown sugar back by 2 to 3 tablespoons if you want a glaze that leans more savory than candy-like. The beans still get coated, but the bacon and garlic come forward more, which works well if the bundles are serving alongside richer mains.
Use Turkey Bacon for a Lighter Side
Turkey bacon works, but it won’t render the same way as pork bacon, so the bundles won’t have quite the same crisp, smoky finish. Bake them until the edges are browned and the glaze has thickened, and don’t expect the same amount of fat in the pan juices.
Gluten-Free Version
Use a certified gluten-free soy sauce or tamari and the rest of the recipe stays the same. The glaze keeps its savory balance, and you won’t lose the sticky finish that makes the bundles work.
Storage and Reheating
- Refrigerator: Store leftovers in an airtight container for up to 3 days. The bacon softens a little as it sits, but the flavor holds well.
- Freezer: These freeze, but the beans lose some snap and the bacon won’t stay crisp. Freeze only if you’re planning to reheat them as a side for a casserole-style meal.
- Reheating: Rewarm in a 350F oven until hot, about 10 to 15 minutes. The oven brings the bacon back better than the microwave, which turns the glaze loose and the beans watery.
Answers to the Questions Worth Asking
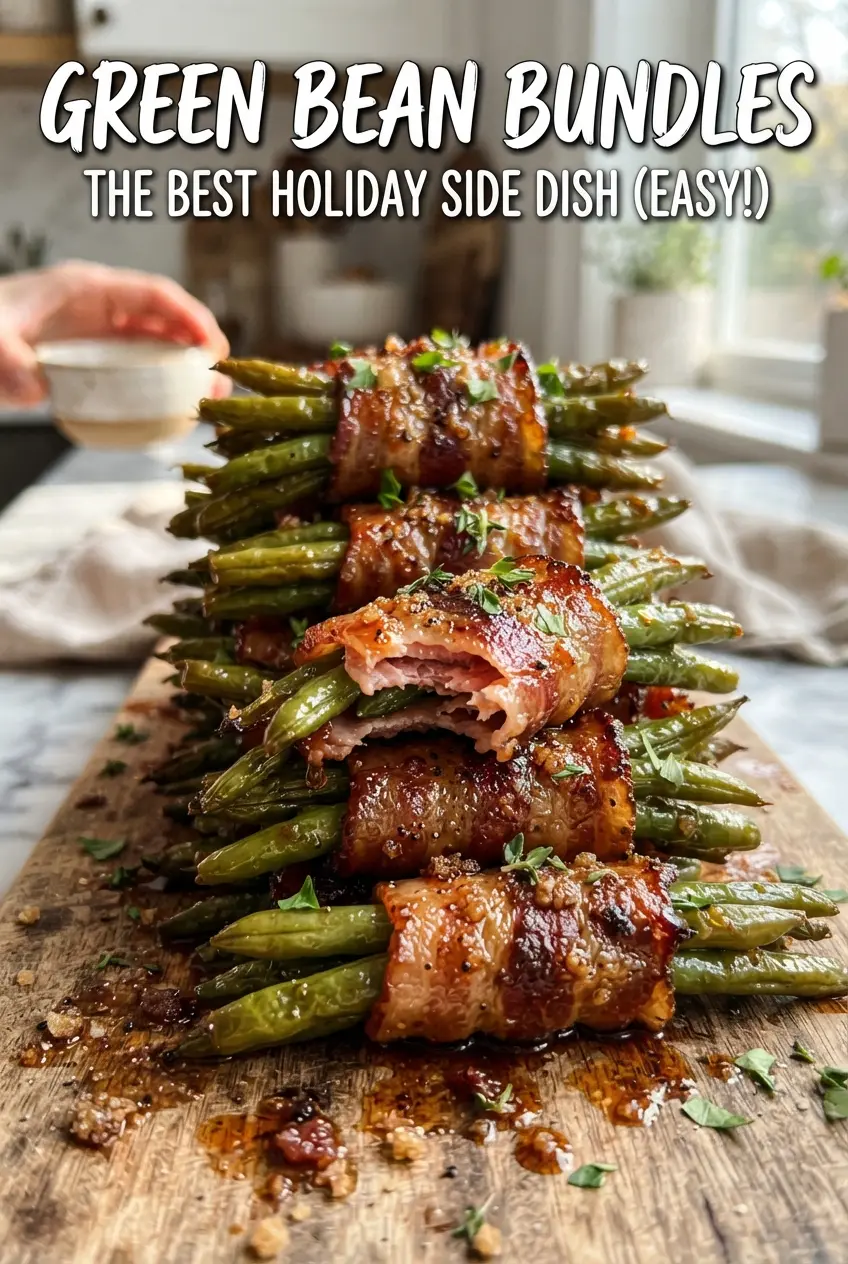
Green Bean Bundles
Ingredients
Equipment
Method
- Preheat oven to 400F. Blanch green beans in boiling water for 3 minutes, then plunge into ice water and drain.
- Gather 8-10 green beans into a bundle, then wrap with a half slice of bacon and place seam-side down in a baking dish.
- Whisk melted butter, brown sugar, garlic, soy sauce, and black pepper until combined.
- Pour the glaze evenly over the bundles so they look glossy.
- Bake at 400F for 25-30 minutes until the bacon is crisp and the glaze is bubbly.
- Spoon pan glaze over the bundles and serve warm.